Removal and Installation
UNIT REPAIR OVERHAULDISMOUNTING
1. Lift up vehicle and drain oil from rear differential housing.
2. Remove rear brake drums and pull out right and left rear axle shafts.

3. Before removing propeller shaft, give match marks on joint flange and propeller shaft as shown.
4. Remove propeller shaft by removing its 4 flange bolts and nuts.
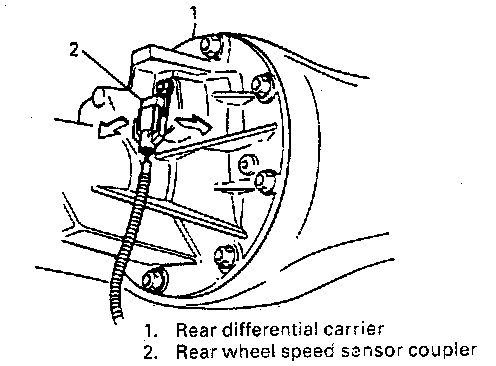
5. Remove rear wheel speed sensor cover from rear differential carrier and disconnect sensor coupler, if equipped.
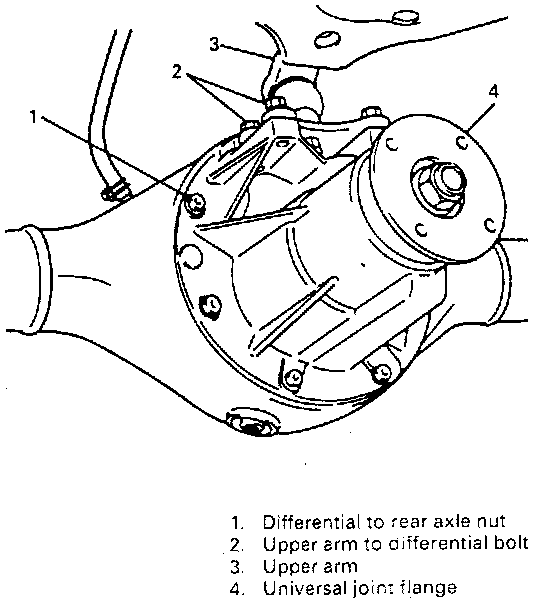
6. Remove 4 upper arm mounting bolts and lower rear axle.
WARNING: This work must be carried out with rear shock absorbers installed as they are. Without them, axle may fall off and possibly cause personal injury.
7. Remove differential assembly by removing its 8 fastening nuts.
REMOUNTING
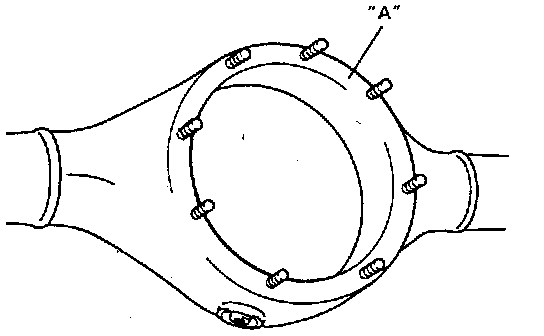
1. Clean mating surfaces of rear axle and differential assembly and apply sealant (Suzuki bond 1215) to axle side evenly.
"A": Sealant 99000-31110
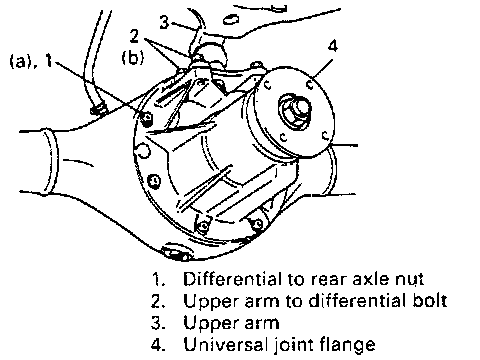
2. Install differential assembly to axle and fix it with nuts tightened to specified torque.
Tightening Torque
(a): 55 Nm (5.5 kg-m, 40.0 ft. lbs.)
3. Join differential carrier with upper arm and fasten by bolts.
Tightening Torque
(b): 50 Nm (5.0 kg-m, 36.5 ft. lbs.)
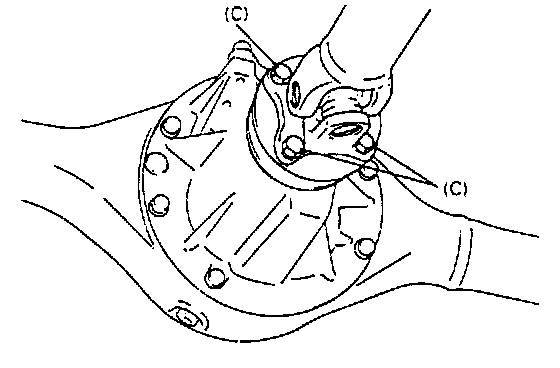
4. Install propeller shaft to joint flange aligning match marks and torque flange bolts to specification.
Tightening Torque
(C): 55 Nm (5.5 kg-m, 40.0 ft. lbs.)
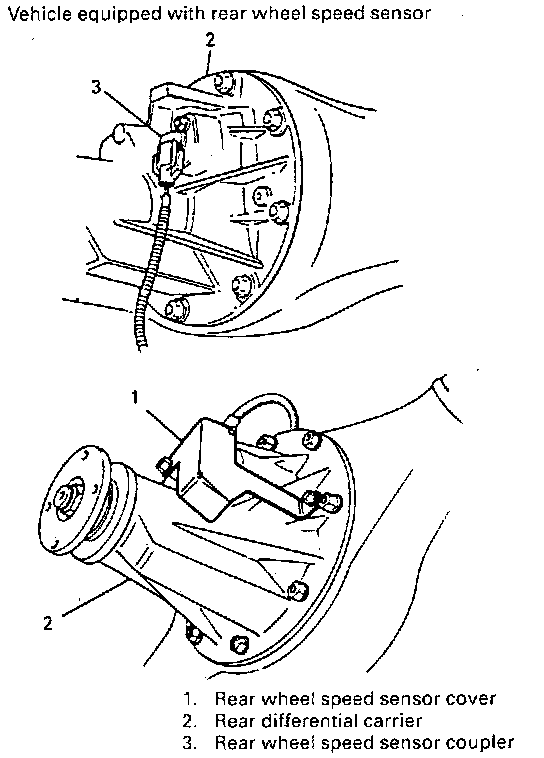
5. Connect rear wheel speed sensor coupler and install sensor cover to rear differential carrier, if equipped.
6. Install right and left rear axle shafts and drums.
7. Install wheels.
8. Fill hypoid gear oil as specified and tighten plug to specification. Lower lift.