Removal and Installation
RemovalNOTE: For identification of the brake caliper type, see maker name or mark on brake caliper as shown in the figure.
1. Hoist vehicle and remove wheel.
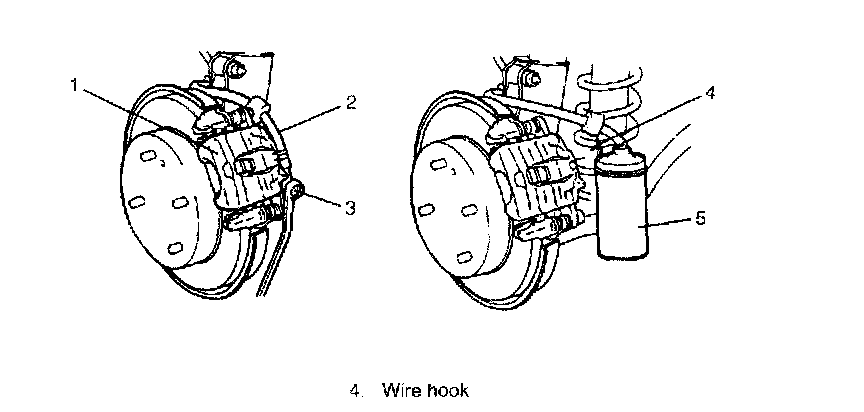
2. Remove brake flexible hose mounting bolt (3) from caliper (1). As this will allow fluid to flow out of hose (2), have a container (5) ready beforehand.
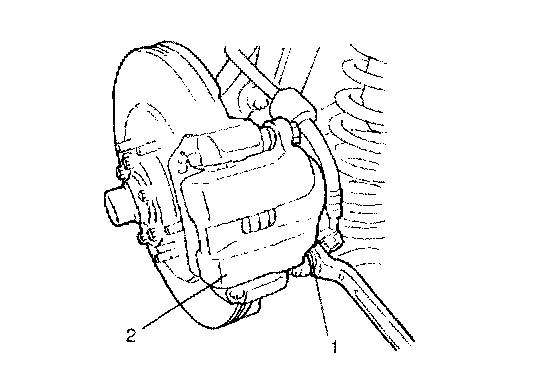
3. Remove caliper pin bolts (1).
4. Remove caliper (2).
Installation
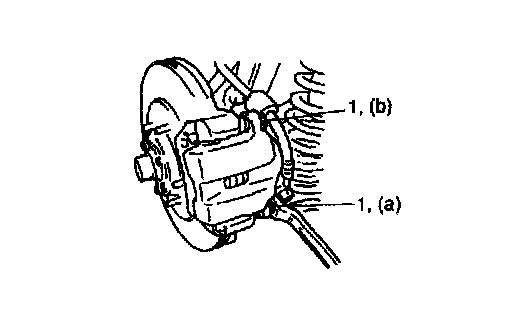
1. Install caliper to caliper carrier.
2. Torque caliper pin bolts (1) to specifications.
NOTE: Make sure that boots are fit into groove securely.
Tightening torque
Caliper pin bolt (a): 50 Nm (5.0 kgf-m, 36.5 ft. lbs.)
Caliper pin bolt (b): 85 Nm (8.5 kgf-m, 61.5 ft. lbs.)
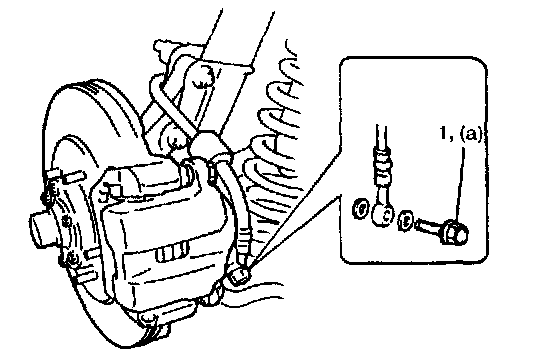
3. Install brake flexible hose as shown and torque hose mounting bolt (1) to specification.
Tightening torque
flexible hose bolt (a): 23 Nm (2.3 kgf-m, 17.0 ft. lbs.)
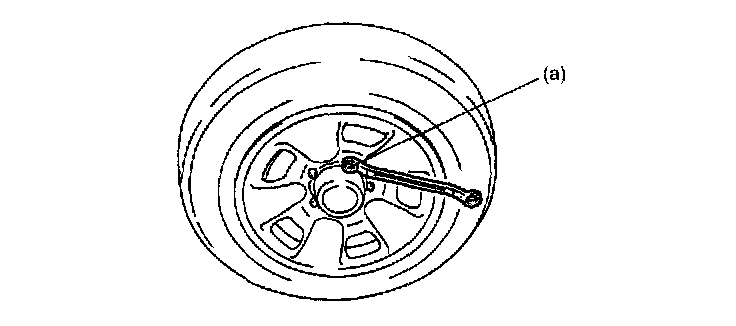
4. Torque wheel nuts to specification.
Tightening torque
Wheel nut (a): 100 Nm (10.0 kgf-m, 72.5 ft. lbs.)
5. After completing installation, fill reservoir with brake fluid and bleed brake system. Perform brake test and check each installed part for oil leakage.