Control Valve Front Body Assemble
Control Valve Front Body Assemble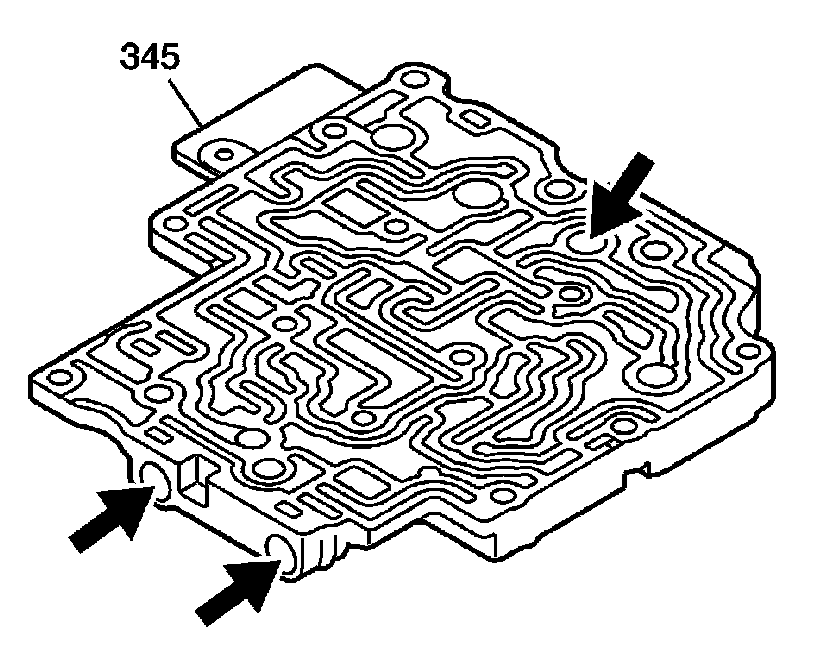
1. Inspect the front control valve body (345) casting for the following conditions:
^ Porosity
^ Cracks
^ Damaged machine surface
^ Chips or debris
^ Damage to valve bores
2. Inspect all valves, springs, bushings, and clean all components in clean solvent.
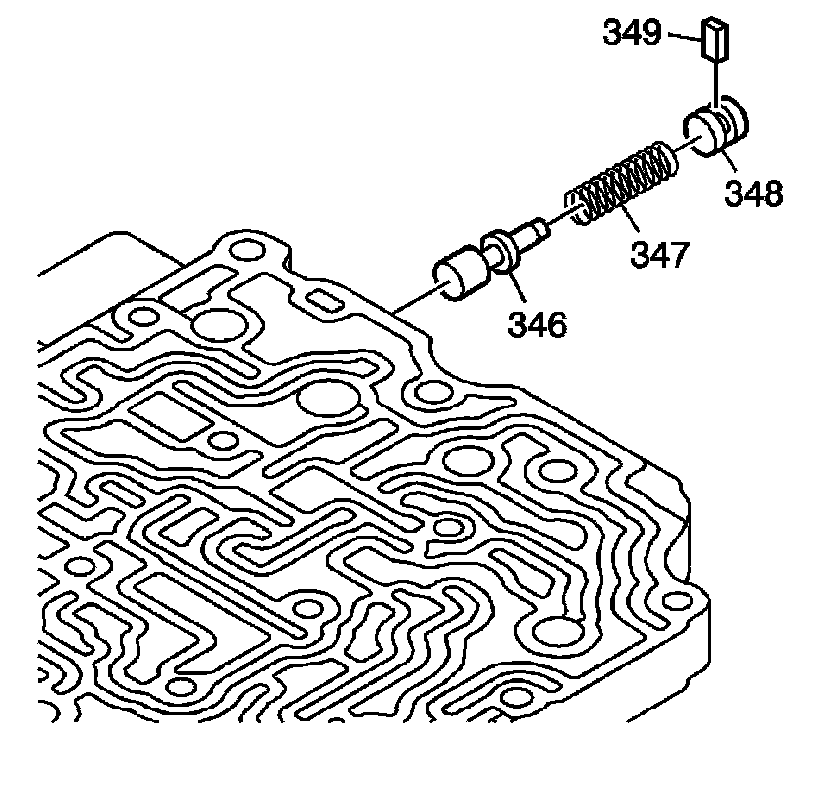
3. Install the solenoid modulator valve (346).
4. Install the solenoid modulator valve spring (347).
5. Install the solenoid modulator valve bore plug (348).
6. Install the sleeve/bore plug retainer (349).
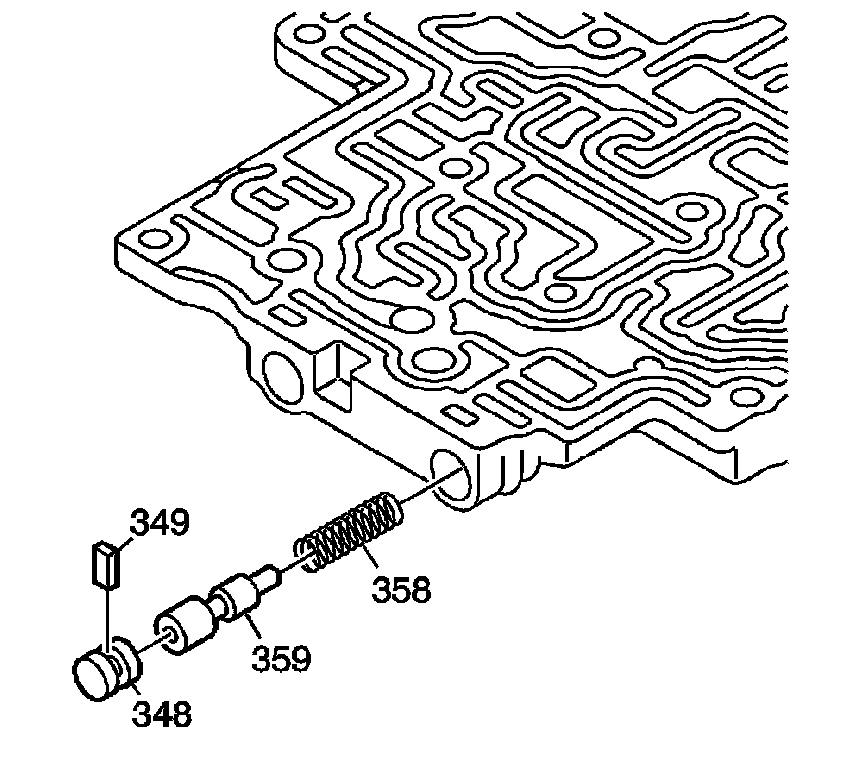
7. Install the second coast clutch (B1) control valve spring (358).
8. Install the second coast clutch (B1) control valve (359).
9. Install the solenoid modulator valve bore plug (348).
10. Install the sleeve/bore plug retainer (349).
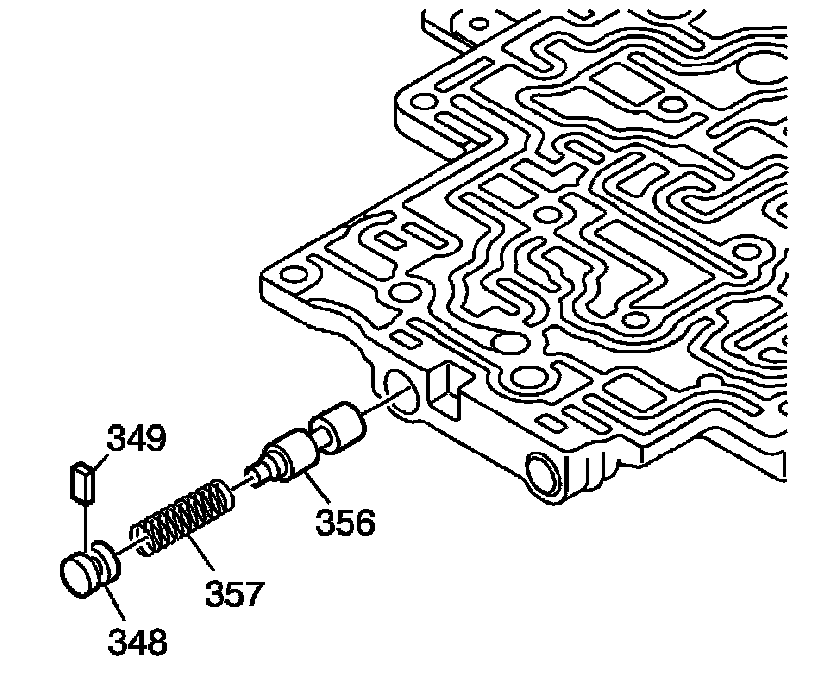
11. Install the neutral relay valve (356).
12. Install the neutral relay valve spring (357).
13. Install the solenoid modulator valve bore plug (348).
14. Install the sleeve/bore plug retainer (349).
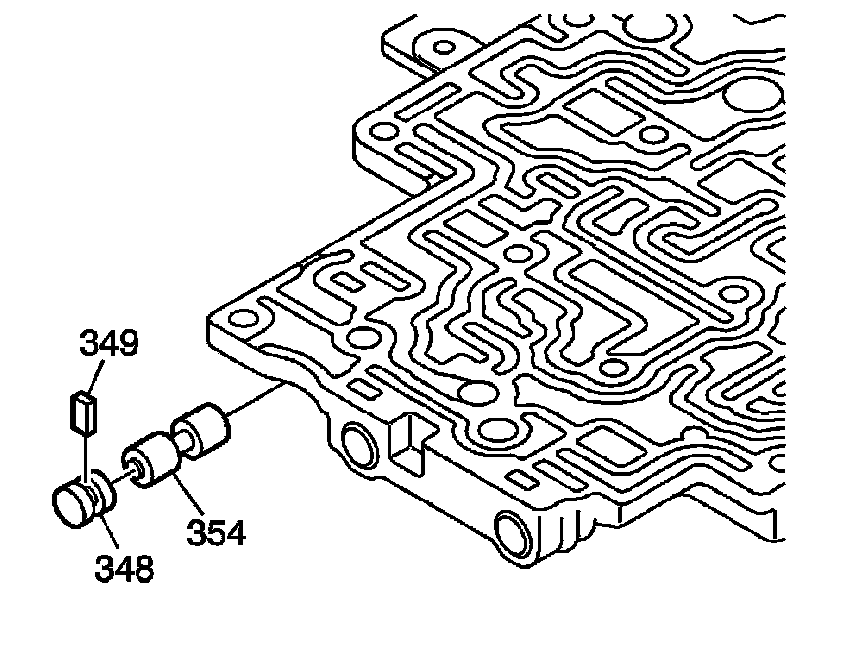
15. Install the forward clutch (C1) control valve (354).
16. Install the solenoid modulator valve bore plug (348).
17. Install the sleeve/bore plug retainer (349).
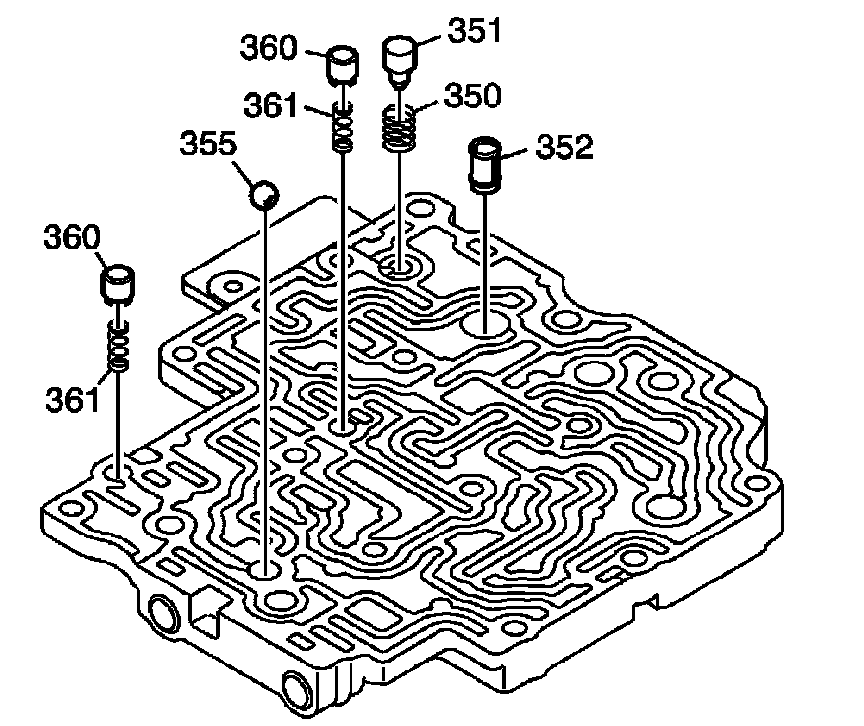
18. Install the pressure relief valve spring (350).
19. Install the pressure relief valve (351).
20. Install the fluid strainer (352).
21. Install the ball check valve (355).
22. Install the 2 check valve compression springs (361).
23. Install the 2 check valves (360).