Intake Manifold: Removal and Installation
Intake Manifold: Removal and InstallationREMOVAL
1) Release fuel pressure.
2) Remove intake manifold collector.
3) Remove fuel tube and fuel injector assembly.
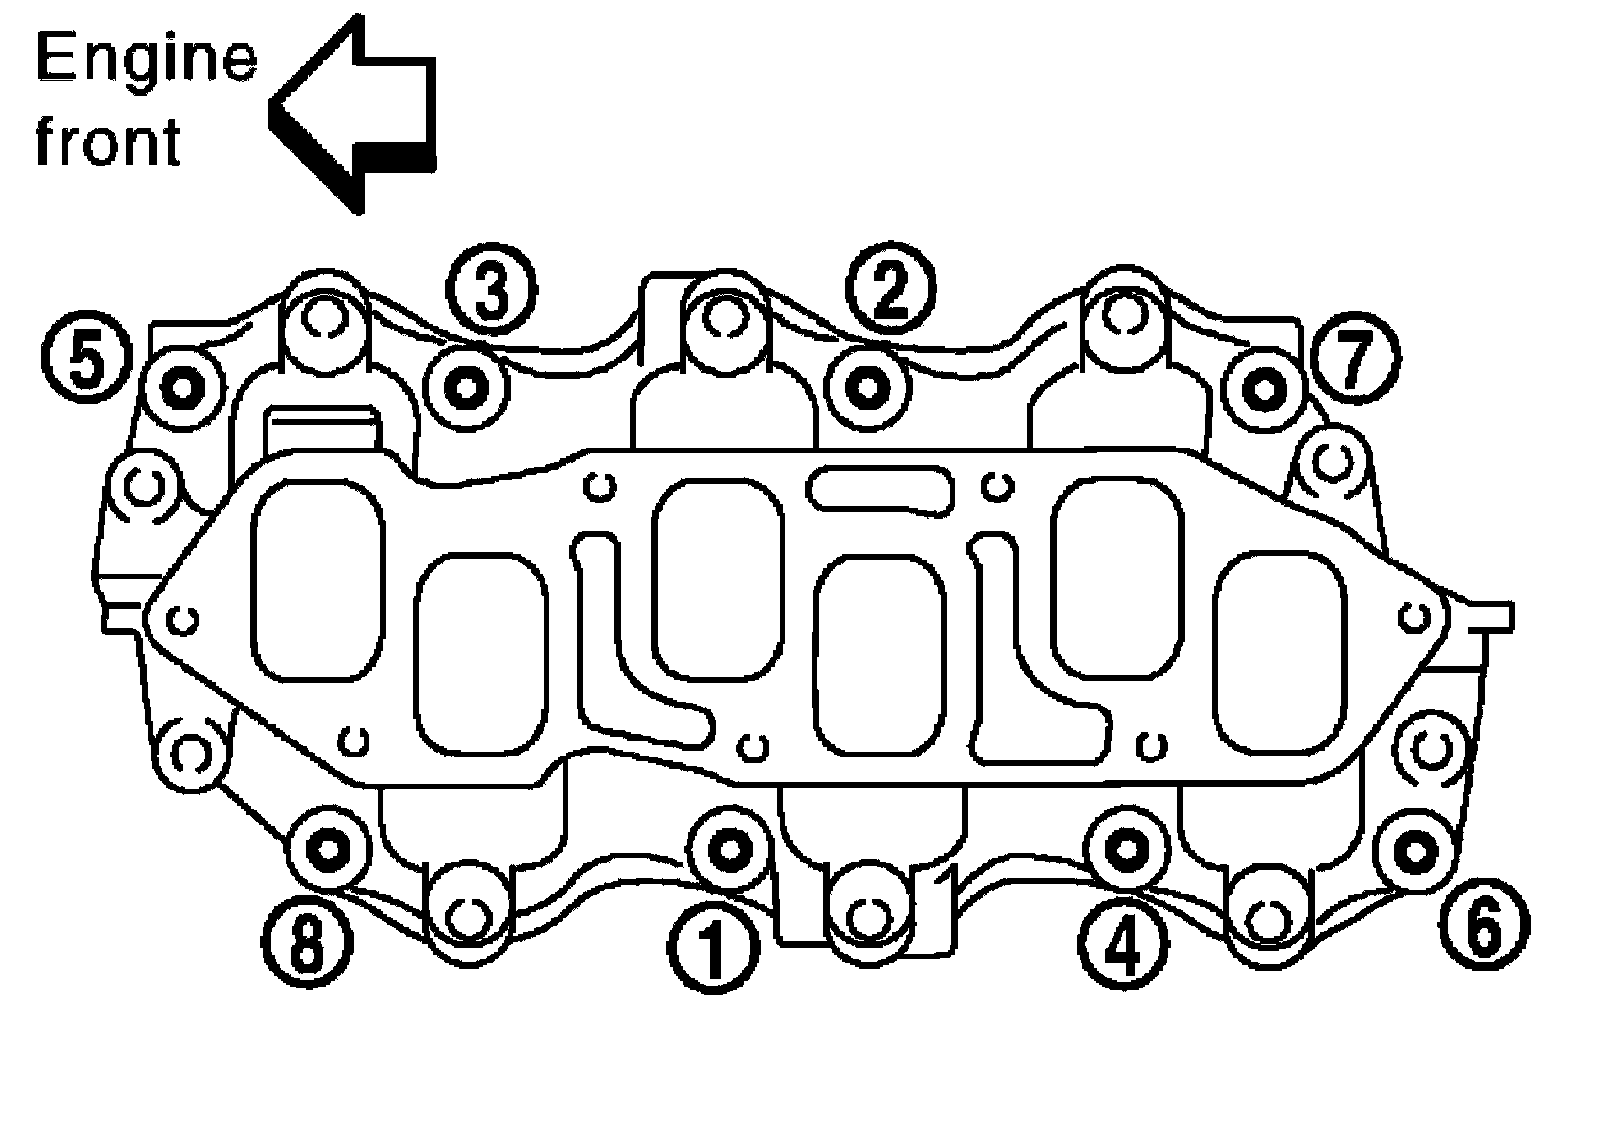
4) Loosen nuts and bolts with power tool in reverse order as shown to remove intake manifold.
5) Remove gaskets.
CAUTION:
Cover engine openings to avoid entry of foreign materials.
INSPECTION AFTER REMOVAL
Surface Distortion
^ Check the surface distortion of the intake manifold mating surface with straightedge and feeler gauge.

Limit: 0.1 mm (0.004 in)
^ If it exceeds the limit, replace intake manifold.
INSTALLATION
Installation is in the reverse order of removal. Note the following:
Intake Manifold
^ If stud bolts were removed from cylinder head, install them and tighten to the specified torque.
Intake manifold studs :11.0 Nm (1.1 kg-m, 8 ft-lb)
^ Tighten all nuts and bolts to the specified torque in two or more steps in numerical order as shown.

Intake manifold bolt and nuts
1st step :7.4 Nm (0.75 kg-m, 65 in-lb)
2nd step and after :29.0 Nm (3.0 kg-m, 21 ft-lb)