Rear
Rear Brake Pad Removal and InstallationCAUTION:
^ During removal, be careful not to damage brake flexible hose and not to depress brake pedal.
NOTE:
When replacing brake pad, replace it both side caliper as the set.
Removal
1) Hoist vehicle and remove rear wheels.
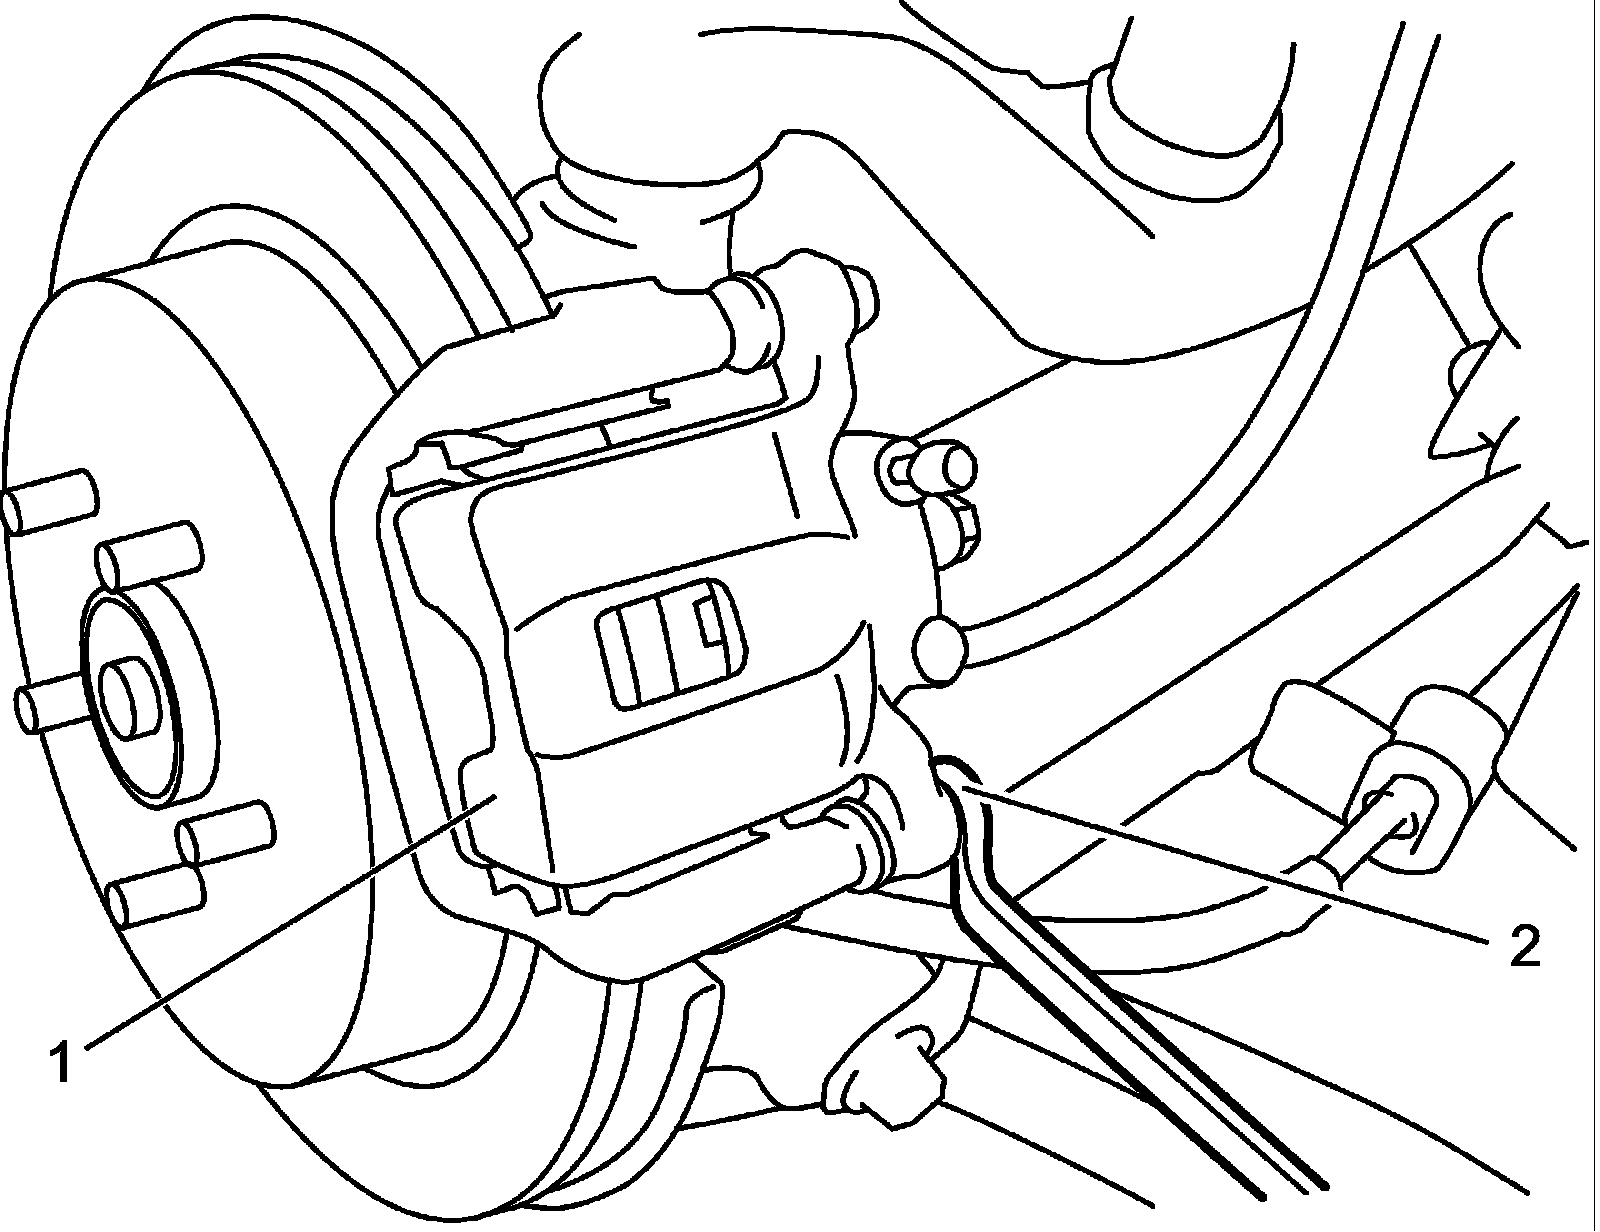
2) Remove caliper pin bolts (2).
3) Remove caliper (1) from caliper carrier.
4) Remove brake pads.
Installation
1) Apply pad grease (included in spare parts) to brake pad (1) as shown in the figure.
2) Install pad spring (2) and pads (1).
NOTE:
Install brake pad with wear indicator (3) to vehicle center side on right wheel brake.


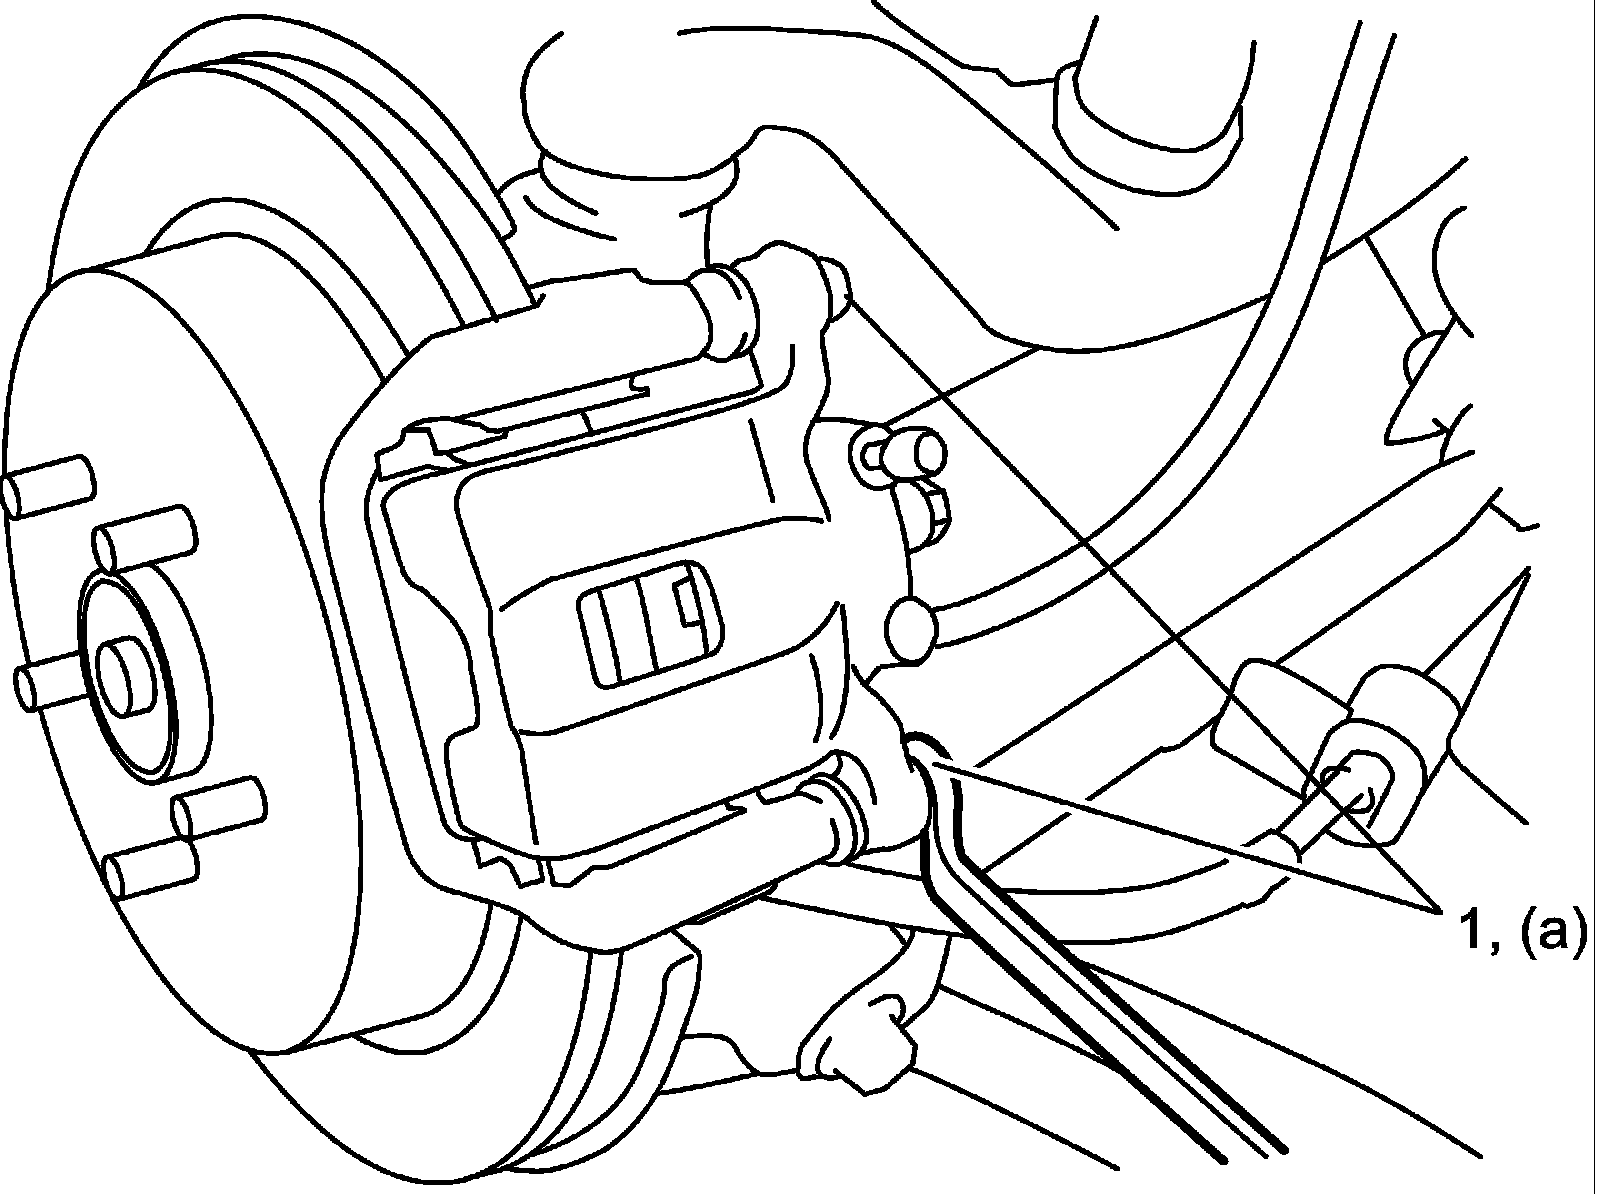
3) Install caliper and tighten caliper (slide) bolt (1) to specified torque.
NOTE:
Make sure that boots are fit into groove securely.
Tightening torque
Caliper pin bolt (a): 43 Nm (4.4 kg-m, 32.0 ft. lbs.)
4) Install rear wheel and tighten rear wheel nuts to specified torque.
5) Upon completion of installation, perform brake test.