Pressure Regulating Solenoid: Service and Repair
Solenoid Valves (Shift Solenoid-A, Shift Solenoid-B, TCC Pressure Control Solenoid and Pressure Control Solenoid) Removal and InstallationRemoval
1) Disconnect negative cable at battery.
2) Pull out fluid level gauge and lift up vehicle.
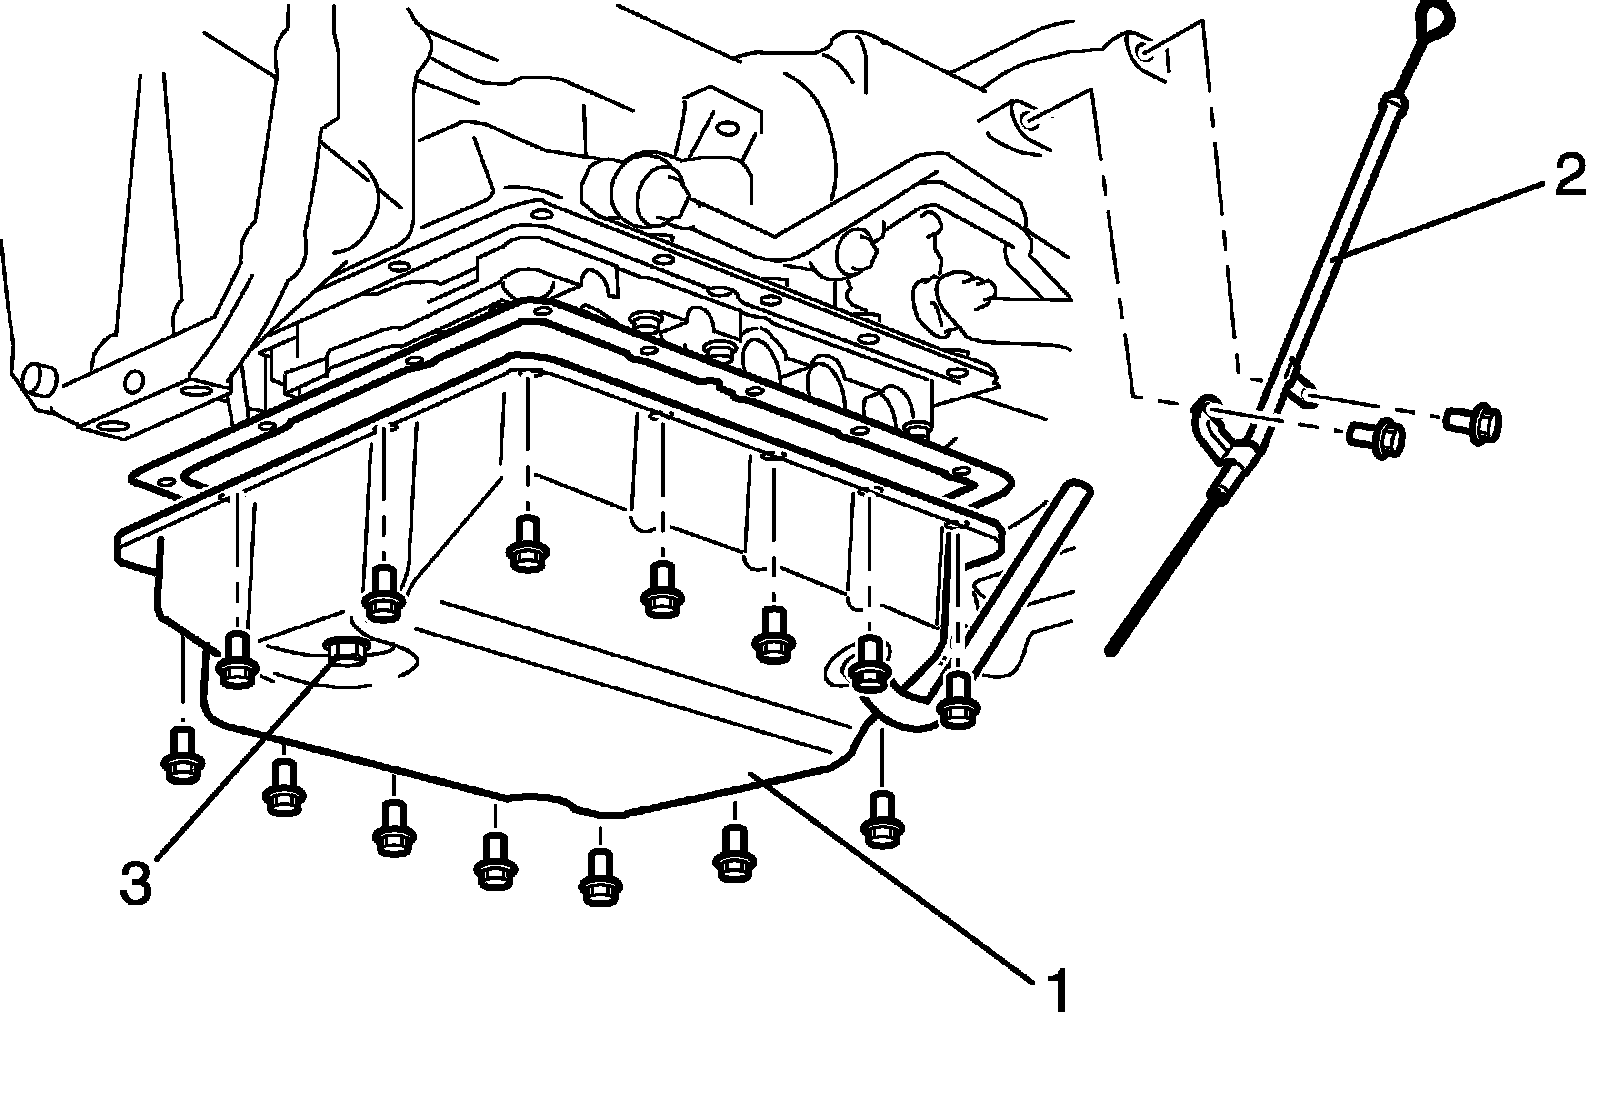
3) Remove drain plug (3) and drain A/T fluid.
4) Install drain plug (3) with new gasket.
5) Remove oil filler tube (2) and A/T oil pan (1).
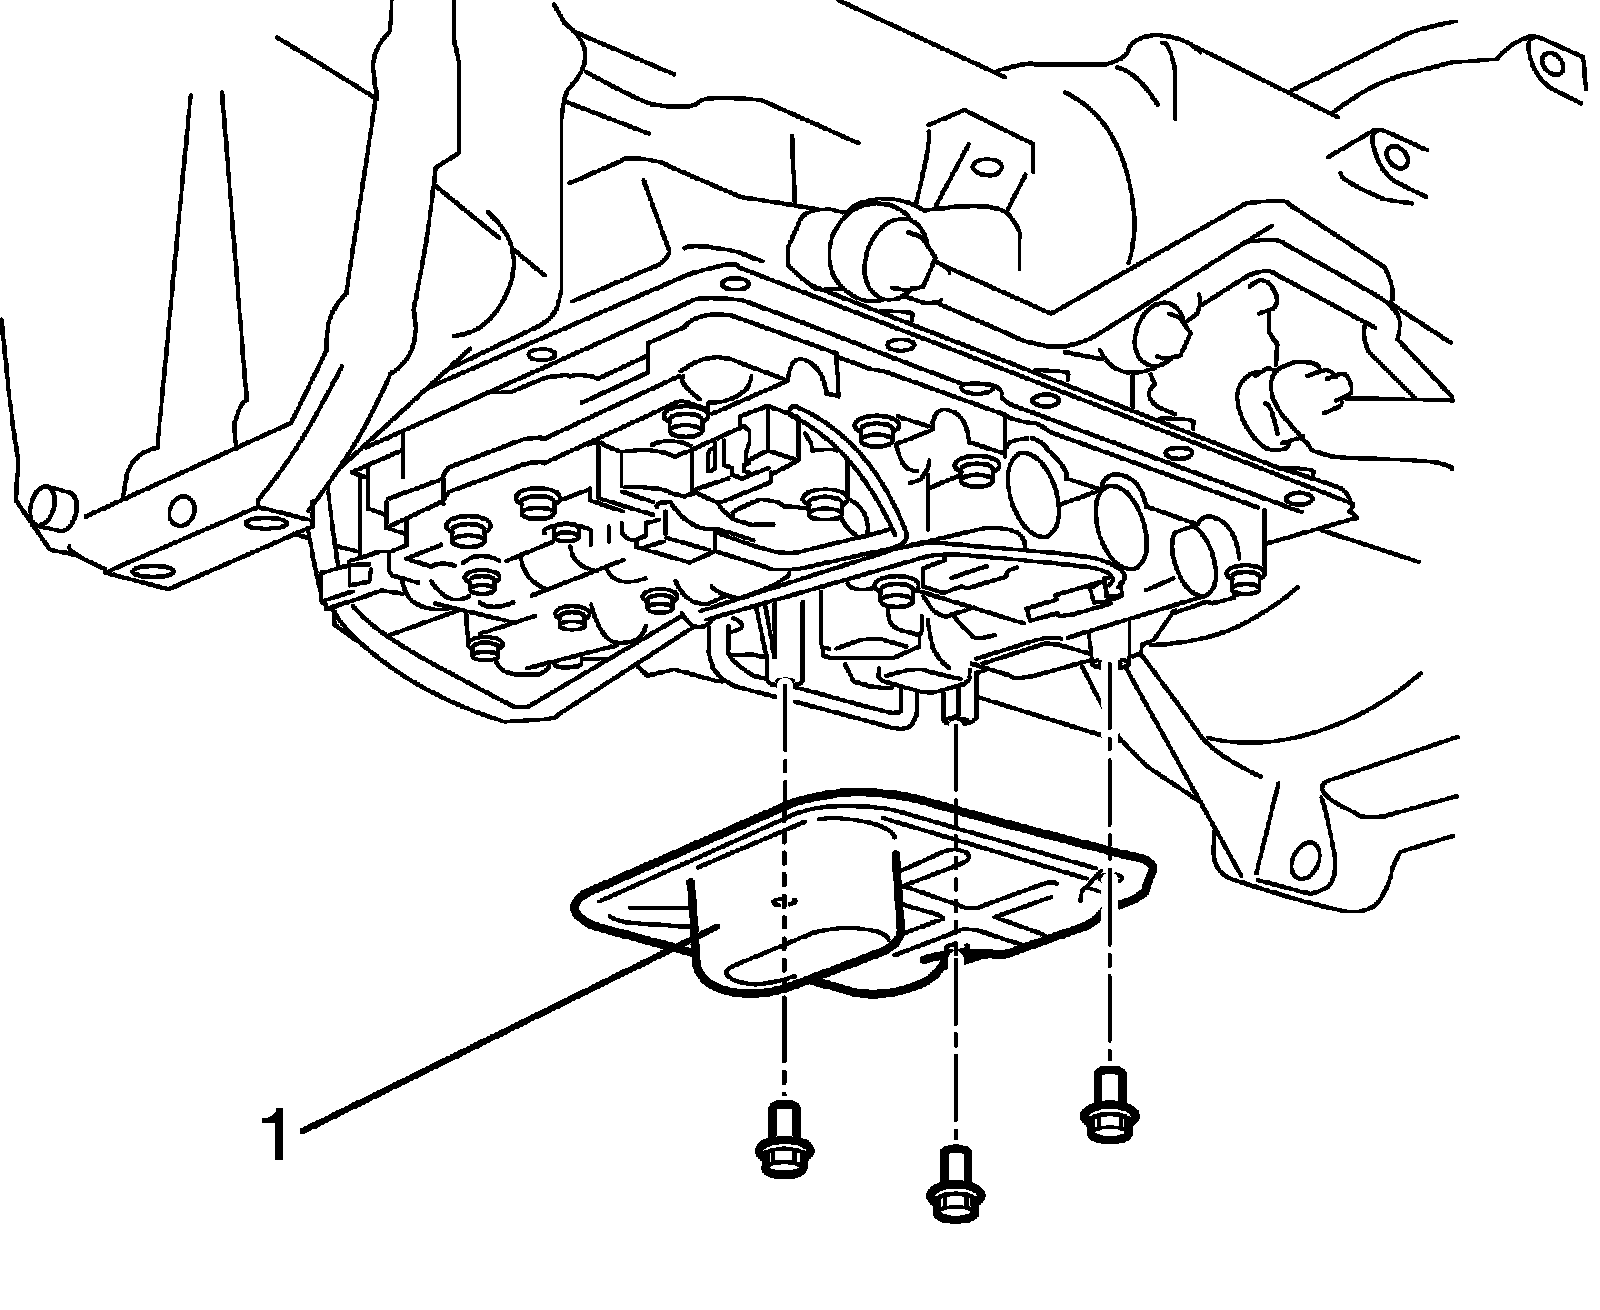
6) Remove A/T oil strainer (1).
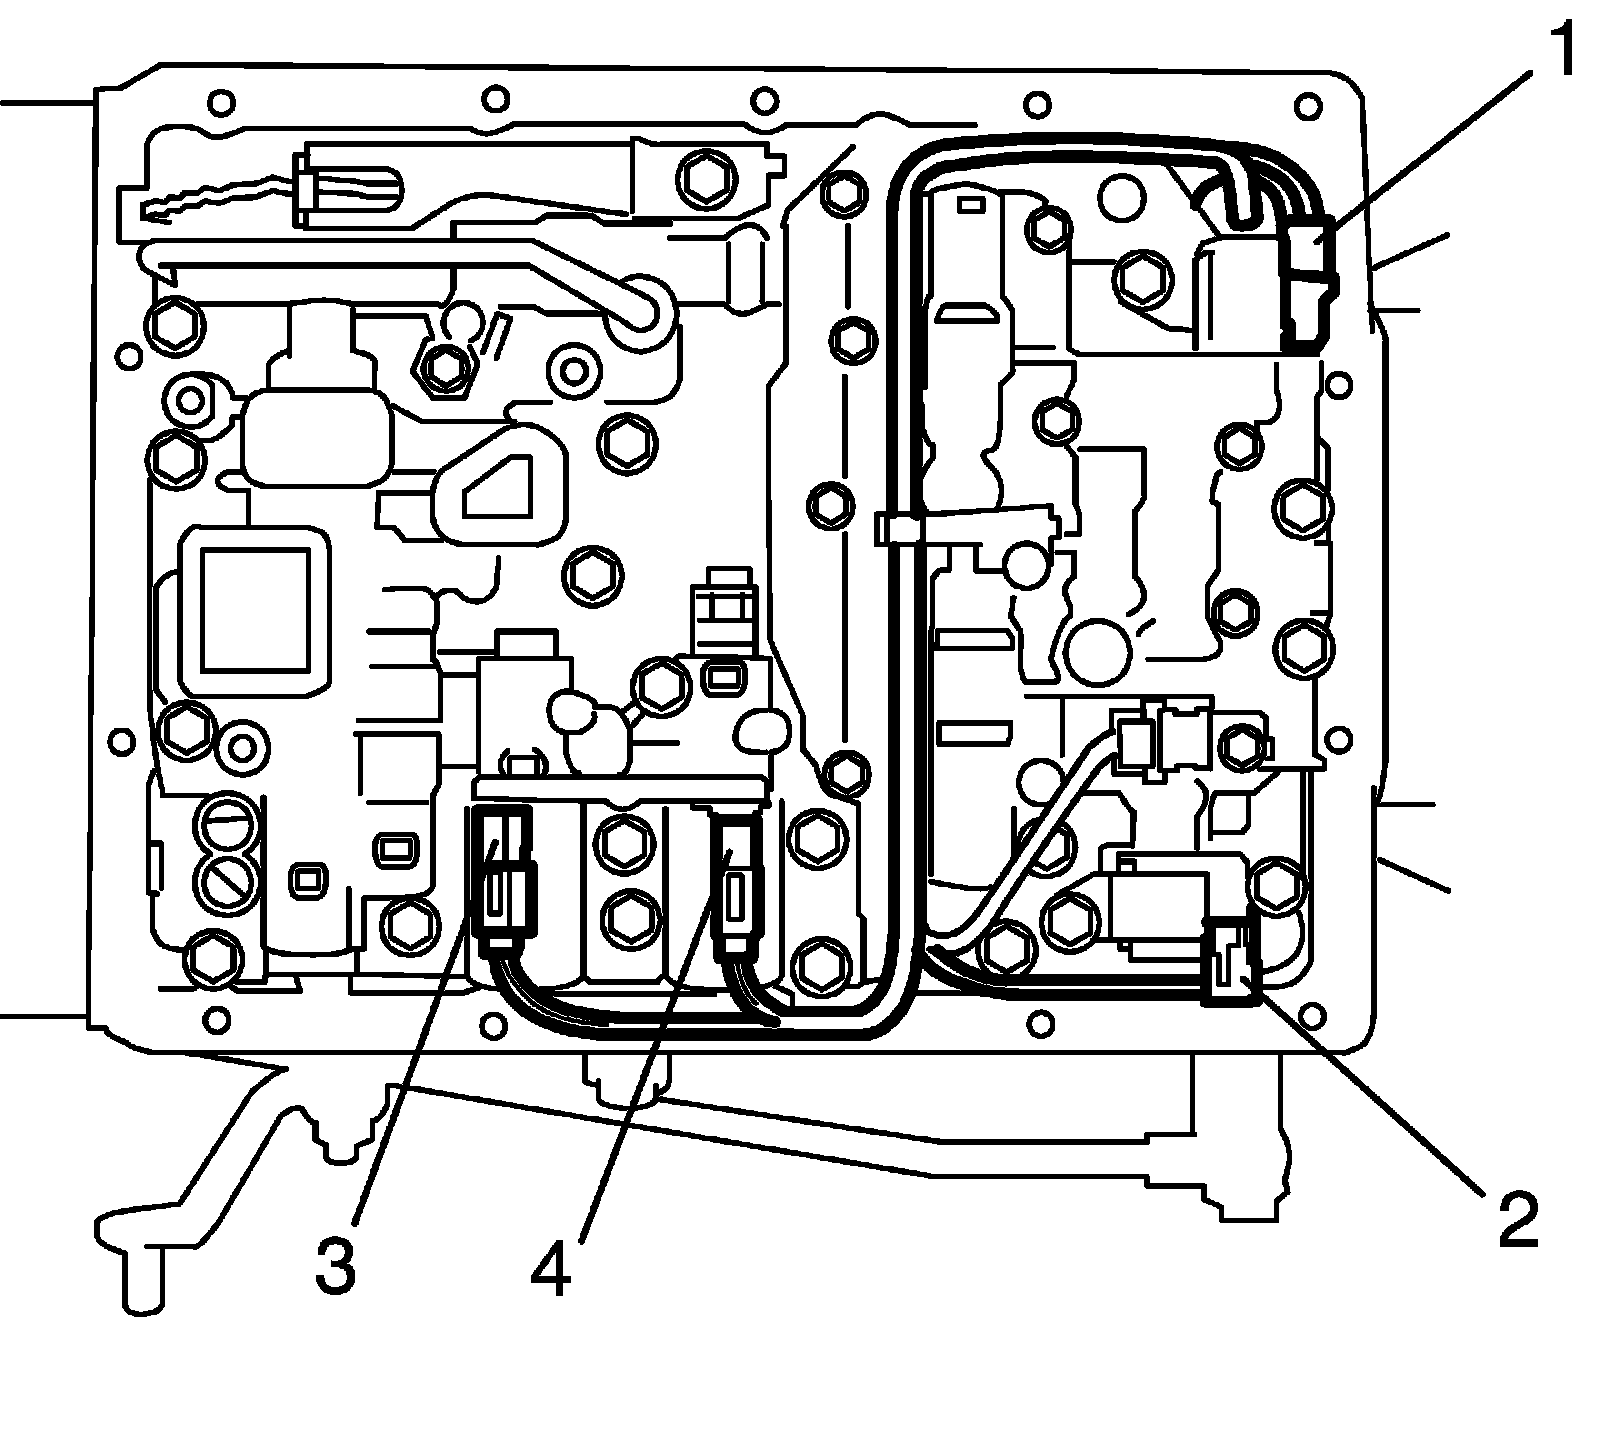
7) Disconnect shift solenoid-A connector (1), shift solenoid-B connector (2), TCC pressure control solenoid connector (4) and pressure control solenoid connector (3).
8) Remove solenoid valves.
Installation
Reverse removal procedure to install solenoid valves, noting the following points.
^ For details of solenoid valves and their connectors installation, refer to Automatic Transmission Unit Assembly:4 A/T. Use new O-ring.
^ For details of A/T oil pan installation, refer to Automatic Transmission Unit Assembly:4 A/T.
^ Tighten exhaust No.1 pipe bolts & nuts and exhaust bracket bolts & nuts.
^ Fill A/T fluid and check fluid level according to procedure described in A/T Fluid Change:4 A/T.
^ Check for fluid leakage after warming up A/T.