Parking Brake Control: Service and Repair
Parking Brake Control: Removal and InstallationRemoval
1) Disconnect the return spring from the equalizer.
2) Remove the right and left rear cables from the equalizer.
3) Remove the front cable nuts from underneath the vehicle.
4) Remove the rear half of the center console.
5) Remove the four control lever assembly bolts, then remove the control lever assembly.
6) Remove the front cable grommet from the control lever assembly.
7) Remove the front cable to control lever assembly bolt.
8) Remove the adjusting nut and discard, then remove the front cable.
CAUTION:
Do not reuse the adjusting nut, use a new adjusting nut for installation.
9) Remove the rear disc rotors.
10) Remove the left and right parking brake shoes, then disconnect the rear cables from the toggle levers.
11) Remove the left and right rear cable bolts and nuts, then remove the left and right rear cables.
Installation
Installation is in the reverse order of removal.
^ The control lever assembly bolts must be installed in the following order:
Control lever assembly bolt : 12.7 Nm (1.3 kg-m, 9 ft-lb)
1) Install and temporarily tighten the control lever assembly bolts (A), (B) and (D).
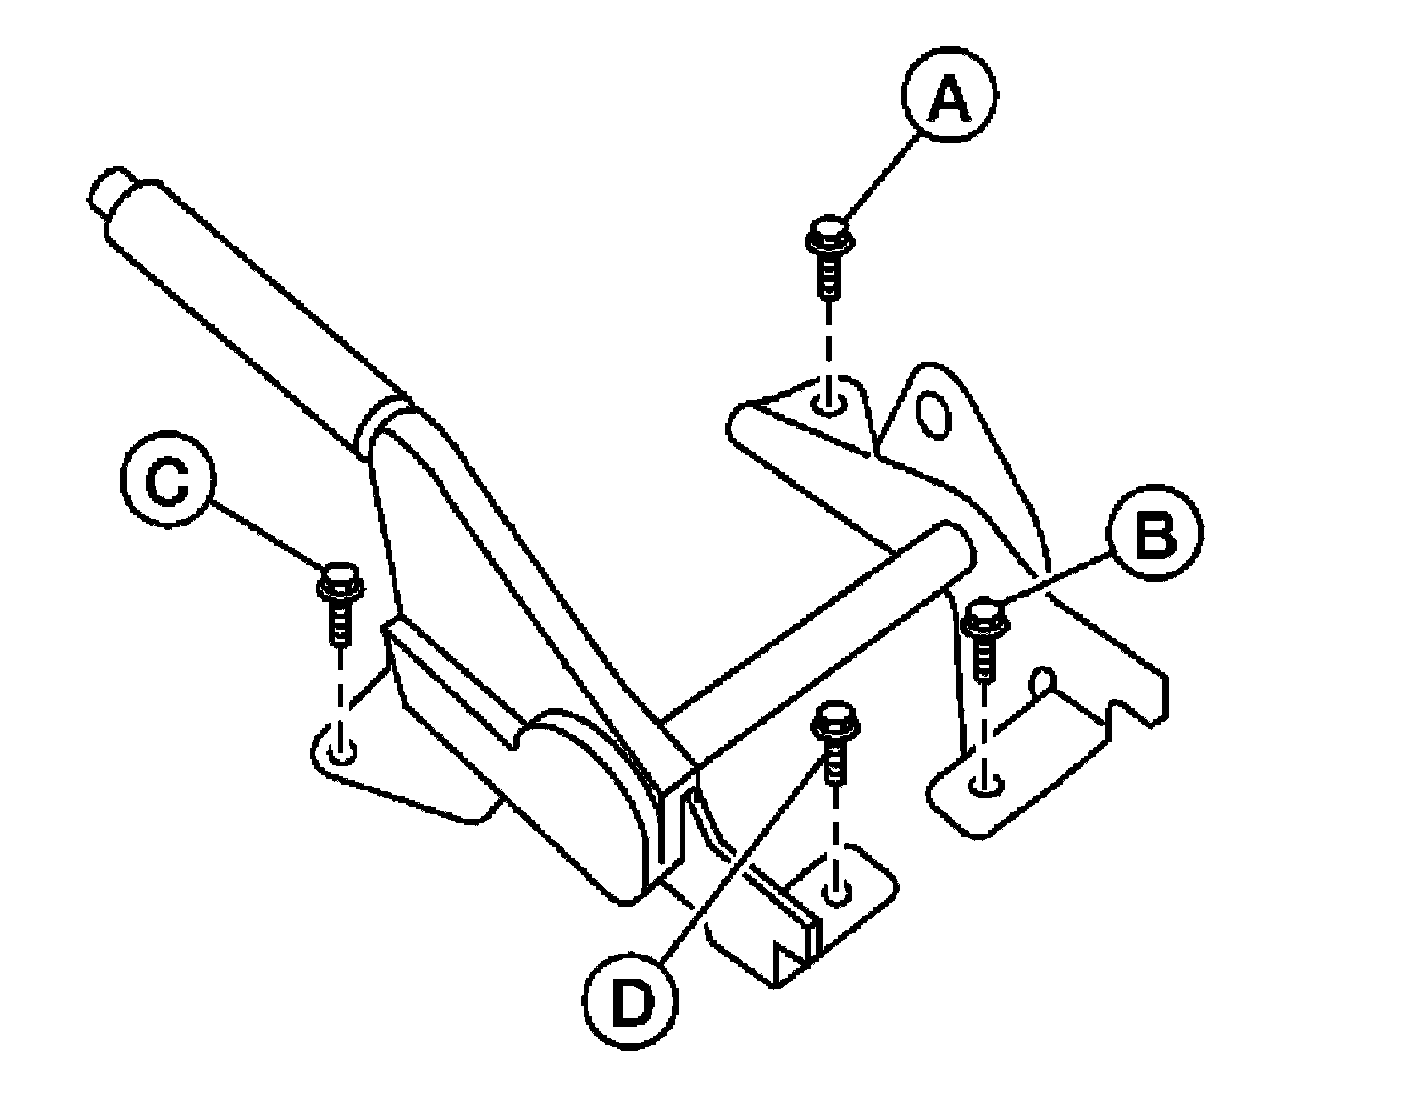
2) Install and tighten the control lever assembly bolt (C) to specification.
3) Install and tighten the control lever assembly bolt (D) to specification.
4) Install and tighten the control lever assembly bolt (A) to specification.
5) Install and tighten the control lever assembly bolt (B) to specification.
^ Adjust the parking brake. Refer to [Service Data and Specifications].
CAUTION:
^ Do not reuse the adjusting nut, use a new adjusting nut for installation.
^ Install the control lever assembly bolts in the specified order and pattern.