Shift Control: Disassembly and Assembly
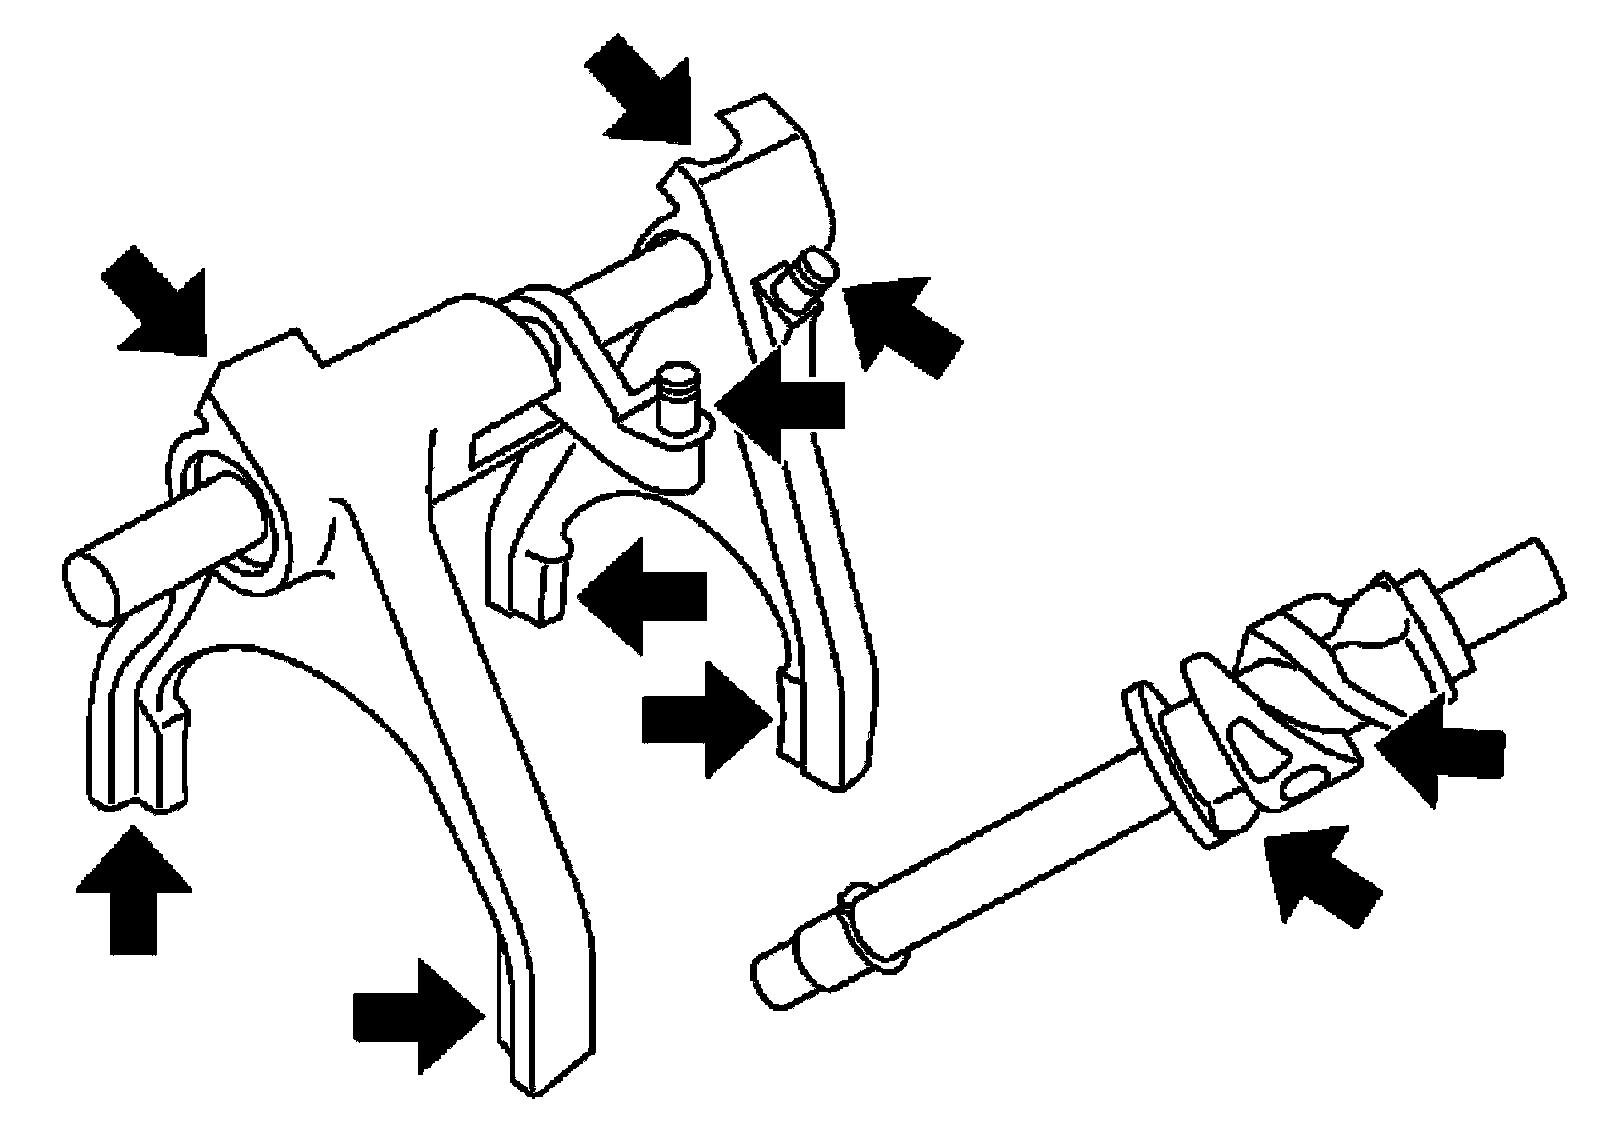
Shift Control: Disassembly and AssemblyDisassembly (A/T Models)
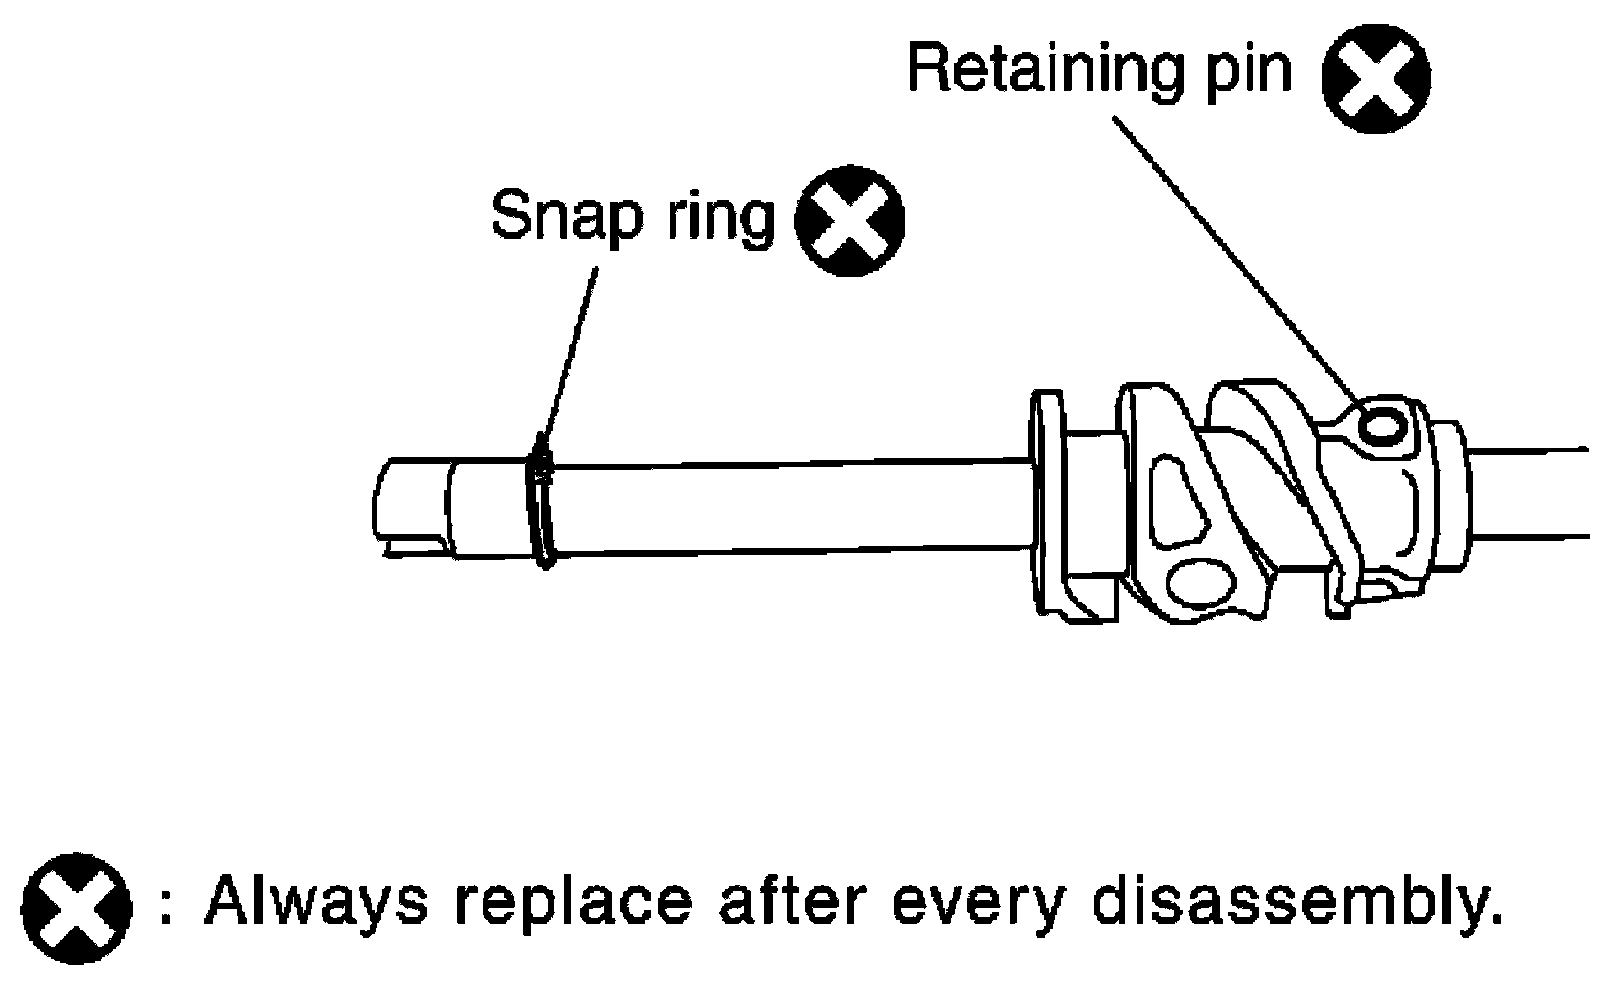
1) Remove the snap ring.
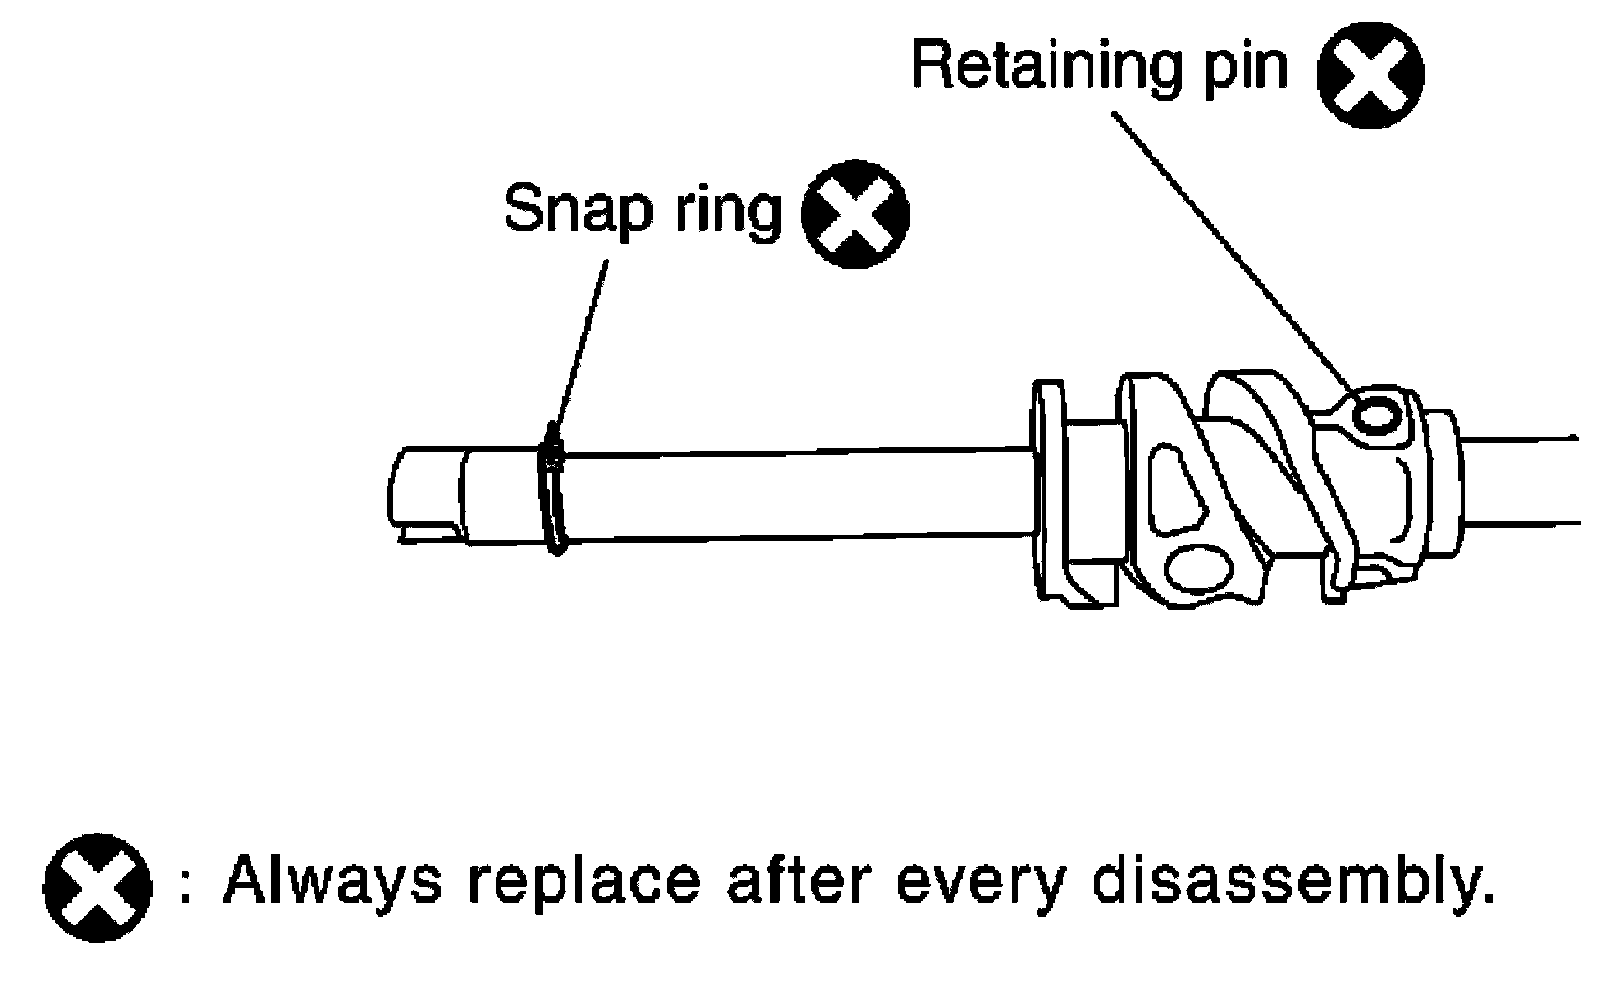
2) Remove the retaining pin.
3) Remove the drum cam from the control shift rod.
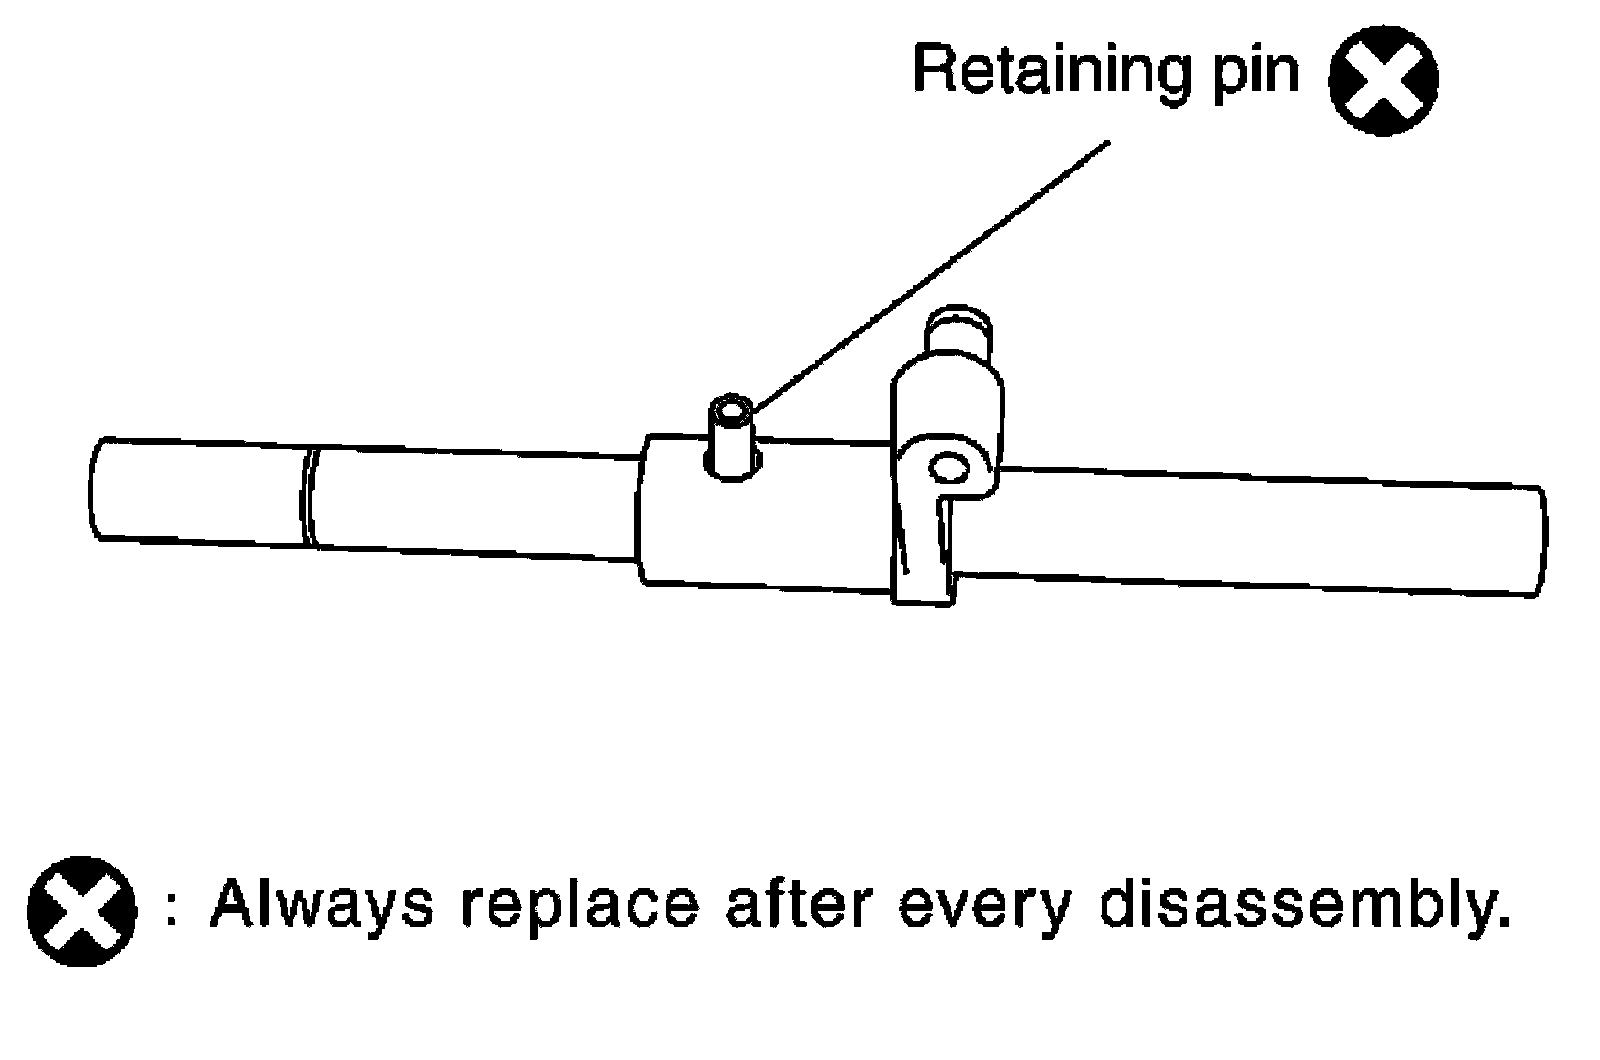
4) Remove the retaining pin from the L-H shift rod.
5) Remove the 2-4 shift bracket.
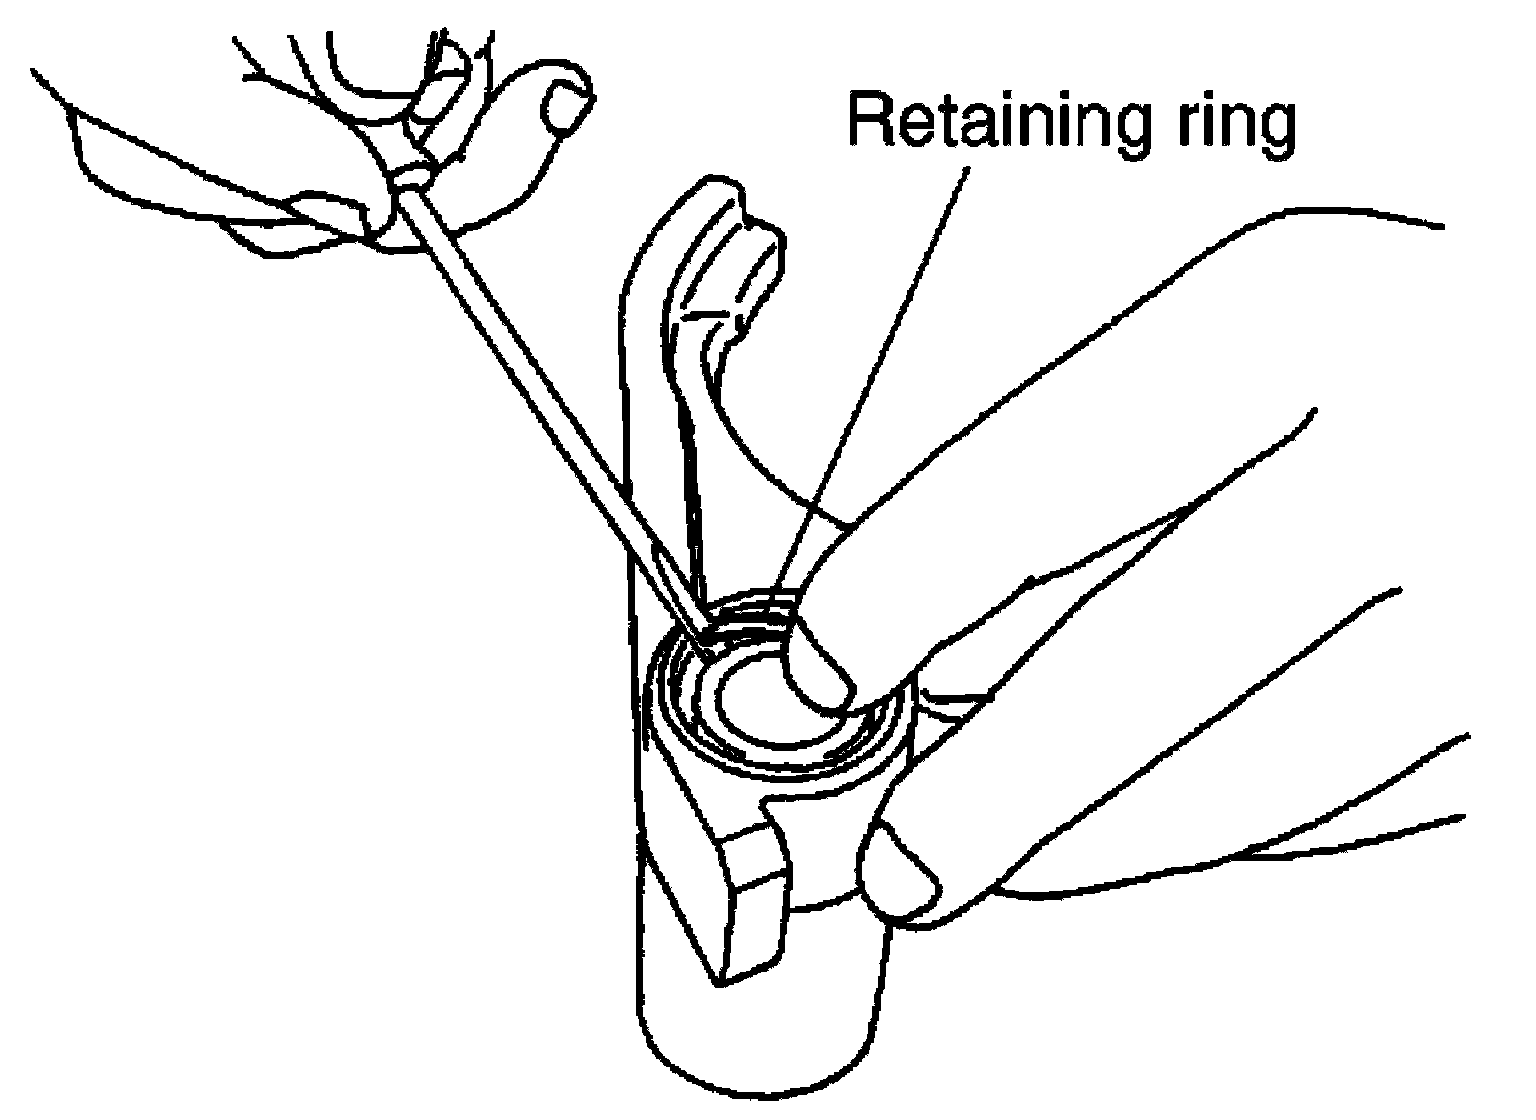
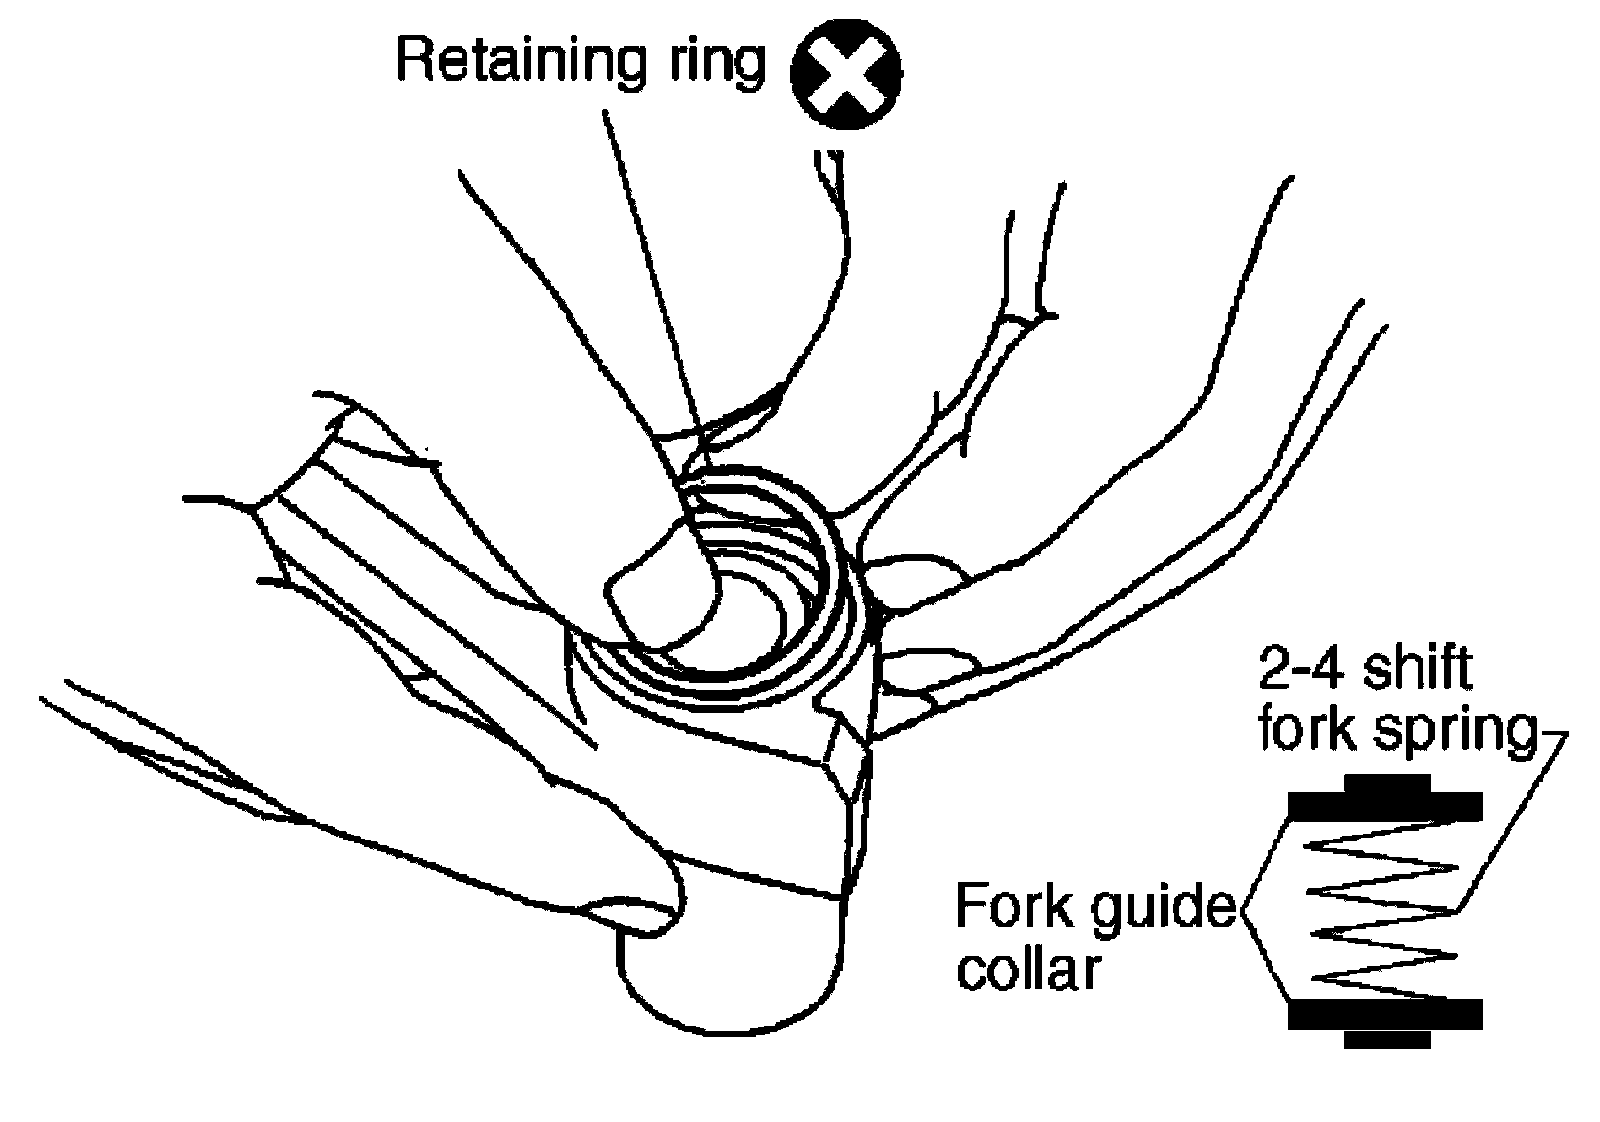
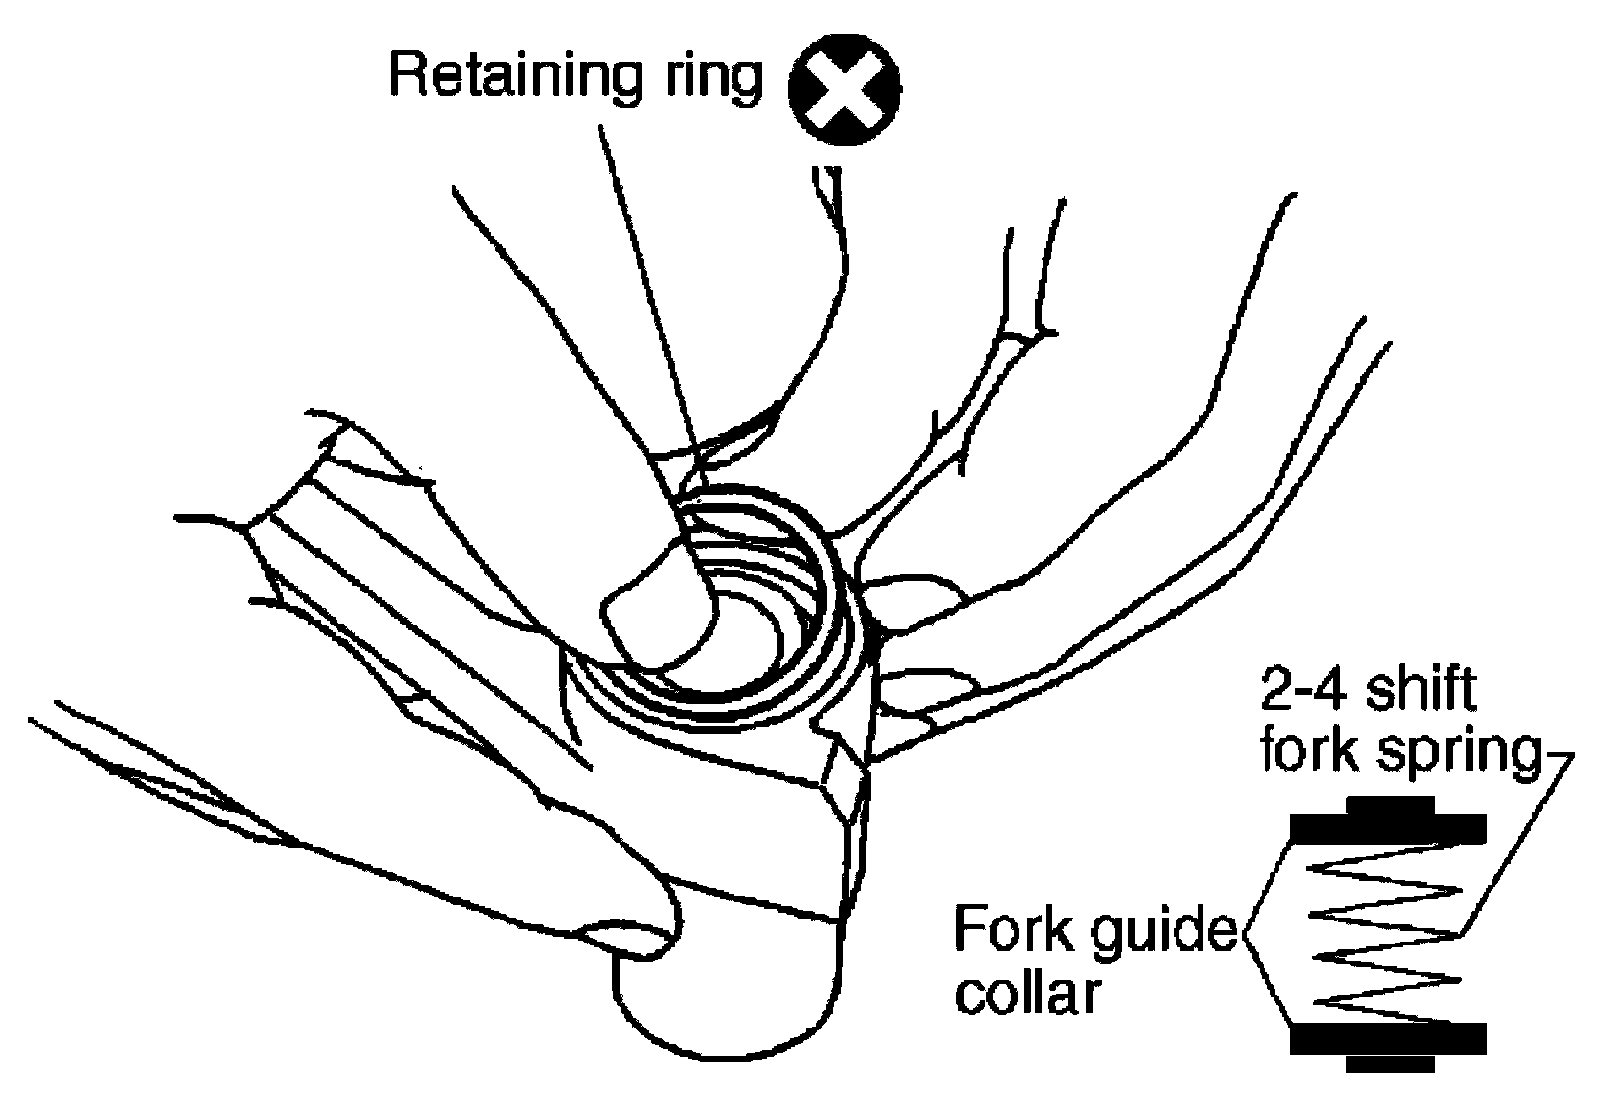
6) Remove the retaining ring from the 2-4 shift fork, using suitable tool.

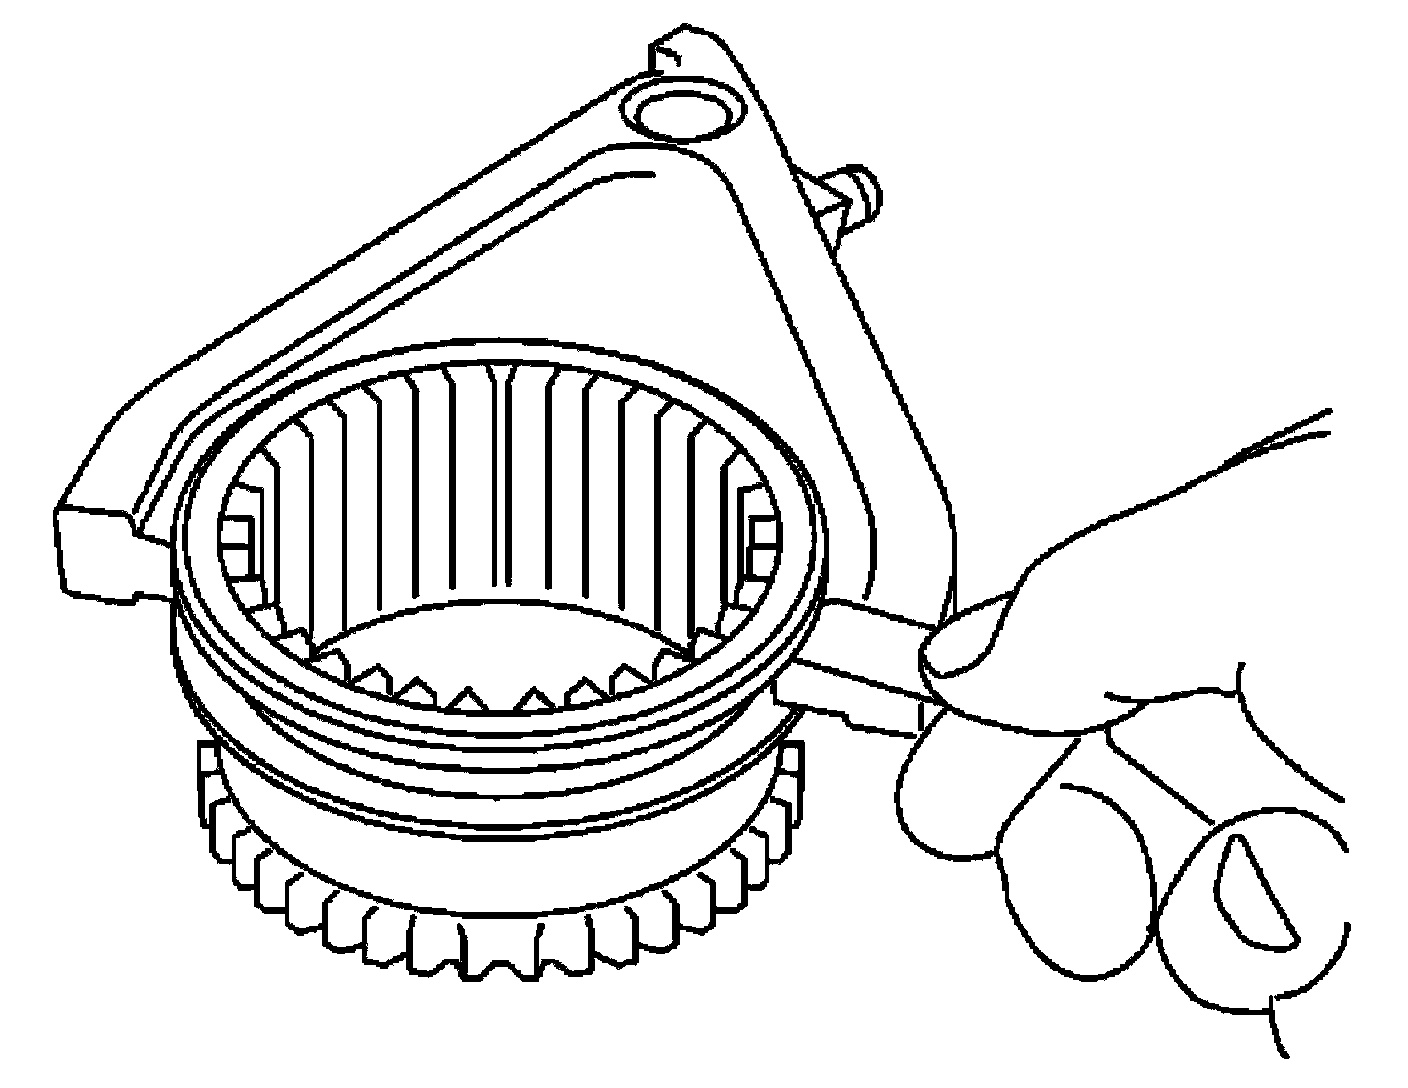
7) Remove the fork guide collar and 2-4 shift fork spring from the 2-4 shift fork.
Disassembly (M/T Models)
1) Remove the retaining ring from the 2-4 shift fork, using suitable tool.
2) Remove the fork guide collar and 2-4 shift fork spring from the 2-4 shift fork.
Inspection after Disassembly
Shift Fork
^ Measure the clearance between the shift fork and sleeve. If it is out of specification, replace it with a new one.
Standard value
2-4 : Refer to [Service Data and Specifications]
L-H : Refer to [Service Data and Specifications]
Shift Rod and Fork Components
^ Check the working face of the shift rod and fork for wear, partial wear, abrasion, bending and other abnormality. If any is found, replace with a new one.
Assembly (A/T Models)
1) Install clevis pin and shift collar to L-H shift fork after assembling them.
CAUTION:
Use caution when installing L-H shift fork, clevis pin or shift collar.
2) Install clevis pin and shift collar to 2-4 shift bracket after assembling them.
CAUTION:
Use caution when installing 2-4 shift bracket.
3) Install the fork guide collar and 2-4 shift fork spring to the 2-4 shift fork, and then secure it with the retaining ring.
CAUTION:
^ Do not reuse retaining ring.
^ Be careful with orientation.
4) Install the 2-4shift bracket to the L-H shift rod.
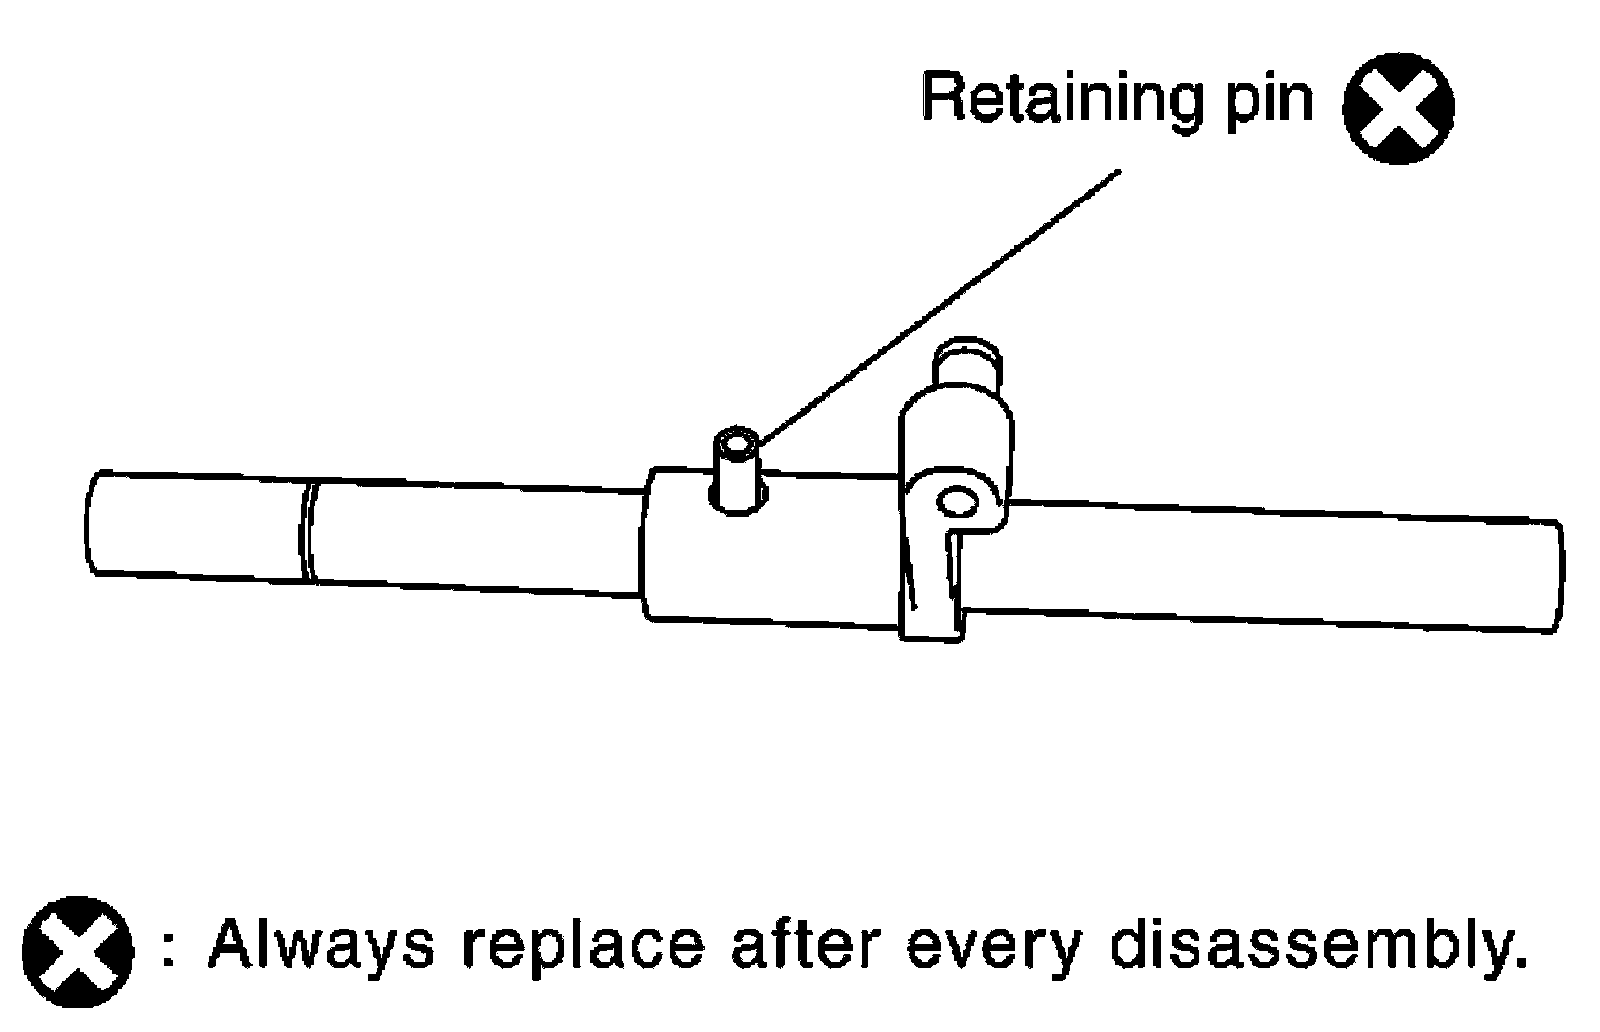
5) Install the retaining pin evenly to the L-H shift rod.
CAUTION:
Do not reuse retaining pin.
6) Install the drum cam to the control shift rod, and then secure it with the retaining pin.
CAUTION:
Do not reuse retaining pin.
7) Install the snap ring to the control shift rod.
CAUTION:
Do not reuse snap ring.
Assembly (M/T Models)
1) Install clevis pin and shift collar to L-H shift fork after assembling them.
CAUTION:
Use caution when installing L-H shift fork, clevis pin or shift collar.
2) Install clevis pin and shift collar to 2-4 shift bracket after assembling them.
CAUTION:
Use caution when installing 2-4 shift bracket.
3) Install the fork guide collar and 2-4 shift fork spring to the 2-4 shift fork, and then secure it with the retaining ring.
CAUTION:
^ Do not reuse retaining ring.
^ Be careful with orientation.