Fuel System
SFI SYSTEMPRECAUTION
1. BEFORE WORKING ON FUEL SYSTEM, DISCONNECT NEGATIVE (-) TERMINAL CABLE FROM BATTERY
HINT: Any diagnostic trouble code retained by the computer will be erased when the negative (-) terminal cable is removed from the battery. Therefore, if necessary, read the diagnosis before removing the negative (-) terminal cable from the battery.
2. DO NOT SMOKE OR WORK NEAR AN OPEN FLAME WHEN WORKING ON THE FUEL SYSTEM
3. KEEP GASOLINE AWAY FROM RUBBER OR LEATHER PARTS
4. FUEL SYSTEM
a. When disconnecting the high fuel pressure line, a large amount of gasoline will spill out, so observe these procedures:
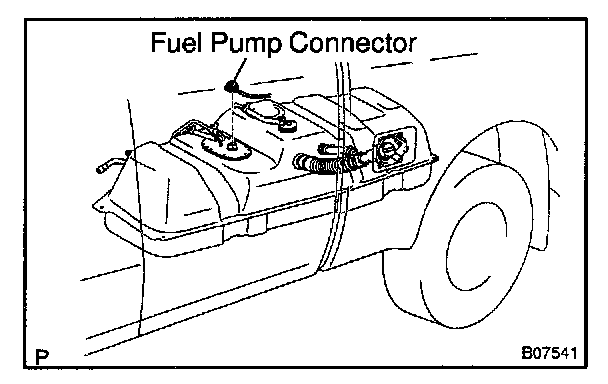
1. Disconnect the fuel pump connector.
2. Start the engine.After the engine has stopped on its own, turn the ignition switch OFF.

3. Put a container under the connection.
4. Slowly loosen the connection.
5. Disconnect the connection.
6. Plug the connection with a rubber plug.
7. Reconnect the fuel pump connector.
b. When connecting the union bolt (fuel pressure pulsation damper) on the high pressure pipe union, observe these procedures:
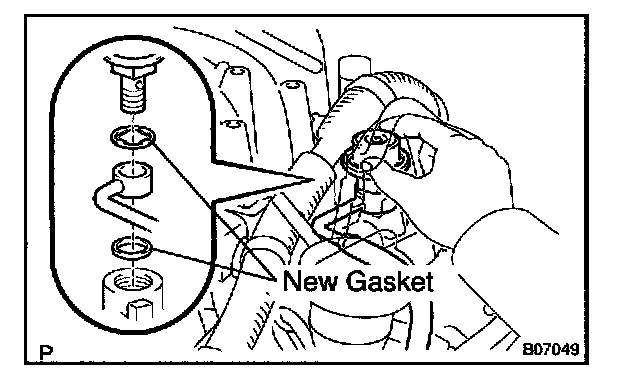
1. Always use 2 new gaskets.
2. Tighten the union bolt by hand.
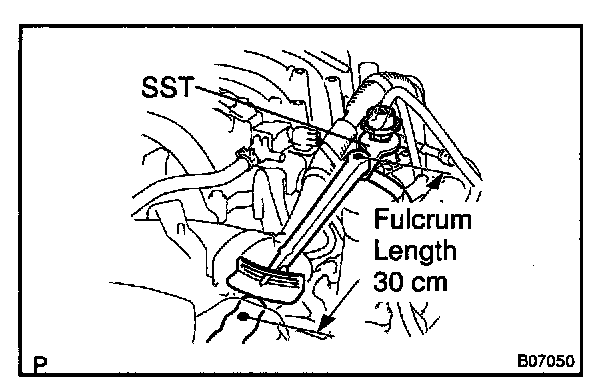
3. Using SST, tighten the union bolt to the specified torque.
SST 09612-24014 (09617-24011)
Torque:
33 Nm (340 kg.cm, 24 ft.lb) for use with SST
39 Nm (400 kg.cm, 29 ft.lb)
HINT: Use a torque wrench with a fulcrum length of 30 cm (11.81 in.).
c. When connecting the flare nut on the high pressure pipe union, observe these procedures:
1. Apply a light coat of engine oil to the flare nut, and tighten the flare nut by hand.

2. Using SST, tighten the flare nut to the specified torque.
SST 09631-22020
NOTE: Do not rotate the fuel filter outlet, when tightening the flare nut.
Torque:
28 Nm (285 kg.cm, 21 ft.lb) for use with SST
34.3 Nm (350 kg.cm, 25 ft.lb)
HINT: Use a torque wrench with a fulcrum length of 30 cm (11.81 in.).
d. Observe these precautions when removing and installing the injectors.

1. Never reuse the O-ring.
2. When placing a new O-ring on the injector, take care not to damage it in any way.
3. Coat a new O-ring with spindle oil or gasoline before installing-never use engine, gear or brake oil.
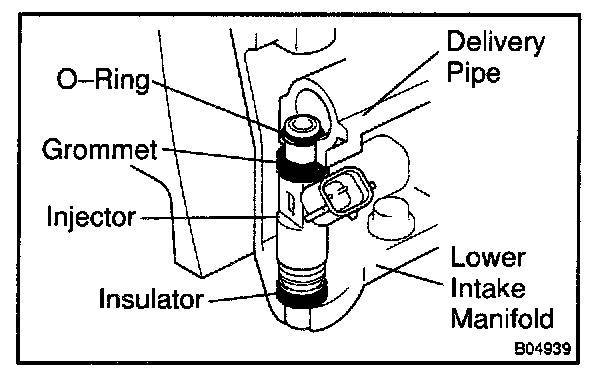
e. Install the injector to the delivery pipe and lower intake manifold as shown in the illustration.
Before installing the injector, must apply spindle oil or gasoline on the place where a delivery pipe or an intake manifold touches an O-ring of the injector.
f. Observe these precautions when disconnecting the fuel tube connector (quick type):
1. Check that there is any dirt or the like on the pipe and around the connector before disconnecting them and clean the dirt away.
2. Be sure to disconnect by hands.
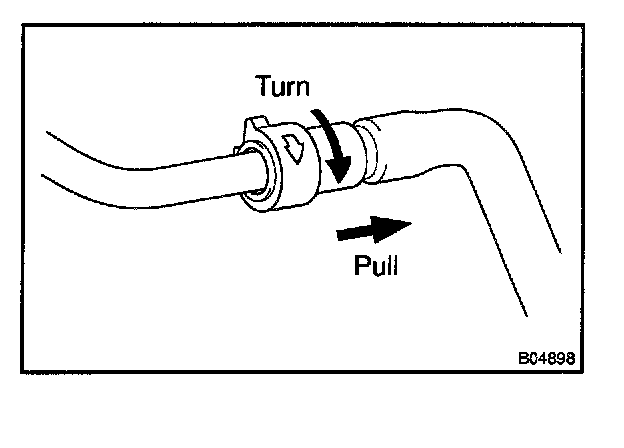
3. When the connector and the pipe are stuck, turn and pull the connector to free to disconnect and pull it out. Do not use any tools at this time.
4. Inspect if there is any dirt or the like on the seal surface of the disconnected pipe and clean it away.
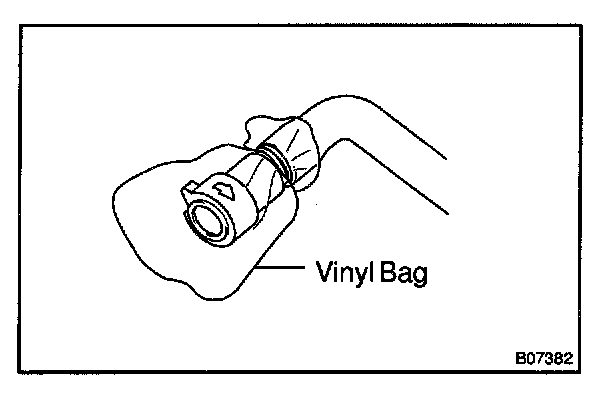
5. Prevent the disconnected pipe and connector from being damaged or mixed with foreign objects by covering them with a vinyl bag.
g. Observe these precautions when connecting the fuel tube connector (quick type):
1. Do not reuse the retainer removed from the pipe.
2. Must use hands to remove the retainer from the pipe.
3. Check that there is any damage or foreign objects on the connected part of the pipe.

4. Match the axis of the connector with axis of the pipe, and push in the connector until the connector makes a "click" sound.In case that the connections is tight, apply small amount of fresh engine oil on the tip of the pipe.

5. After having finished the connection, check if the pipe and the connector are securely connected by pulling them.
6. Check if there is any fuel leakage.
h. Observe these precautions when handling nylon tube.
1. Pay attention not to turn the connected part of the nylon tube and the quick connector by force when connecting them.
2. Pay attention not to kink the nylon tube.
3. Do not remove the EPDM protector from the outside of the nylon tube.
4. Must not close the piping with the nylon tube by bending it.
i. Check that there is any fuel leak after maintenance anywhere on the fuel system.
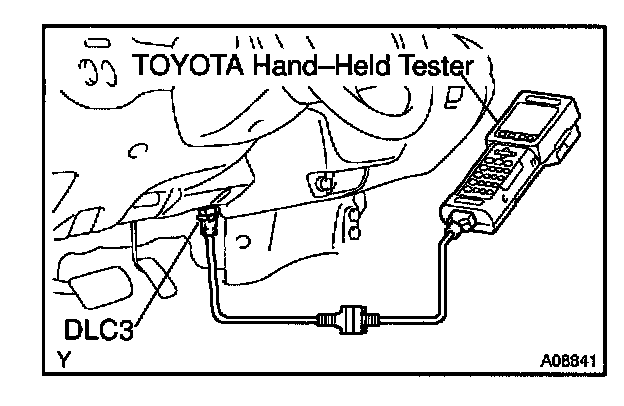
1. Connect a TOYOTA hand-held tester to the DLC3.
2. Turn the ignition switch ON and push the TOYOTA hand-held tester main switch ON.
NOTE: Do not start the engine.
3. Select the ACTIVE TEST mode on the TOYOTA hand-held tester.
4. Please refer to the TOYOTA hand-held tester operator's manual for further details.
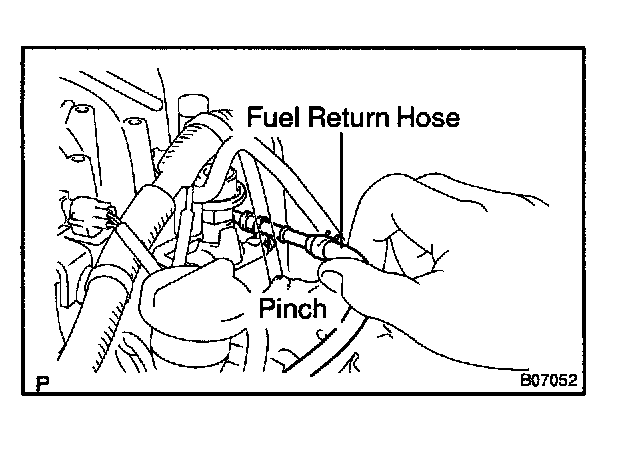
5. Pinch the fuel return hose.
The pressure in the high pressure line will rise to approx. 392 kPa (4 kg/Sq.cm, 57 psi). In this state, check to see that there are no leaks from any part of the fuel system.
NOTE: Always pinch the hose.Avoid bending as it may cause the hose to crack.
6. Turn the ignition switch OFF.
7. Disconnect the TOYOTA hand-held tester from the DLC3.