Planetary Sun Gear

DISASSEMBLY

1. CHECK OPERATION OF No.1 ONE-WAY CLUTCH
Hold the planetary sun gear and turn the 2nd brake hub. Check that the 2nd brake hub must be able to turn freely clockwise and locks counterclockwise.

2. REMOVE ASSEMBLED No.1 ONE-WAY CLUTCH AND 2ND BRAKE HUB

3. REMOVE THRUST WASHER FROM SUN GEAR INPUT DRUM

4. REMOVE 2 OIL SEAL RINGS
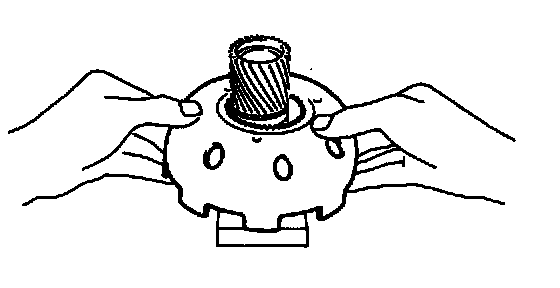
5. REMOVE SUN GEAR INPUT DRUM FROM PLANETARY SUN GEAR

a. Use a wooden block or equivalent as work stand.

b. Using a snap ring expander, remove the snap ring.
c. Remove the sun gear input drum from the planetary sun gear.

6. REMOVE SNAP RING FROM PLANETARY SUN GEAR
Using a screwdriver, remove the snap ring from the planetary sun gear.
INSPECTION

CHECK PLANETARY SUN GEAR BUSHING
Using a dial indicator, measure the inside diameter of the planetary sun gear bushings.
Maximum inside diameter: 27.08 mm (1.0661 inch)
If the inside diameter is greater than the maximum, replace the planetary sun gear.
REASSEMBLY

1. INSTALL SNAP RING TO PLANETARY SUN GEAR
2. INSTALL SUN GEAR INPUT DRUM
a. Place a wooden block or equivalent as a work stand and place the planetary sun gear onto it.
b. Install the sun gear input drum onto the planetary sun gear.

c. Using a snap ring expander, install the snap ring.

3. INSTALL OIL SEAL RING
a. Coat the 2 oil seal rings with ATF.
b. Install the 2 oil seal rings onto the planetary sun gear.
NOTICE: Do not spread the ring ends too much.
HINT: After installing the oil seal rings, check that they rotate smoothly.

4. INSTALL THRUST WASHER
HINT: Make sure that the lug shapes match the holes on the sun gear input drum.

5. INSTALL ASSEMBLED No.1 ONE-WAY CLUTCH AND 2ND BRAKE HUB ONTO PLANETARY SUN GEAR

6. CHECK OPERATION OF No.1 ONE-WAY CLUTCH
Hold the planetary sun gear and turn the 2nd brake hub. Check that the 2nd brake hub must be able to turn freely clockwise and locks counterclockwise.