Condenser HVAC: Service and Repair
REMOVAL1. Recover refrigerant from refrigeration system.
2. Remove front grille and front under cover.
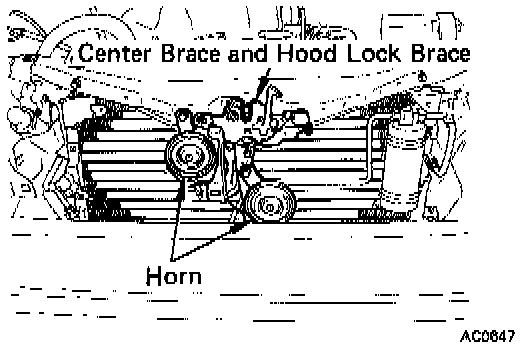
3. Remove center brace and horns.
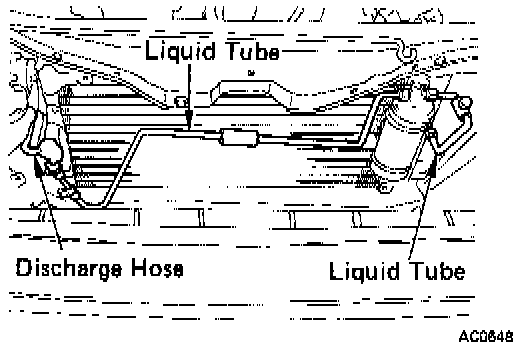
4. Disconnect discharge hose and liquid tube clamp from condenser inlet fitting.
5. Disconnect liquid tube and liquid tube clamp from condenser outlet fitting.
NOTE: Cap the open fittings immediately to keep moisture out of the system.
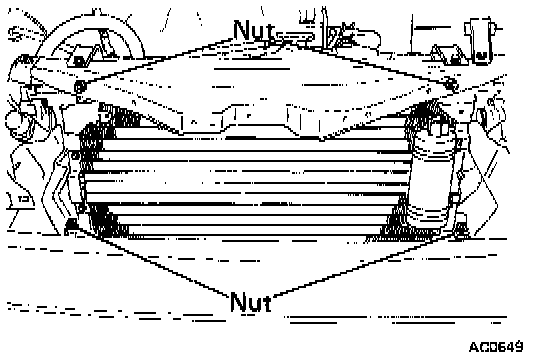
6. Remove the four nuts and remove the condenser.
INSTALLATION
1. Install condenser and install the four condenser nuts, making sure the rubber cushions fit on the mounting flanges correctly.
2. Connect liquid tube, discharge hose to condenser.
Torque:
Liquid tube: 13 Nm (10 ft lb)
Discharge hose: 25 Nm (18 ft lb)
3. Install center brace and horns.
4. Install front grille and under cover.
5. If condenser was replaced, add compressor oil to compressor.
Add 40 - 50 cc (1.4 - 1.7 fl.oz.)
6. Evacuate, charge and test refrigeration system.
Refill capacity: 600-750 g (21.1-26.5 oz)