EGR Control Solenoid: Testing and Inspection
INSPECTION1. Remove air intake chamber.
2. Remove vacuum switching valve.
- Disconnect the air hose and vacuum hose from the air intake chamber.
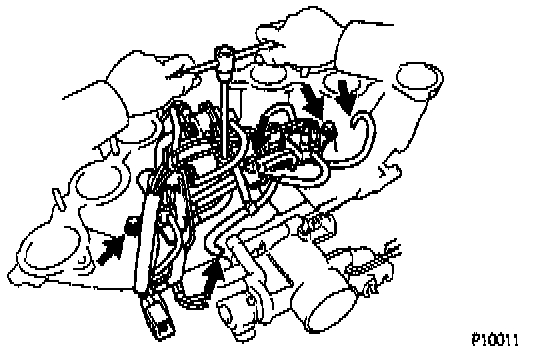
- Remove the 4 bolts and emission control valve set assembly.
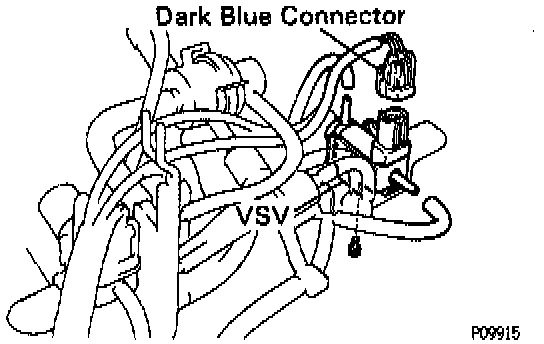
- Disconnect the connector and 2 vacuum hoses, and remove the screw and vacuum switching valve.
3. Inspect vacuum switching valve for open circuit.
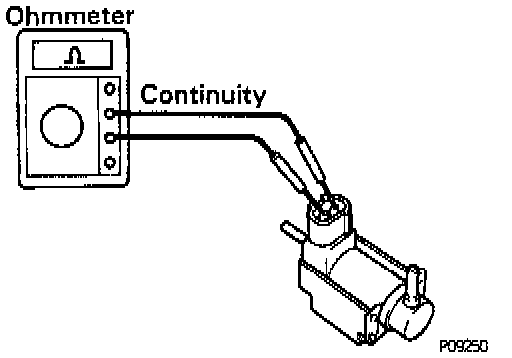
- Using an ohmmeter, check that there is continuity between the terminals.
Resistance: 30 - 34 ohms at 20°C (68°F)
- If there is no continuity, replace the vacuum switching valve.
4. Inspect vacuum switching valve for ground.
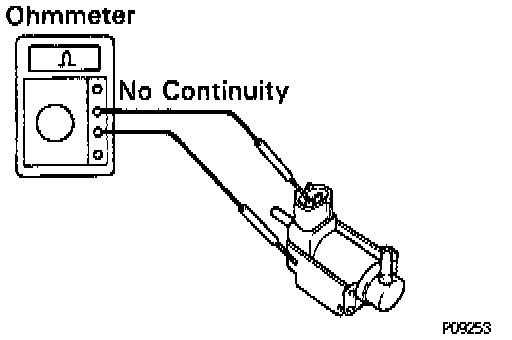
- Using an ohmmeter, check that there is no continuity between each terminal and the body.
- If there is continuity, replace the vacuum switching valve.
5. Inspect vacuum switching valve operation.
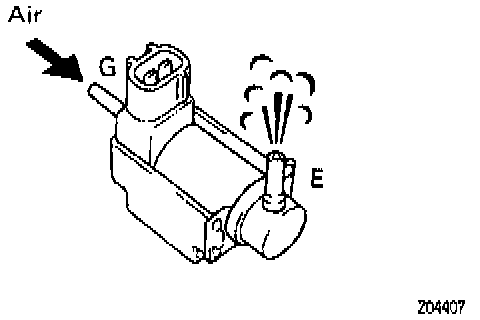
- Check that the air flows from pipe G to pipe E.
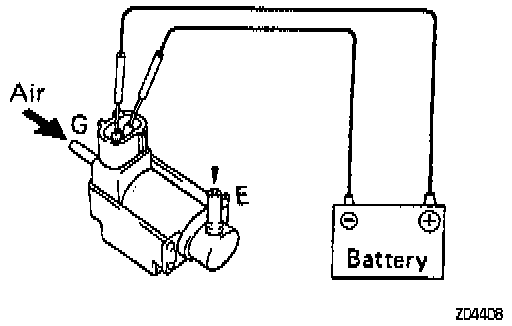
- Apply battery voltage across the terminals.
- Check that the air does not flows from pipe G to pipe E.
- If operation is not as specified, replace the vacuum switching valve.
6. Reinstall vacuum switching valve.
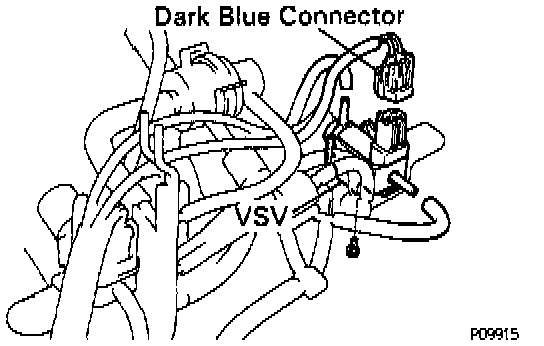
- Install the vacuum switching valve with the screws.
- Connect the connector and 2 vacuum hoses to the vacuum switching valve.
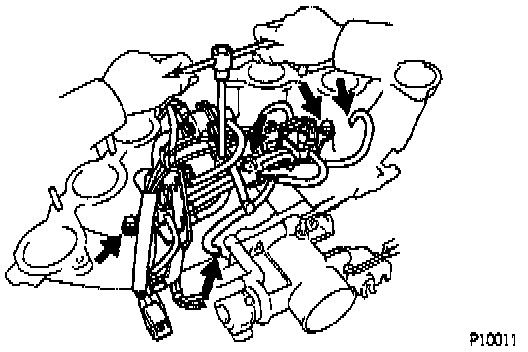
- Install the emission control valve set assembly with the 4 bolts.
Torque: 20 Nm (14 ft lb)
- Connect the air hose and vacuum hose to the air intake chamber.
7. Reinstall air intake chamber.