Part 1
COMPONENT PARTS REMOVALComponents
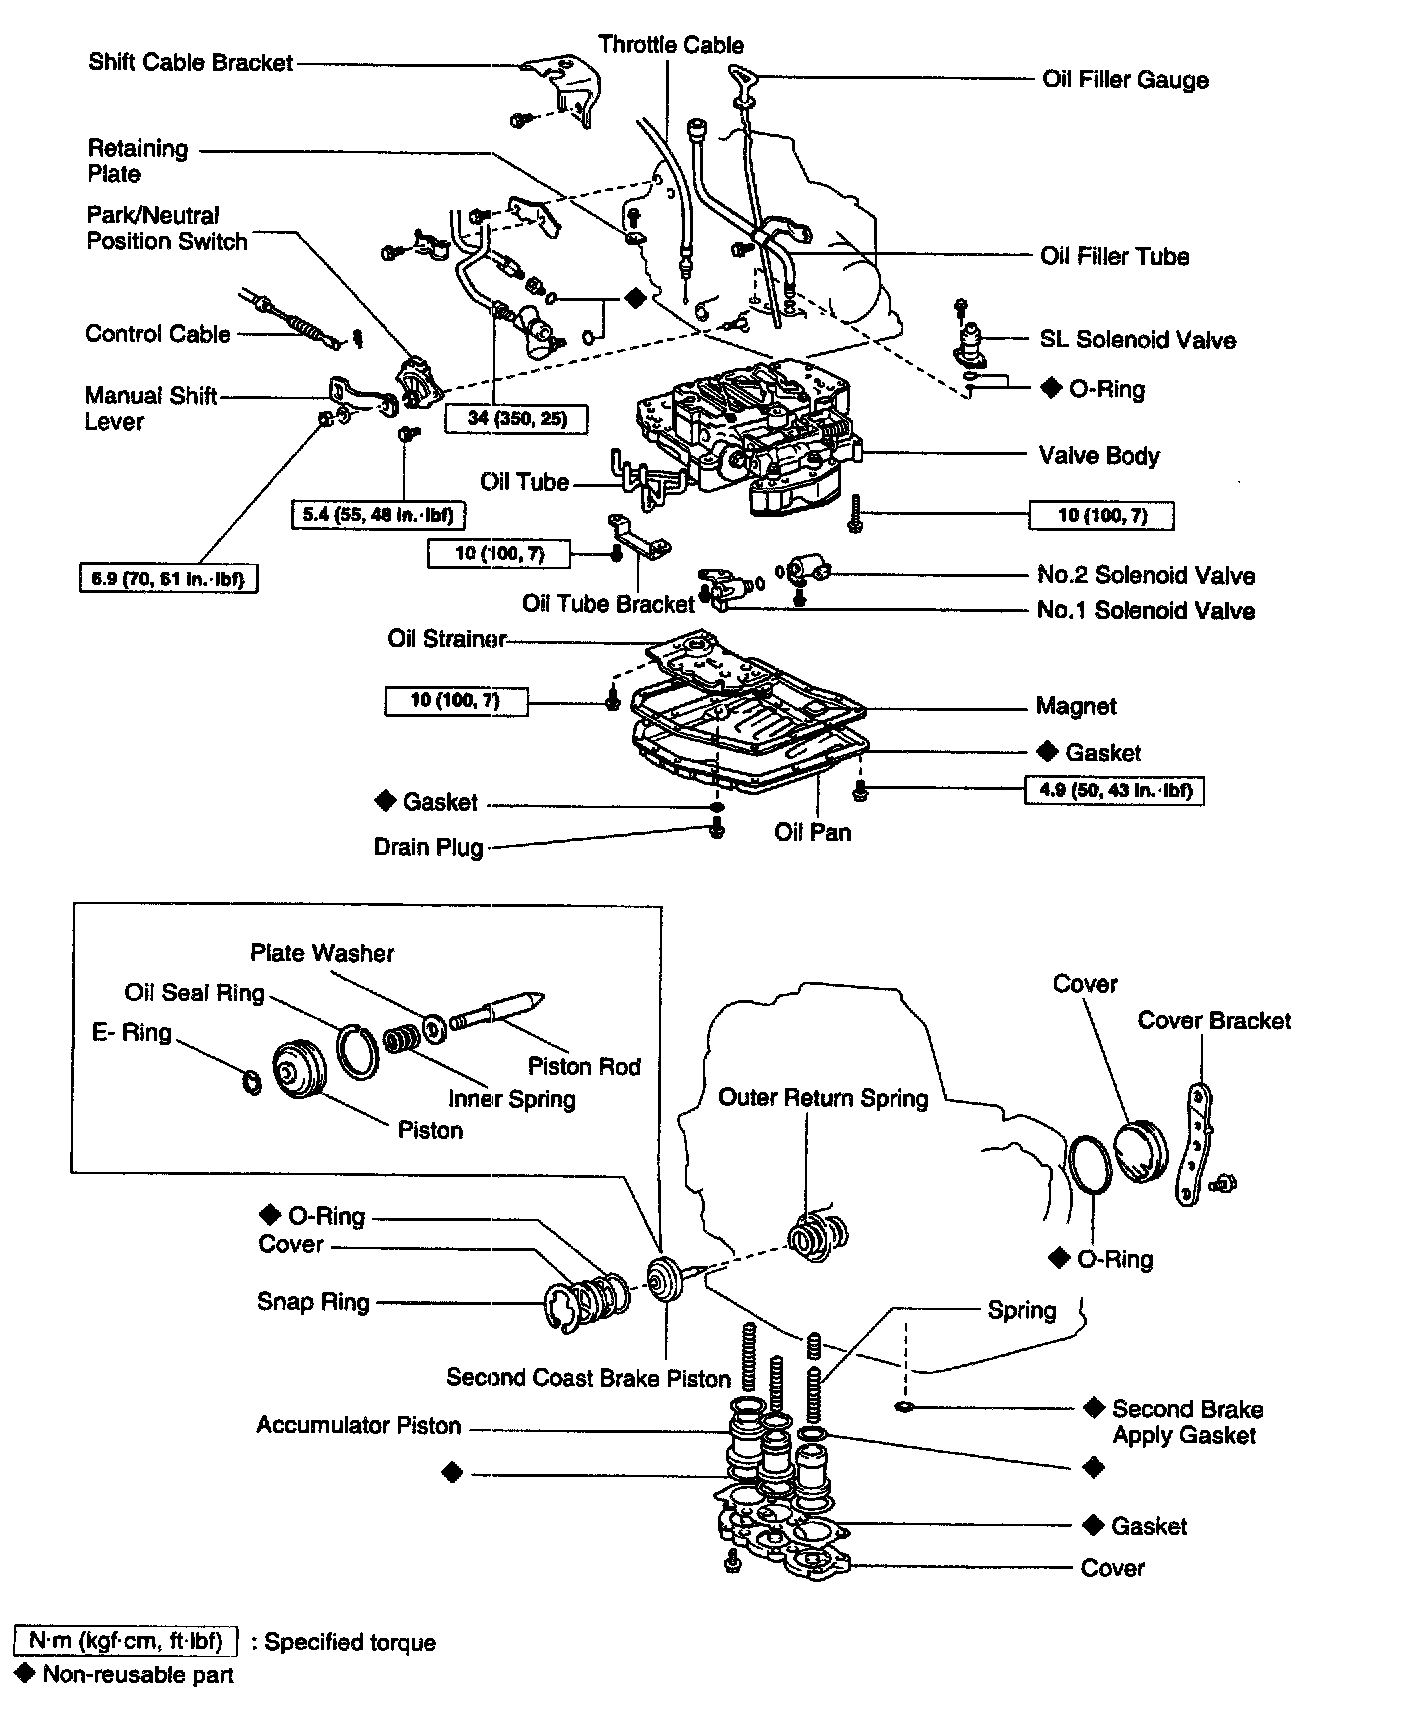


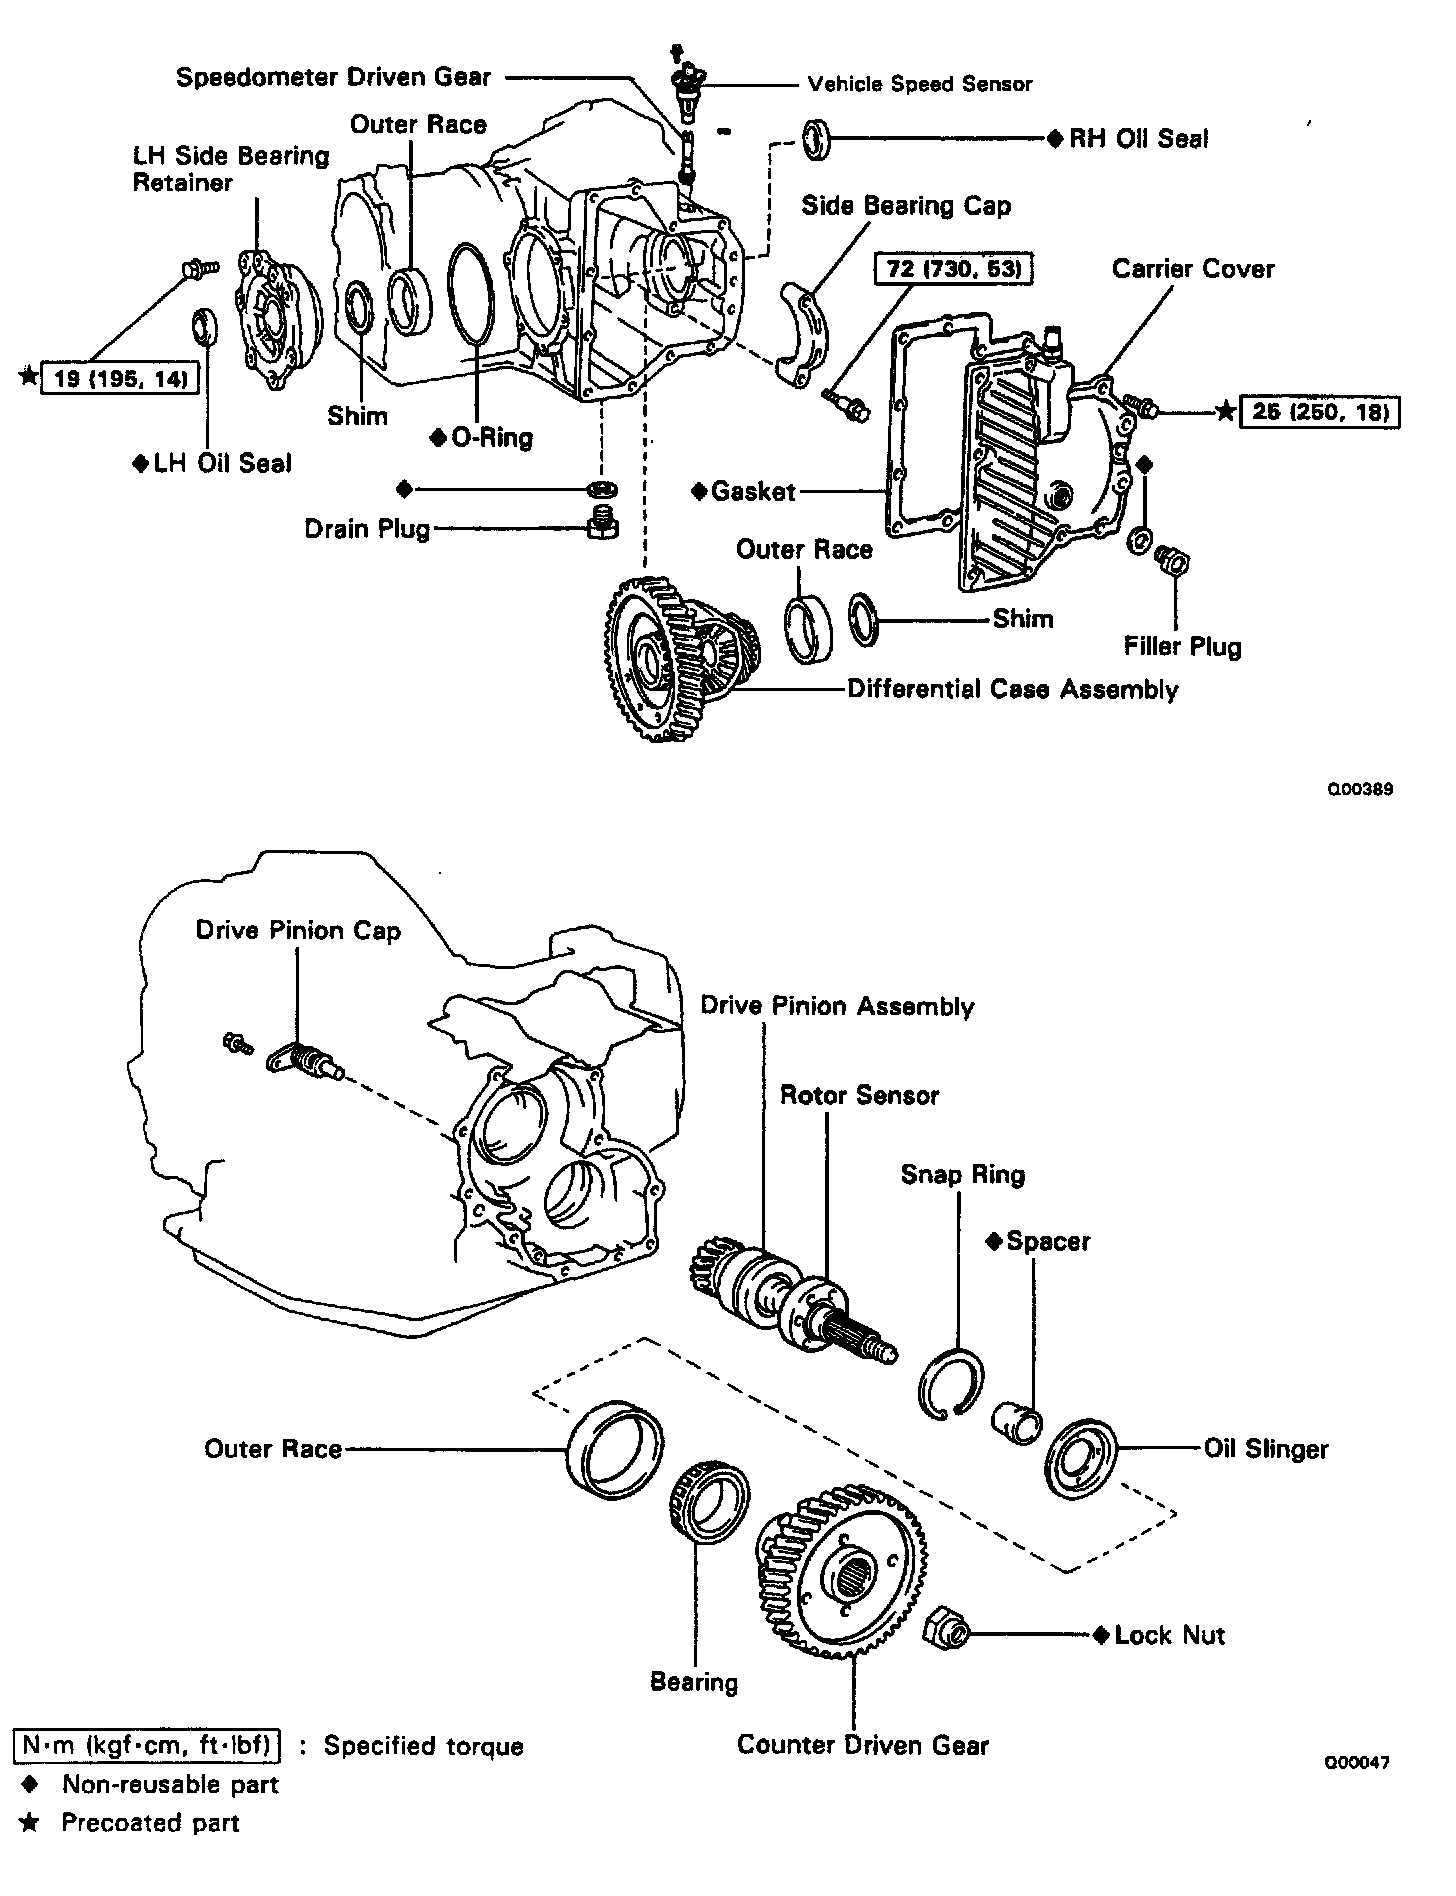
Separate Basic Subassembly

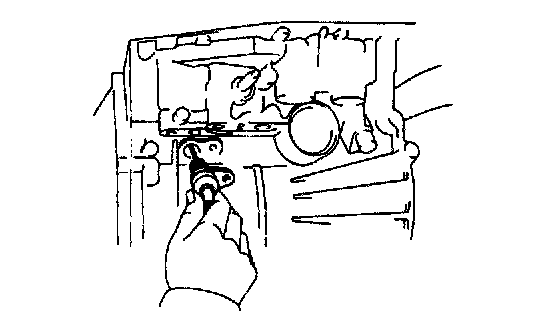
1. REMOVE PARK/NEUTRAL POSITION SWITCH
a. Remove the manual shift lever.
b. Pry off the lock washer and remove the manual valve shaft nut.
c. Remove the 2 bolts and pull out the Park/Neutral Position (PNP) switch.
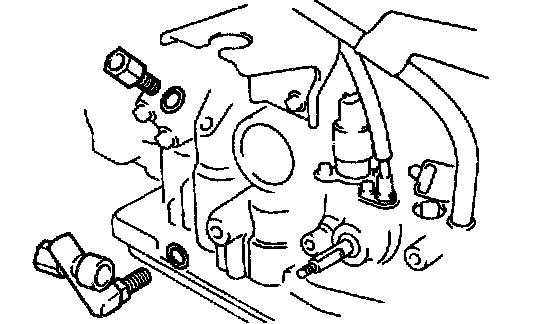
2. REMOVE UNION AND ELBOW
a. Using the open end wrench, remove the union and elbow.
b. Remove the O-rings from the union and elbow.
3. REMOVE SL SOLENOID
a. Disconnect the connector.
b. Remove the 2 bolts and SL solenoid.
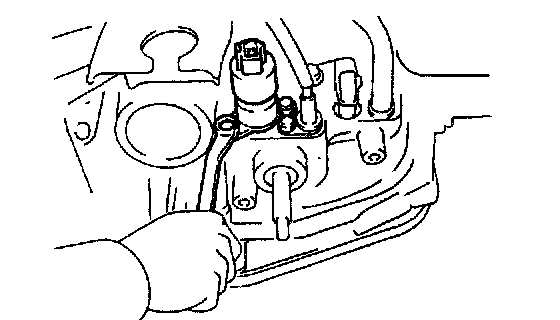
4. REMOVE THROTTLE CABLE RETAINING PLATE

5. REMOVE SOLENOID WIRE RETAINING BOLT
6. REMOVE COVER

a. Remove the 2 bolts and cover bracket.

b. Remove the cover.

7. REMOVE OIL PAN AND GASKET
a. Remove the 15 bolts.
b. Remove the oil pan by lifting transaxle case.
NOTICE: Do not turn the transaxle over as this will contaminate the valve body with the foreign materials in the bottom of the oil pan.
c. Place the transaxle on wooden blocks to prevent damage to the tube bracket.

8. EXAMINE PARTICLES IN PAN
Remove the magnets and use them to collect any steel chips. Look carefully at the chips and particles in the oil pan and on the magnets to anticipate what type of wear you will find in the transmission:
Steel (magnetic): bearing, gear and plate wear
Brass (non-magnetic): bushing wear

9. DISCONNECT NO.1 AND NO.2 SOLENOID CONNECTORS

10. REMOVE TUBE BRACKET AND OIL STRAINER
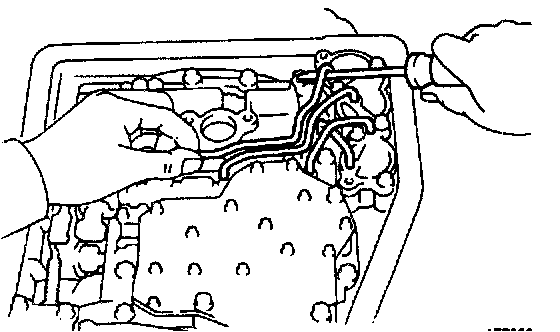
11. REMOVE OIL TUBES
Pry up both tube ends with a large screwdriver and remove the 4 tubes.

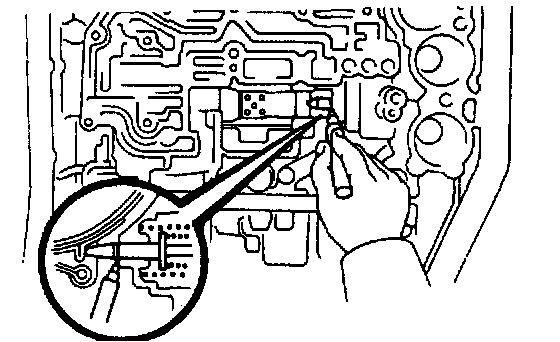
12. REMOVE MANUAL DETENT SPRING
13. REMOVE MANUAL VALVE AND MANUAL VALVE BODY

14. REMOVE VALVE BODY
a. Remove the 12 bolts.
15. REMOVE THROTTLE CABLE AND SOLENOID WIRING FROM CASE
16. REMOVE SECOND BRAKE APPLY GASKET

17. REMOVE ACCUMULATOR PISTON AND SPRINGS
a. Loosen the 5 bolts one turn at a time until the spring tension is released.
b. Remove the cover and gasket.

c. Remove the piston and spring for C1 and C2.
d. Remove the O-rings.
e. Pop out piston C1 into a rag, using low-pressure compressed air 98 kPa (1 kgf/cm2, 14 psi).
f. Remove the 2 O-rings from the B2 piston.
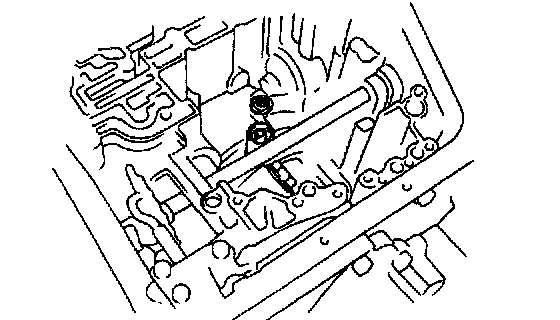
18. MEASURE PISTON STROKE OF SECOND COAST BRAKE
a. Apply a small amount of paint to the piston rod at the point it meets the case.

b. Using Special Service Tools (SST), measure the piston stroke while applying and releasing compressed air (392 - 785 kPa, 4 - 8 kgf/cm2, 57 - 114 psi).
SST 09240-00020
Piston stroke: 1.5 - 3.0 mm (0.059 - 0.118 inch)
If the piston stroke exceeds the limit, replace the piston rod or brake band.
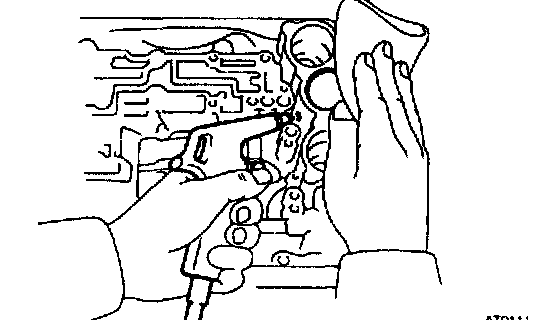
19. REMOVE SECOND COAST BRAKE PISTON

a. Using SST, remove the snap ring.
SST 09350-32014 (09351-32050)
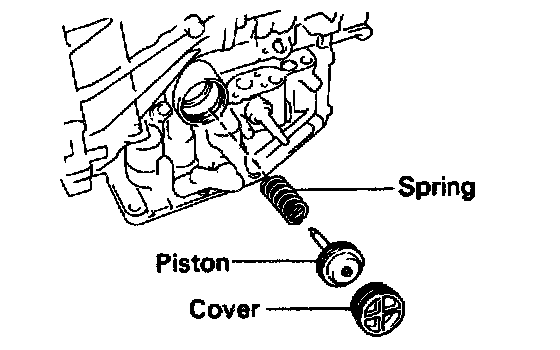
b. Remove the cover.
c. Remove the piston and outer return spring.
d. Remove the O-ring from the cover.
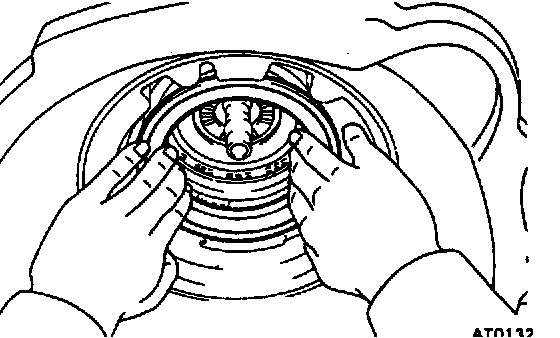
20. REMOVE OIL PUMP AND DIRECT CLUTCH
NOTICE: Before removing the oil pump, remove the second coast brake piston.
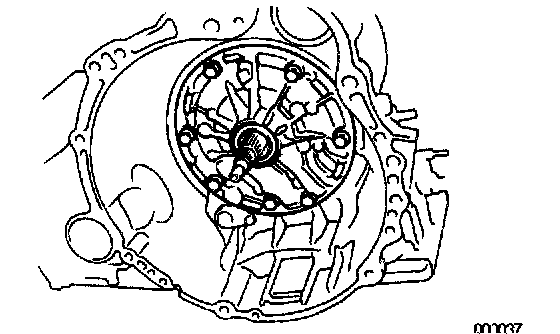
a. Remove the 7 bolts.

b. Using SST, pull out the oil pump from the transaxle case.
SST 09350-32014 (09351-32061)
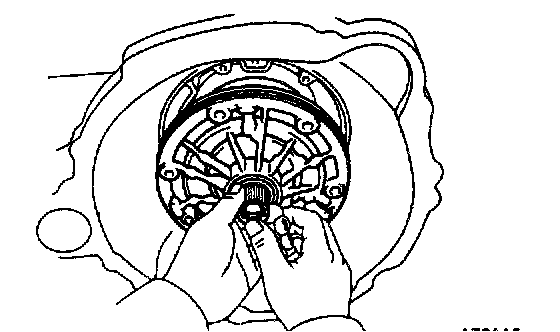
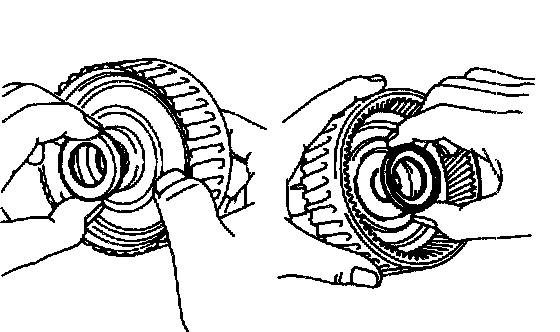
21. REMOVE OIL PUMP AND DIRECT CLUTCH
While holding the input shaft, grasp the pump stator shaft and pull the oil pump and direct clutch together out of the transaxle case.
NOTICE: Push the second coast brake band into the case, being careful not to catch it on the direct clutch drum.

22. REMOVE DIRECT CLUTCH FROM OIL PUMP
23. BE CAREFUL WHEN REMOVING RACE BEHIND OIL PUMP

24. REMOVE CLUTCH DRUM THRUST WASHER
25. REMOVE FORWARD CLUTCH

26. REMOVE BEARINGS AND RACES FROM FORWARD CLUTCH

27. REMOVE SECOND COAST BRAKE BAND
a. Push the pin with a small screwdriver and remove it from the bolt hole of the oil pump mounting.
b. Remove the brake band.

28. REMOVE FRONT PLANETARY RING GEAR
29. REMOVE BEARING RACES FROM FRONT PLANETARY RING GEAR

30. REMOVE PLANETARY GEAR

31. REMOVE RACES AND BEARINGS FROM PLANETARY GEAR

32. REMOVE SUN GEAR, SUN GEAR INPUT DRUM, SECOND BRAKE HUB AND NO.1 ONE-WAY CLUTCH

33. STAND TRANSMISSION CASE UP AND REMOVE SECOND COAST BRAKE BAND GUIDE

34. REMOVE SNAP RING HOLDING SECOND BRAKE DRUM TO CASE
35. REMOVE SECOND BRAKE DRUM
If the brake drum is difficult to remove, lightly tap it with a wooden block.