Initial Inspection and Diagnostic Overview
1. INSPECT REFRIGERANT VOLUME

Observe the sight glass on the liquid tube.
Test conditions:
^ Running engine at 1,500 rpm
^ Blower speed control switch at "HI" position
^ A/C switch ON
^ Temperature control dial at "COOL" position Fully open the doors
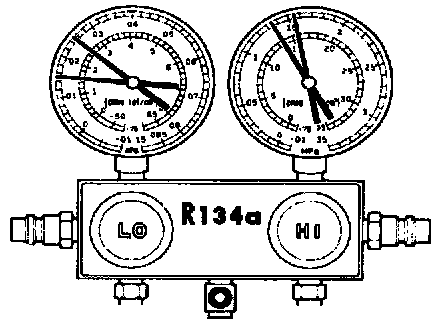
2. INSPECT REFRIGERANT PRESSURE WITH MANIFOLD GAUGE SET
This is a method in witch the trouble is located by using a manifold gauge set. Read the manifold gauge pressure when the these conditions are established.
Test conditions:
^ Temperature at the air inlet with the switch set at RECIRC is 30 - 35 °C (86 - 95 °F)
^ Engine running at 1,500 rpm
^ Blower speed control switch at HI" position
^ Temperature control dial at "COOL position
HINT: It should be noted that the gauge indications may vary slightly due to ambient temperature conditions.
1. Normally functioning refrigeration system.
Gauge reading:
Low pressure side: 0.15 - 0.25 MPa (1.5 - 2.5 kgf/Sq.cm)
High pressure side: 1.37 - 1.57 MPa (14 - 16 kgf/Sq.cm)
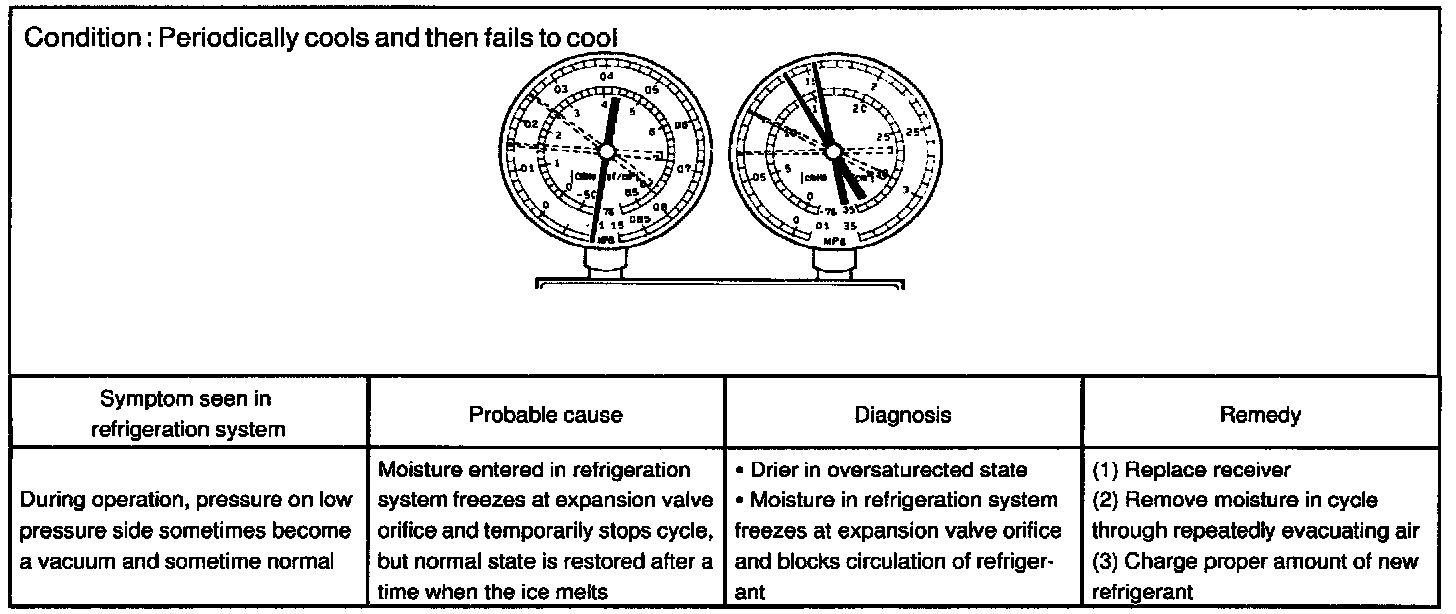
2. Moisture present in refrigeration system.
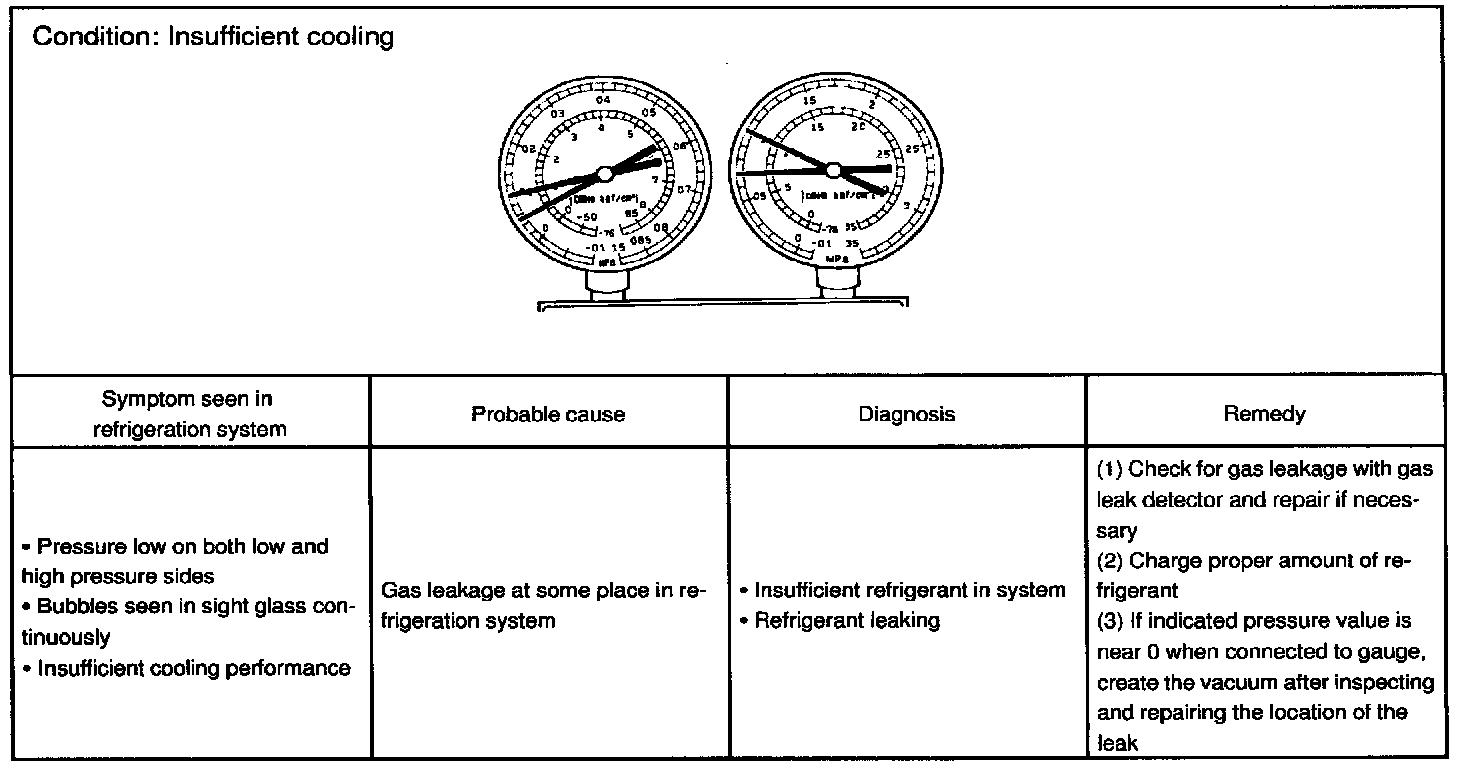
3. Insufficient cooling

4. Poor circulation of refrigerant
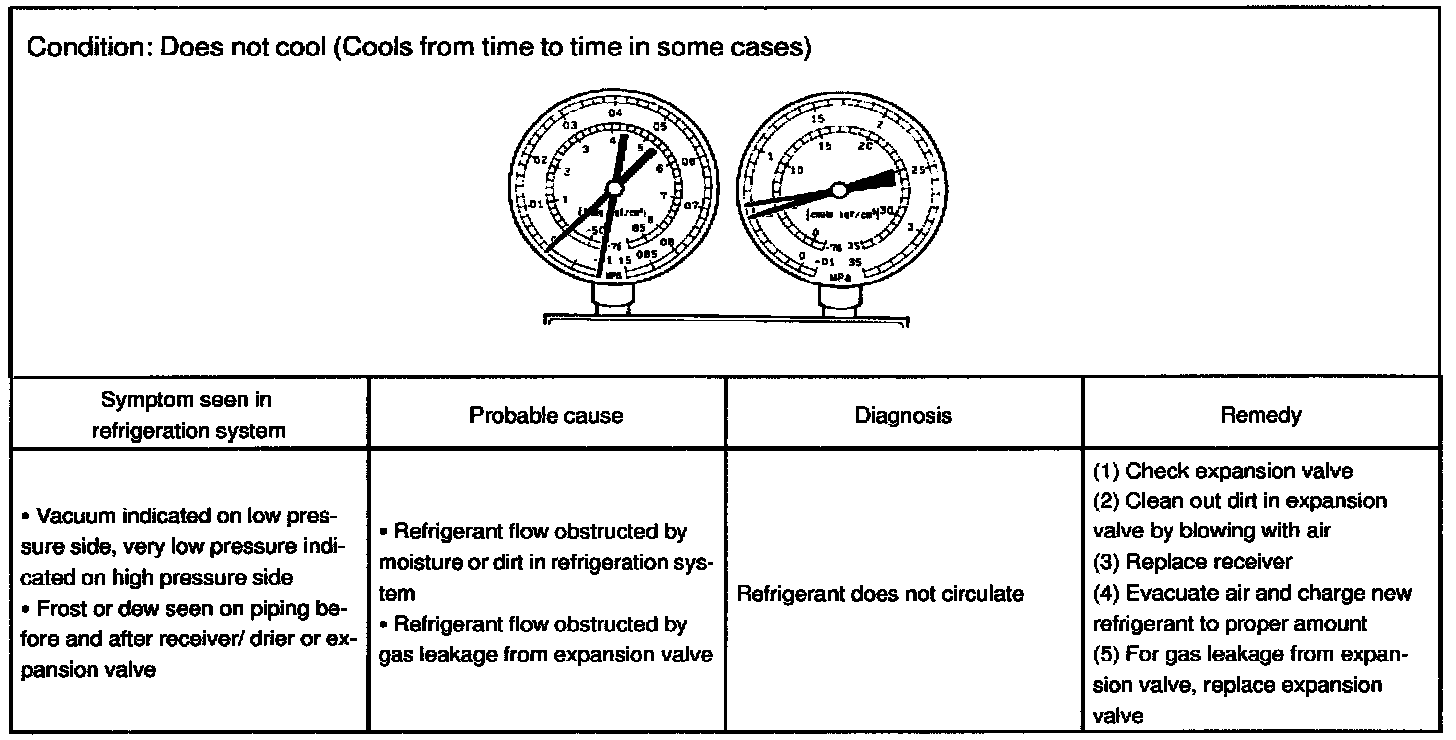
5. Refrigerant does not circulate
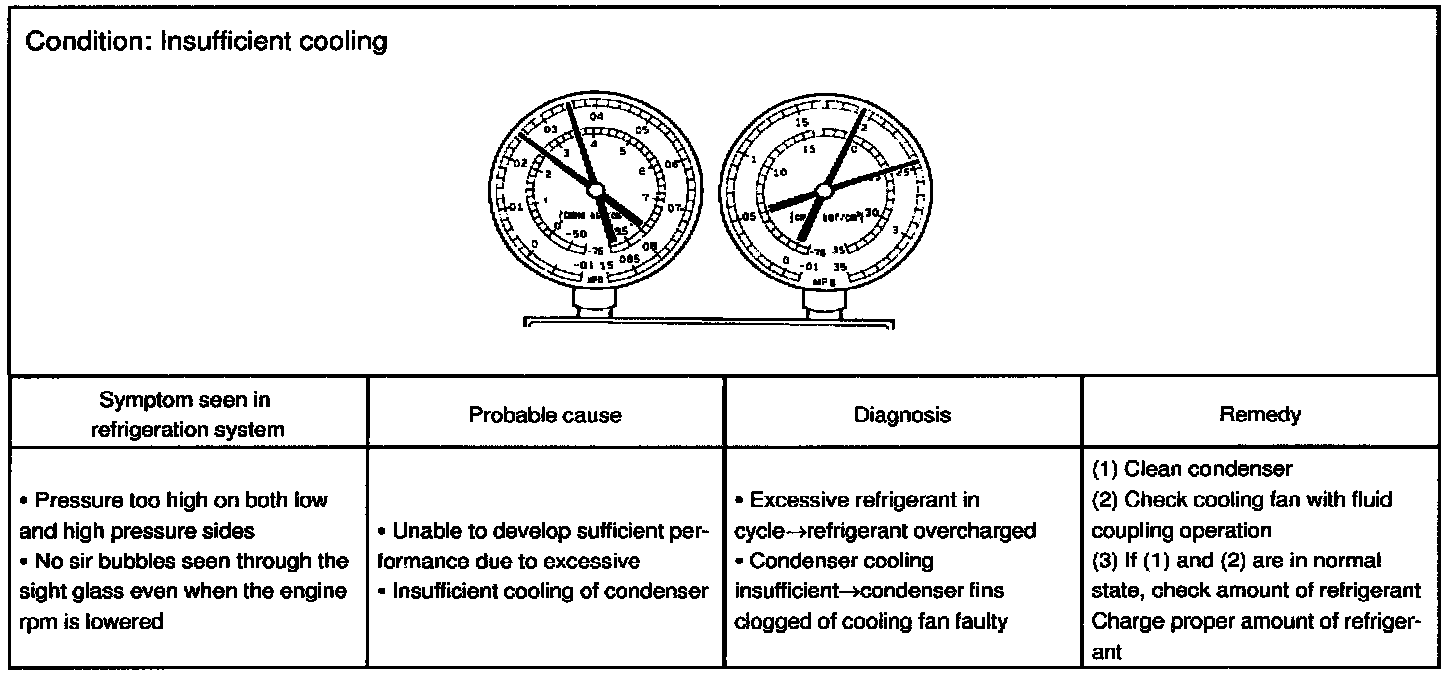
6. Refrigerant overcharged or insufficient cooling of condenser
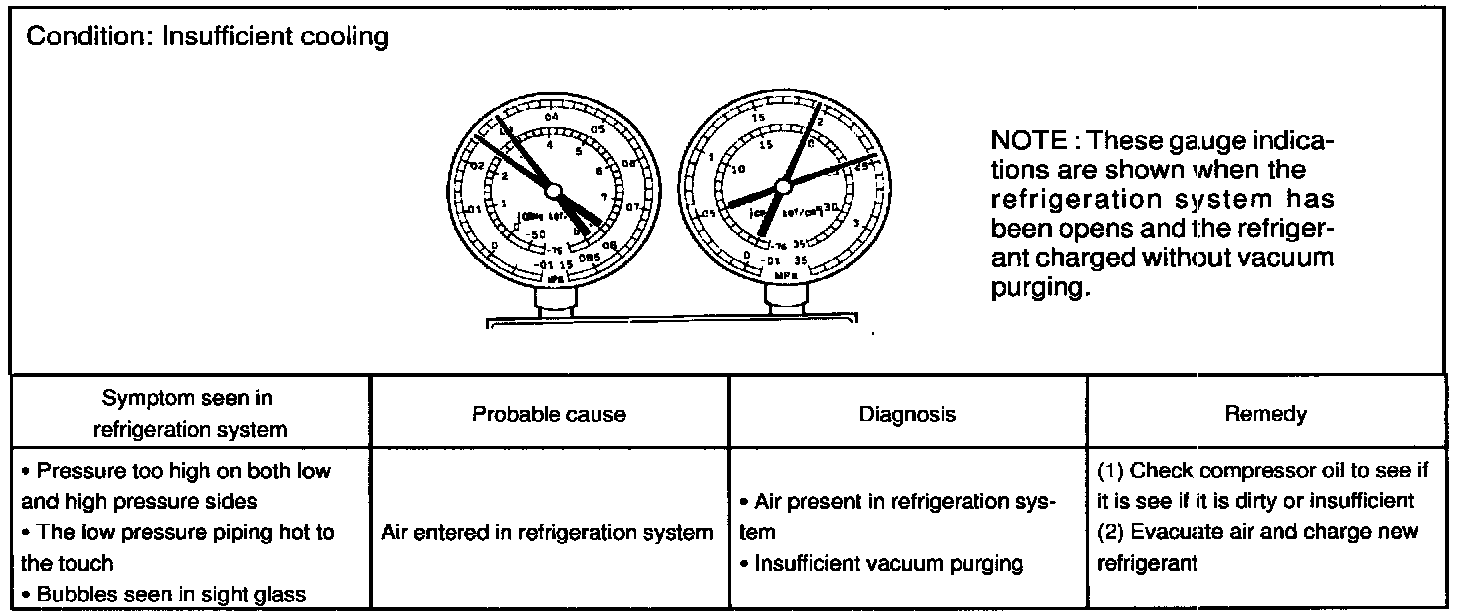
7. Air present in refrigeration system
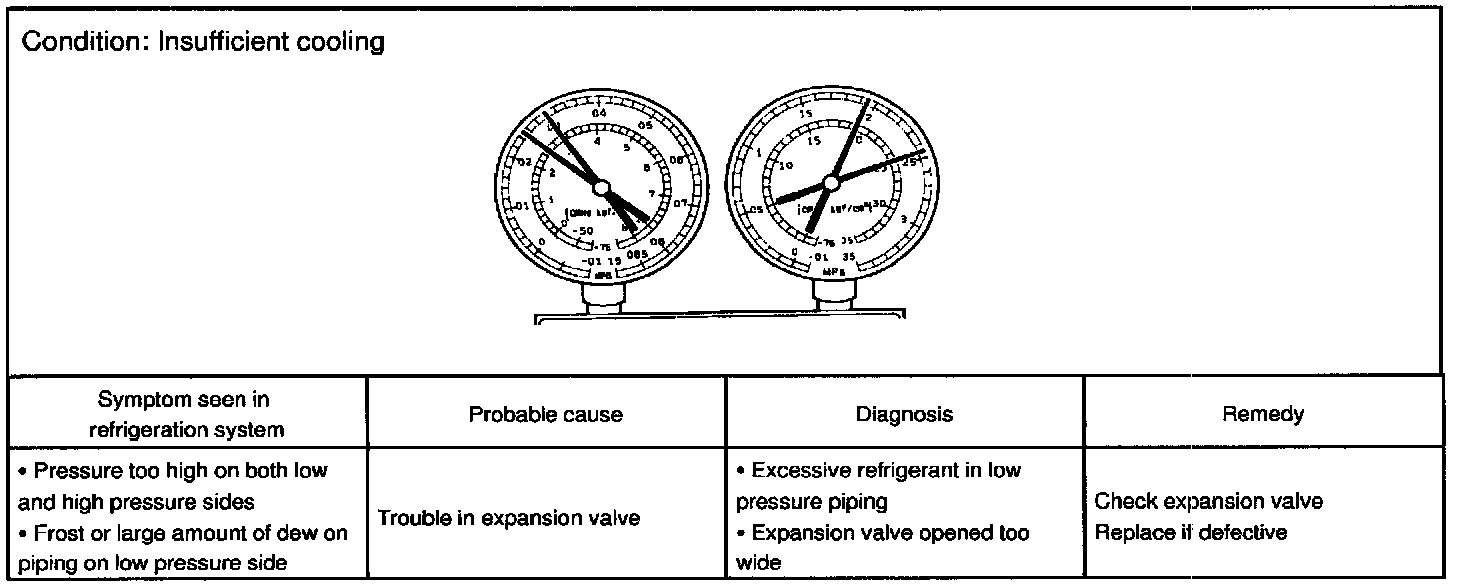
8. Expansion valve improperly

9. Defective compression compressor
3. INSPECT IDLE-UP SPEED
a. Warm up engine.
b. Inspect idle-up speed when the these conditions are established.
^ Warm up engine
^ Blower speed control switch at "HI" position
^ A/C switch ON
^ Temperature control dial at "COOL" position
Magnetic clutch condition Idle speed
Magnetic clutch not engaged 700 ± 50 rpm
Magnetic clutch engaged 700 ± 50 rpm
If idle speed is not as specified, check Idle control system.
4. INSPECT FOR LEAKAGE OF REFRIGERANT
a. Perform in these conditions:
^ Stop engine.
^ Secure good ventilation (If not the gas leak detector may react to volatile gases witch are not refrigerant, such as evaporated gasoline and exhaust gas.)
^ Repeat the test 2 or 3 times.
^ Make sure that there is some refrigerant remaining in the refrigeration system.
When compressor is OFF: approx. 392 - 588 kPa (4 - 6 kgf/Sq.cm, 57 - 85 psi)

b. Bring the gas leak detector close to the drain hose before performing the test.
HINT:
^ After the blower motor stopped, leave the cooling unit for more than 15 minutes.
^ Expose the gas leak detector sensor the under the drain hose.
^ When bring the gas leak detector close to the drain hose, make sure that the gas leak detector does not react to the volatile gases.
If such reaction is unavoidable, the vehicle must be lifted up.

c. If gas leak is not detected on the drain hose, remove the blower resistor from the cooling unit. Then insert the gas leak detector sensor into the unit and perform the test.

d. Disconnect the connector and leave the pressure switch for approx. 20 minutes. Then bring the gas leak detector close to the pressure switch and perform the test.
e. Bring the gas leak detector close to the refrigerant lines and perform the test.