Front Door Window Regulator: Service and Repair
NOTE: Window Regulator removal is step # 12.FRONT DOOR
Front Door:

DISASSEMBLY

1. REMOVE LOWER FRAME BRACKET GARNISH
Using a screwdriver, remove the lower frame bracket garnish.
HINT:
Tape the screwdriver tip before use.

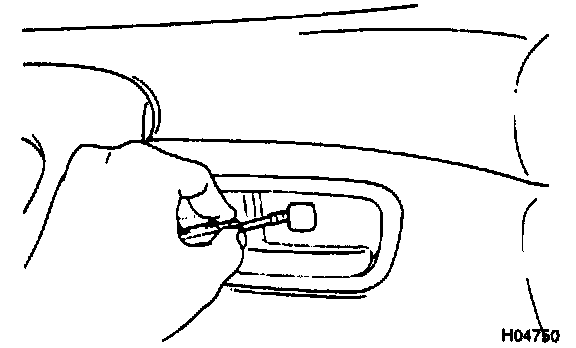
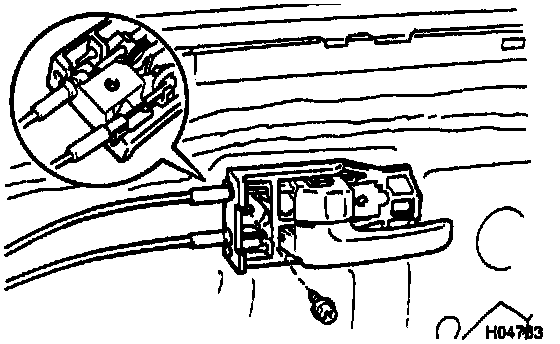
2. REMOVE POWER WINDOW SWITCH
(a) Using a screwdriver, remove the power window switch as shown in the illustration.
HINT:
Tape the screwdriver tip before use.
(b) Disconnect the connector.
3. REMOVE DOOR INSIDE HANDLE BEZEL
(a) Using a screwdriver, open the cover as shown in the illustration.
HINT:
Tape the screwdriver tip before use.
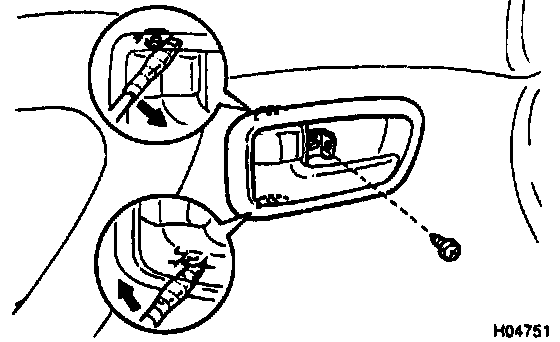
(b) Remove the screw.
(c) Using a screwdriver, remove the inside handle bezel as shown in the illustration.
HINT:
Tape the screwdriver tip before use.
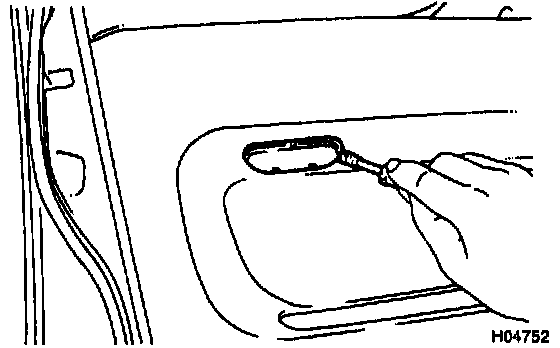
4. REMOVE DOOR COURTESY LIGHT
Using a screwdriver, remove the courtesy light, then disconnect the connector.
HINT:
Tape the screwdriver tip before use.
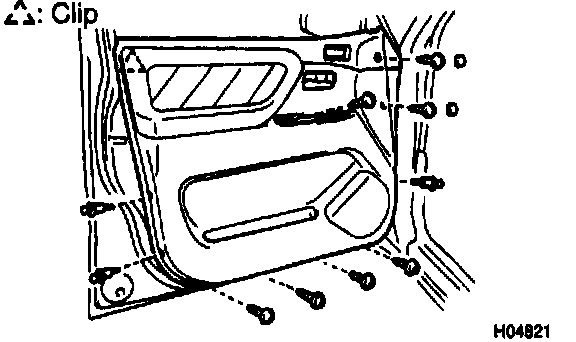
5. REMOVE DOOR TRIM
(a) Remove the 2 caps and 7 screws.
(b) Remove the 3 clips.
(c) Insert a screwdriver between the door and door trim to pry the trim out.
NOTICE:
Be careful not to damage the door and door trim.
HINT:
Tape the screwdriver tip before use.
(d) Pull the trim upward to remove it.
6. REMOVE INSIDE HANDLE
(a) Remove the screw.
(b) Disconnect the 2 control cables from the inside handle as shown in the illustration.
7. REMOVE TWEETER SPEAKER
Disconnect the connector, then remove the bolt and tweeter speaker.
8. REMOVE OUTSIDE REAR VIEW MIRROR
Disconnect the connector, then remove the 2 bolts and outside rear view mirror.
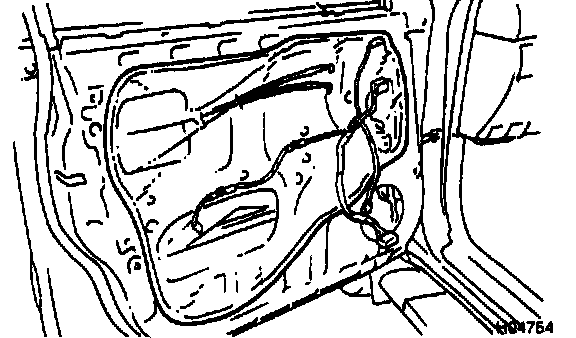
9. REMOVE SERVICE HOLE COVER
(a) Remove the clamps and wire harness.
(b) Remove the service hole cover.
NOTICE:
Do not tear the cover.
HINT:
At the time of assembly, please refer to the following item.
Bring out the 2 control cables and wire harness through the service hole cover.
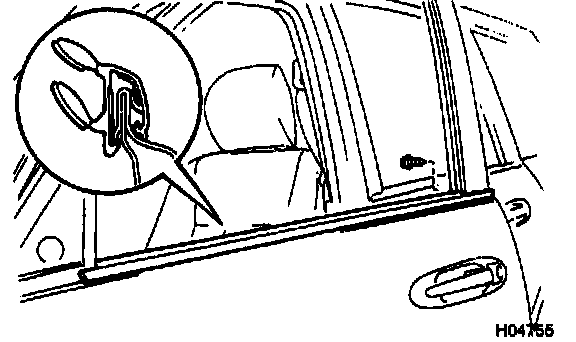
10. REMOVE DOOR BELT MOULDING
(a) Remove the screw.
(b) Using a scraper, remove the door belt moulding.
HINT:
Tape the scraper tip before use.
11. REMOVE THESE PARTS:
(a) Door glass
Torque: 5.0 N.m (51 kgf.cm, 44 in.lbf)
(b) Speaker
(c) Door glass run
(d) Lower frame
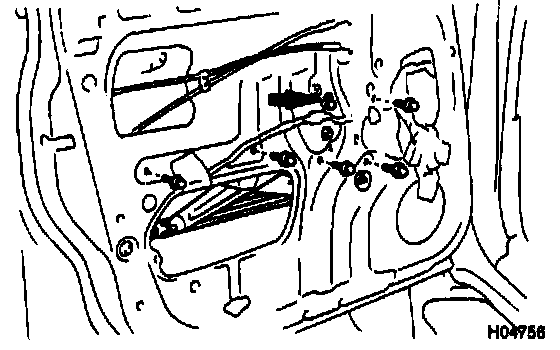
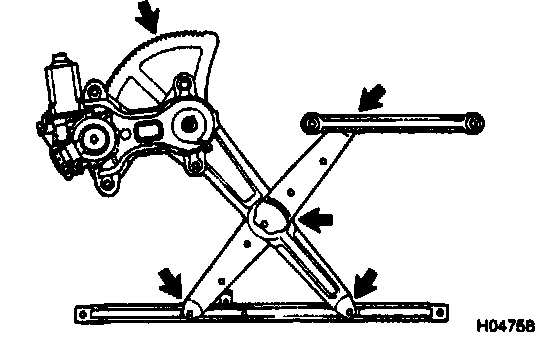
12. REMOVE WINDOW REGULATOR
(a) Disconnect the connector, then remove the 5 bolts.
Torque: 5.0 N.m (51 kgf.cm, 44 in.lbf)
(b) Loosen the bolt and window regulator.
Torque: 5.0 N.m (51 kgf.cm, 44 in.lbf)
HINT:
Remove the regulator through the service hole.
HINT:
At the time of assembly, please refer to the following item.
Apply MP grease to the window regulator.
NOTICE:
At the time of assembly, please refer to the following item.
Do not apply grease to the spring of the window regulator.
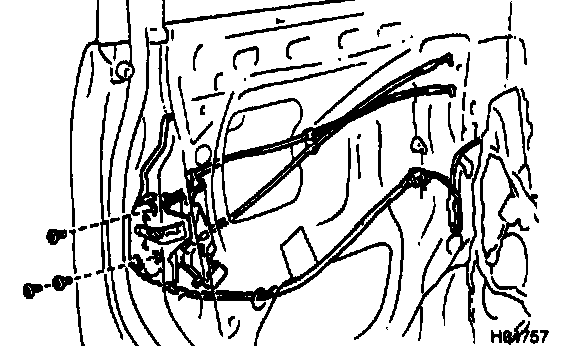
13. REMOVE DOOR LOCK
(a) Disconnect the connector.
(b) Disconnect the 2 links from outside handle and door lock cylinder.
(c) Using a torx wrench, remove the 3 screws and door lock.
Torx wrench: T30 (Part No. 09042--00010 or locally manufactured tool)
Torque: 5.0 N.m (51 kgf.cm, 44 in.lbf)
HINT:
Remove the door lock through the service hole.
HINT:
^ At the time of assembly, please refer to the following items.
^ Apply adhesive to 3 screws.
Part No. 08833-00070, THREE BOND 1324 or equivalent.
^ Apply MP grease to the sliding and rotating parts of the door lock.
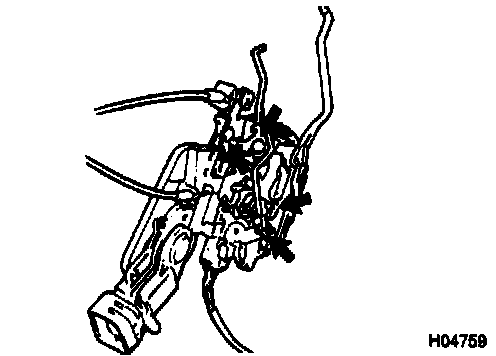
14. REMOVE OUTSIDE HANDLE WITH DOOR LOCK CYLINDER
(a) Remove the 2 bolts and outside handle with door lock cylinder.
Torque: 5.0 N.m (51 kgf.cm, 44 in.lbf)
(b) Remove the bolt and door lock cylinder from the outside handle.
Torque: 5.0 N.m (51 kgf.cm, 44 in.lbf)
REASSEMBLY
Reassembly is in the reverse order of disassembly.
ADJUSTMENT
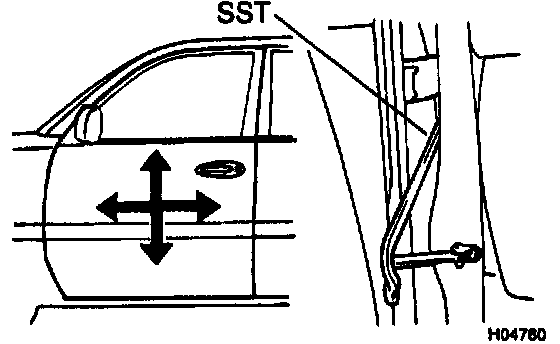
1. ADJUST DOOR IN FORWARD/REARWARD AND VERTICAL DIRECTIONS
Using SST; loosen the body side hinge bolts to adjust.
SST 09812-00010
Torque: 26 N.m (265 kgf.cm, 19 ft.lbf)
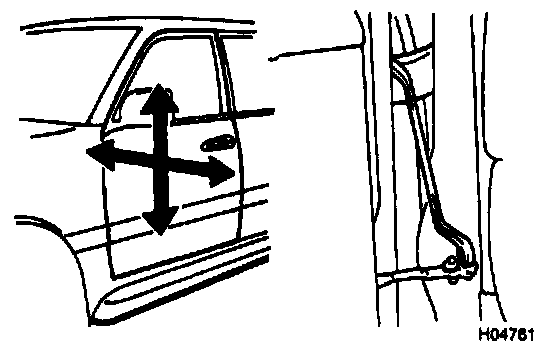
2. ADJUST DOOR IN LEFT/RIGHT AND VERTICAL DIRECTIONS
Loosen the door side hinge bolts to adjust.
HINT:
Substitute the bolt with washer for the centering bolt.
Torque: 26 N.m (265 kgf.cm, 19 ft.lbf)
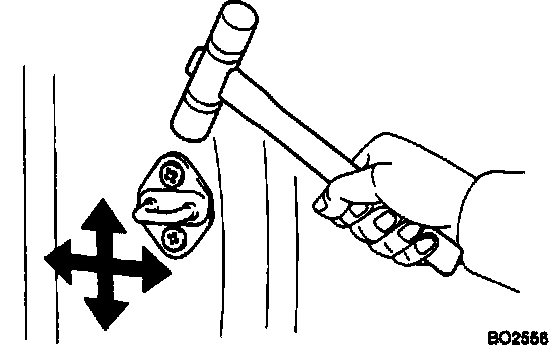
3. ADJUST DOOR LOCK STRIKER
(a) Check that the door fit and door lock linkages are adjusted correctly.
(b) Loosen the striker mounting screws.
Torque: 11 N.m (115 kgf.cm, 8 ft.lbf)
(c) Using a plastic hammer, tap the striker to adjust it.