Removal and Installation
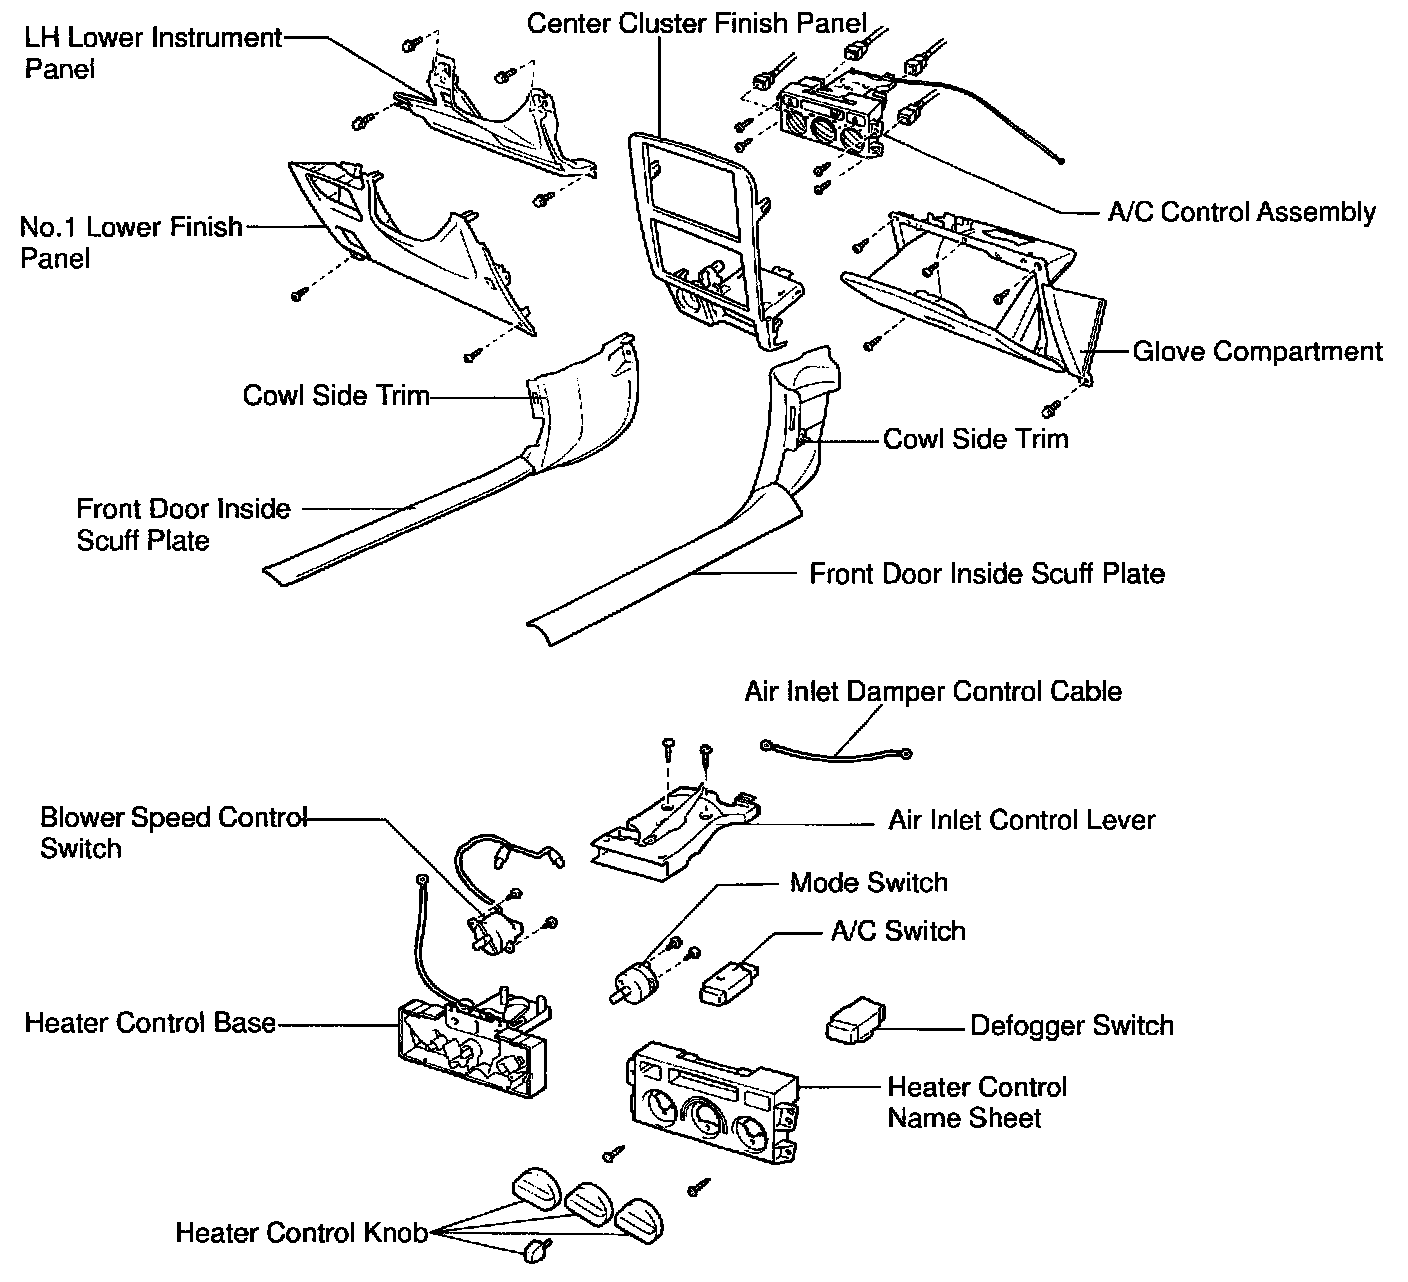
COMPONENTS
REMOVAL
1. REMOVE THESE PARTS:
a. Cowl side trim LH and RH
b. Front door inside scuff plate LH and RH
c. No. 2 lower cover
d. Glove compartment
e. No. 1 lower instrument panel
f. LH lower instrument panel
g. Center cluster finish panel
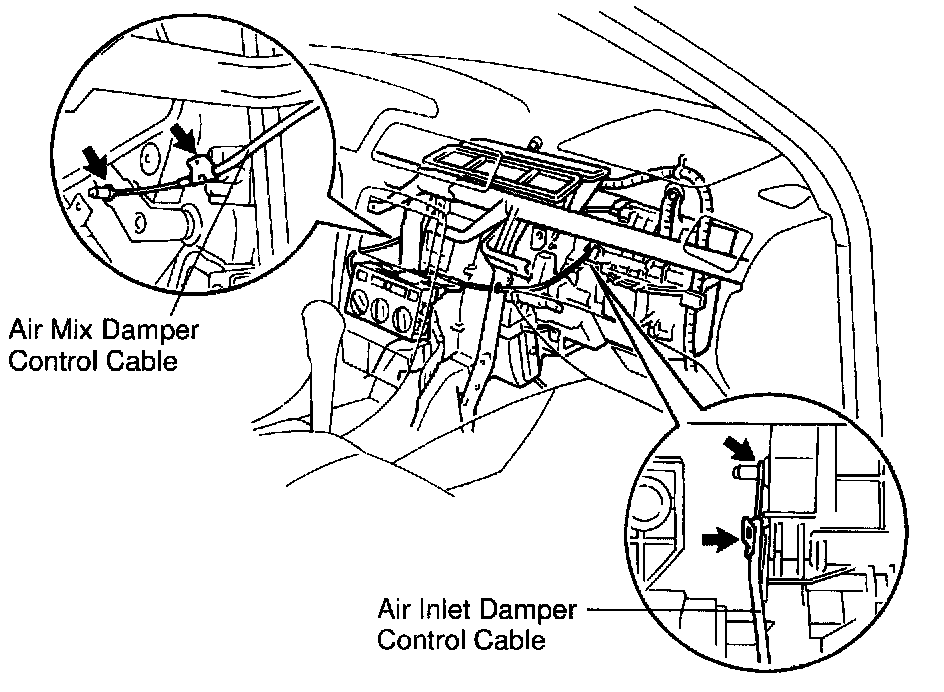
2. DISCONNECT A/C CONTROL CABLES
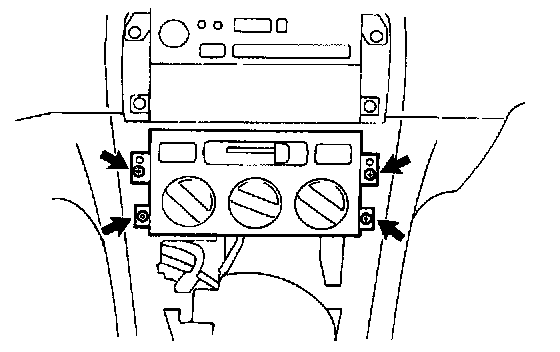
3. REMOVE A/C CONTROL ASSEMBLY
Remove the 4 screws and pull out the A/C control assembly, then disconnect the connector.
INSTALLATION
Installation is in the reverse order of removal.
1. AFTER INSTALLATION INSPECT A/C CONTROL LEVER AND DIAL OPERATION
Move the control dial and lever left and right and check fro stiffness and binding through the full range of the lever and dial If there is stiffness or binding, proceed next step.
2. ADJUST A/C CONTROL CABLES
a. Set A/C control assembly in these conditions:
1. Air inlet control lever in "FRESH" position.
2. Temperature control dial in "MAX. COOL" position.
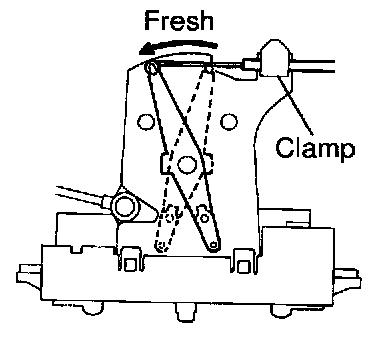
b. Adjust air inlet [1][2]control cable.
1. Pull out the inner of air inlet cable and hit the link of blower unit on the link stopper.
2. Set the cable connector to lever pin and clamp the cable outer.
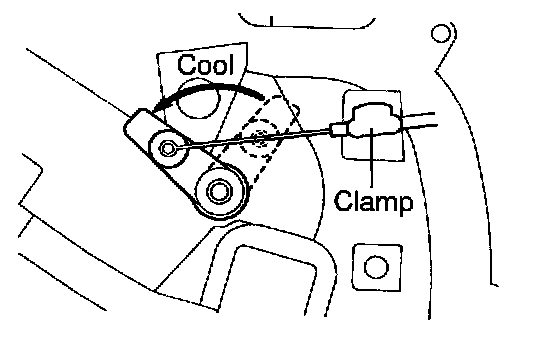
c. Adjust air mix [1][2]control cable.
Set the cable connector to air mix link pin on left side of A/C unit and clamp the cable outer on.