Wiper and Washer Systems: Service and Repair
REMOVAL1. REMOVE WIPER ARMS
2. REMOVE WEATHERSTRIP AND COWL LOUVERS
3. REMOVE WIPER MOTOR ASSEMBLY
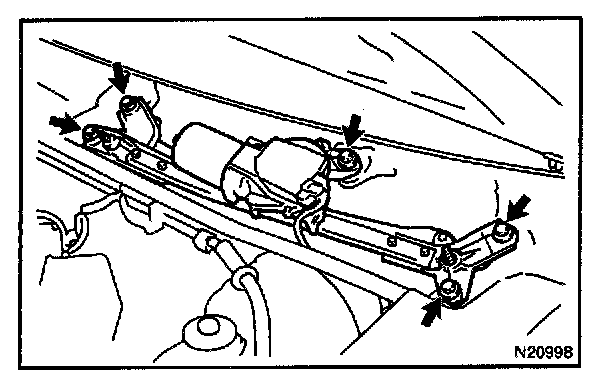
a. Disconnect the connector.
b. Remove the 5 bolts and wiper motor assembly.
4. REMOVE WIPER MOTOR
Remove the 2 bolts, then separate the motor crank arm from the wiper links at the ball and socket joint.
5. REMOVE WINDOW WASHER NOZZLE
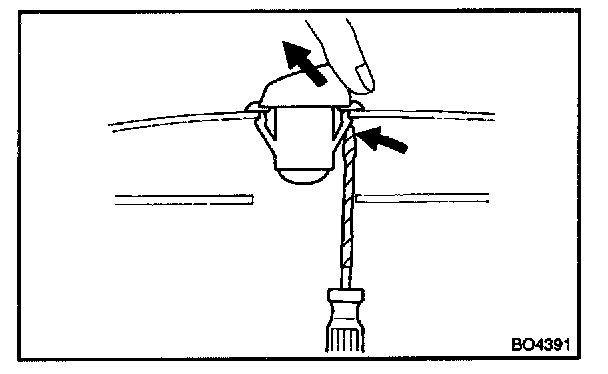
a. Remove the hoses from the nozzles.
b. Using a screwdriver, remove the nozzle.
HINT: Tape the screwdriver tip before use.
INSTALLATION
1. INSTALL WINDOW WASHER NOZZLE
2. INSTALL WIPER LINK TO MOTOR
3. INSTALL THESE PARTS:
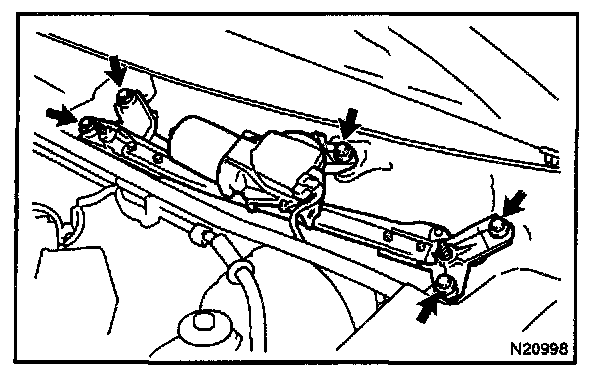
a. Wiper motor assembly
Torque: 5.5 N.m (55 kgf.cm, 49 in.lbf)
b. Cowl louvers and weatherstrip
4. INSTALL WIPER ARMS
a. Operate the wipers once and turn the wiper switch OFF, then install the wiper arms.
HINT: If the driver's side wiper arm mount has a blue dot on it, use an ITT wiper arm. If there is no mark, use a ND wiper arm.
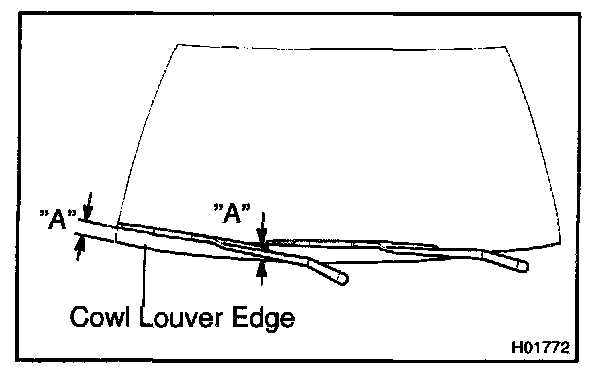
b. Adjust the installation position of the wiper arms as shown (blade tip to cowl louver edge).
"A" Approx. 35 mm (1.4 in.)
c. Tighten the wiper arm nut.
Torque: 24 N.m (245 kgf.cm, 18 ft.lbf)