Component Tests and General Diagnostics
INSPECTION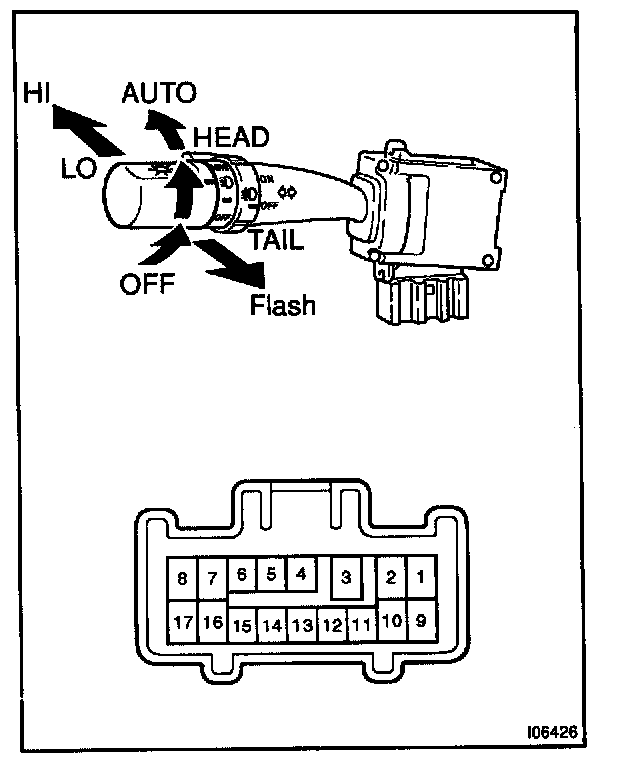
1. INSPECT LIGHT CONTROL SWITCH CONTINUITY

If continuity is not as specified, replace the switch.
2. INSPECT HEADLIGHT DIMMER SWITCH CONTINUITY

If continuity is not as specified, replace the switch.
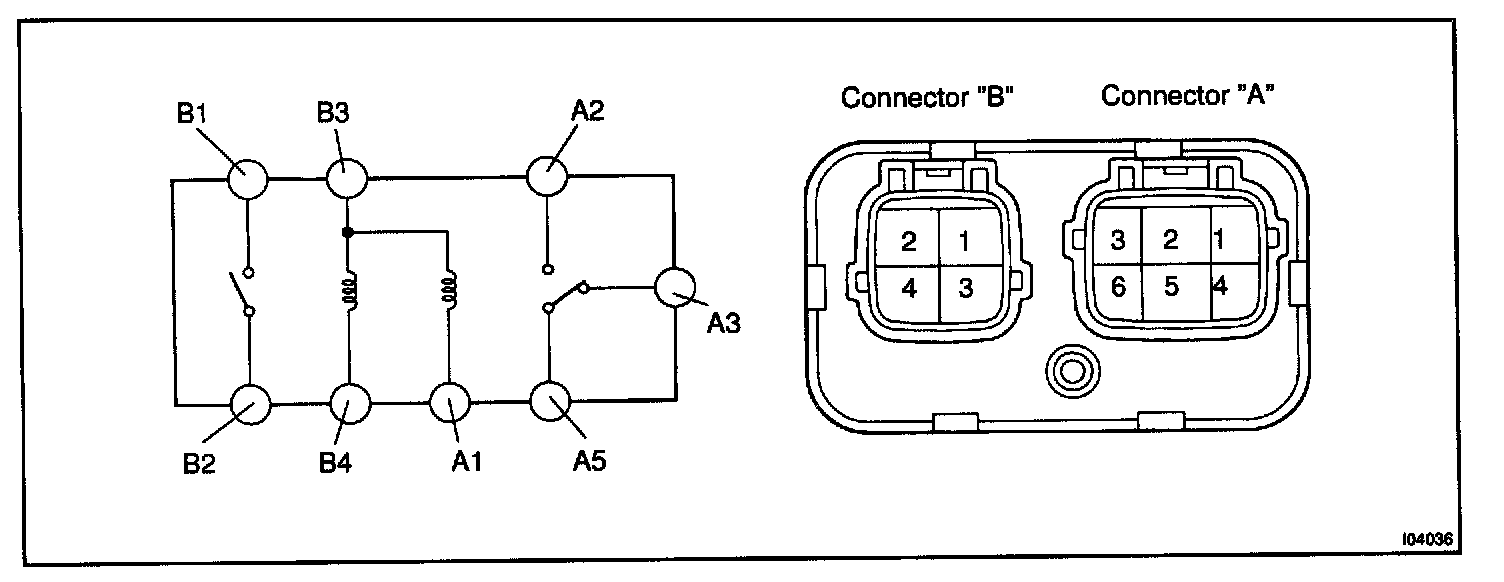
3. INSPECT DAYTIME RUNNING LIGHT NO.3 AND NO.4 RELAY CONTINUITY
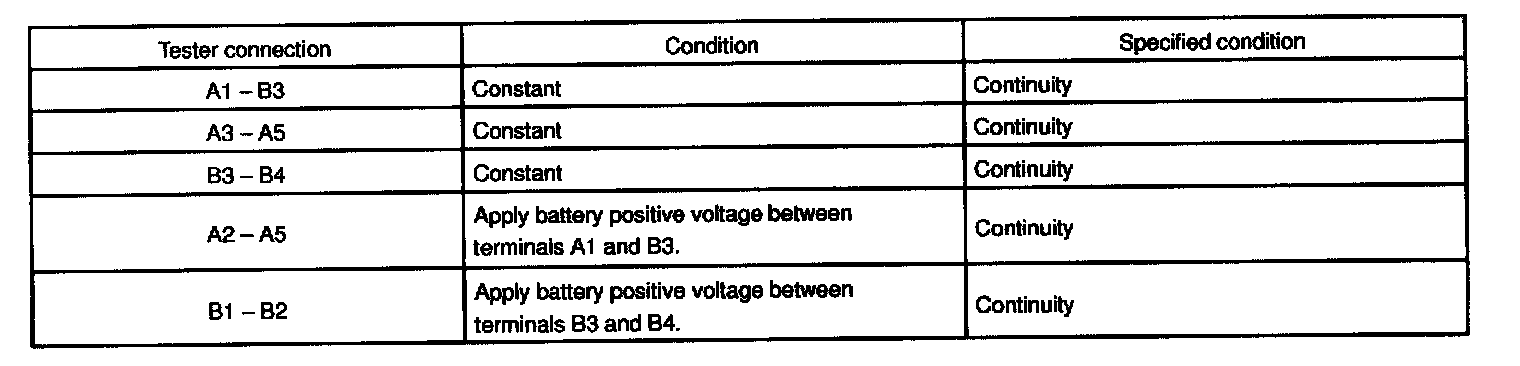
If continuity is not as specified, replace the relay

4. INSPECT HEADLIGHT CONTROL RELAY CONTINUITY

If continuity is not as specified, replace the relay.
5. INSPECT HEADLIGHT DIMMER (DAYTIME RUNNING LIGHT NO.2) RELAY CONTINUITY
If continuity is not as specified, replace the relay.

6. INSPECT TAILLIGHT CONTROL RELAY CONTINUITY
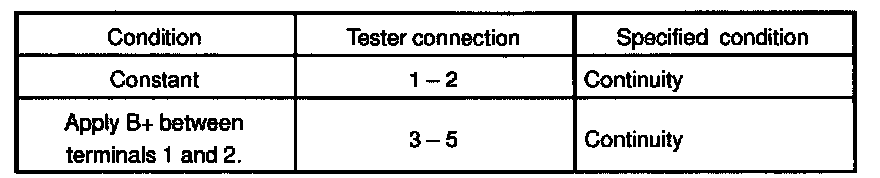
If continuity is not as specified, replace the relay.

7. INSPECT DAYTIME RUNNING LIGHT MAIN RELAY CIRCUIT
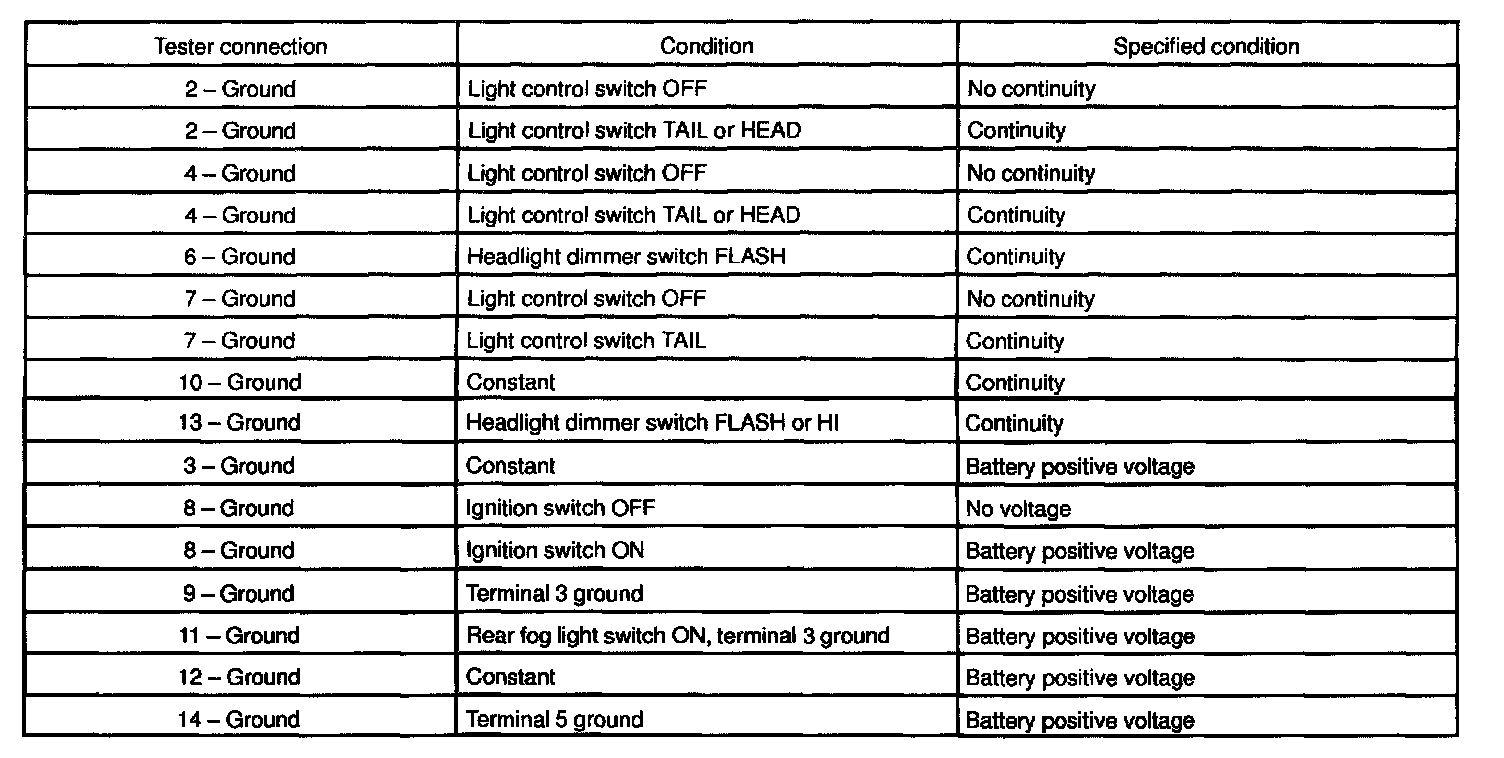
Disconnect the connector from the relay and inspect the connector on the wire harness side.
If circuit is specified, try replacing the relay with a new one. If circuit is not as specified, inspect the circuits connected to other parts.
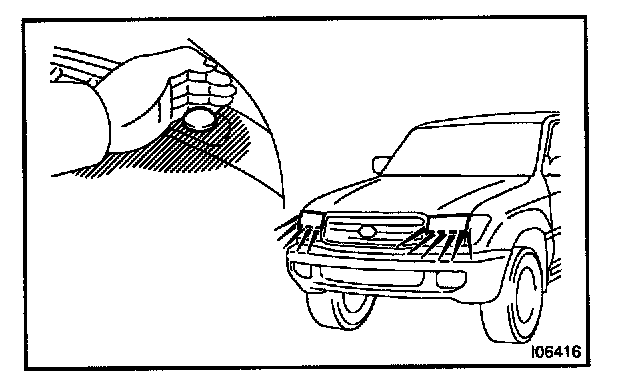
8. AUTO ON:
INSPECT AUTOMATIC LIGHT CONTROL
a. Turn the ignition switch ON.
b. Turn the light control switch to AUTO.
c. Gradually cover the top of the sensor.
d. Check the accessory lights and the headlights should turn ON.
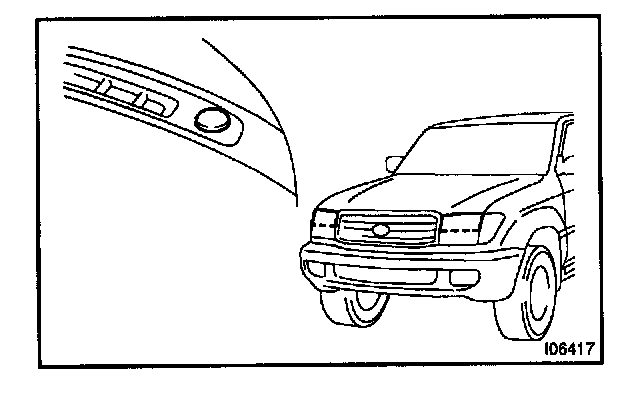
9. AUTO OFF:
INSPECT AUTOMATIC LIGHT CONTROL
a. Gradually expose the sensor.
b. Check the headlights and the accessory lights should turn OFF.
10. INSPECT LIGHT-OFF CONDITION
a. Turn the ignition switch ON.
b. Gradually cover the top of the sensor, lights automatically turn ON.
c. Check that the lights go off under the following conditions.
1. Light control switch is OFF.
2. The area surrounding the sensor gets bright.
3. The driver's door is opened with the ignition switch OFF.
11. INSPECT LIGHT-ON CONDITION
a. Open the driver's door while the ignition switch is OFF.
b. Turn the light control switch to AUTO leaving the door opened and cover the top of the sensor, and verify that the lights go on when the ignition switch is turned ON.
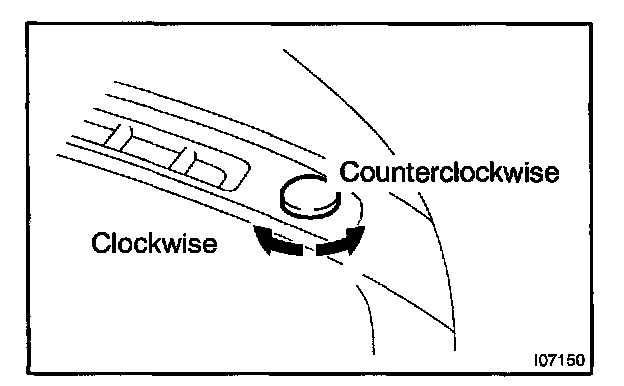
12. ADJUST AUTOMATIC LIGHT CONTROL SENSOR
a. Adjustment of the light control is performed by turning the sensitivity knob on the sensor.
b. This will be determined at what light condition the automatic control will take place.
If response is too quick, turn the knob clockwise.
If response is too slow, turn the knob counterclockwise.
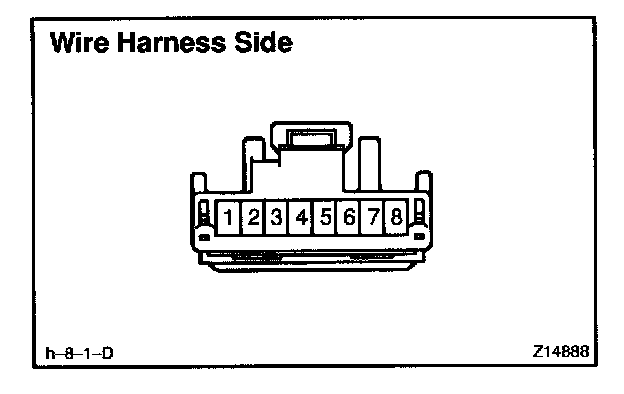
13. Connector disconnected:
INSPECT AUTOMATIC LIGHT CONTROL SENSOR CIRCUIT
Disconnect the connector from the sensor and inspect the connector on the wire harness side, as shown in the table.
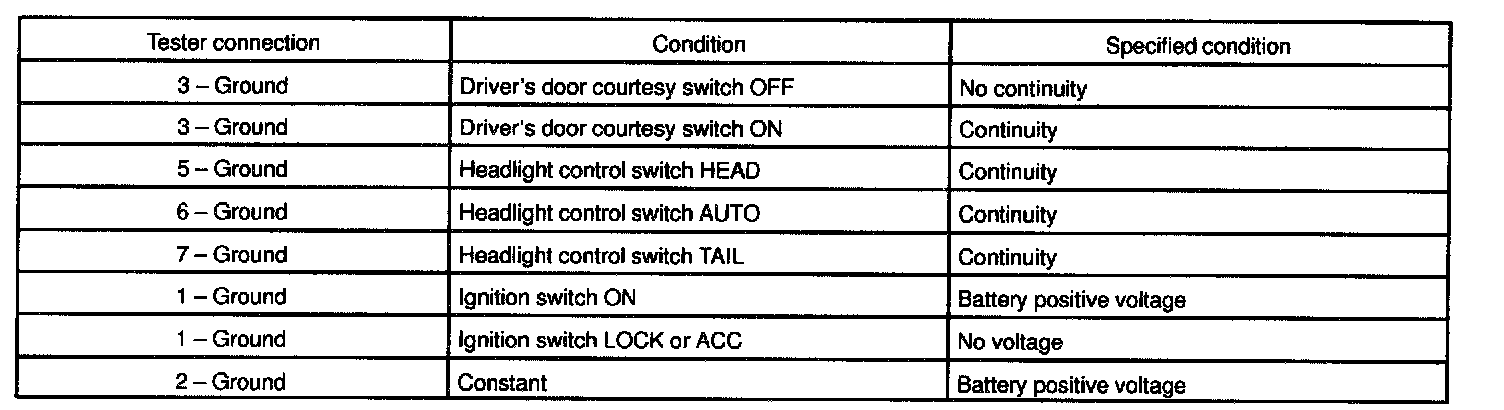
If circuit is as specified, perform the inspection on the following page.
If the circuit is not as specified, inspect the circuits connected to other parts.
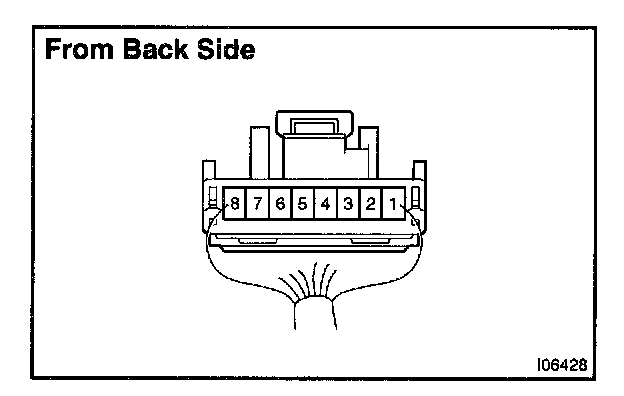
14. Connector connected:
INSPECT AUTOMATIC LIGHT CONTROL SENSOR CIRCUIT
Connect the wire harness side connector to the sensor and inspect wire harness side connector from the back side, as shown.
HINT:
- Ignition switch is ON.
- Light control switch is in AUTO.
- Vehicle's surroundings are bright.
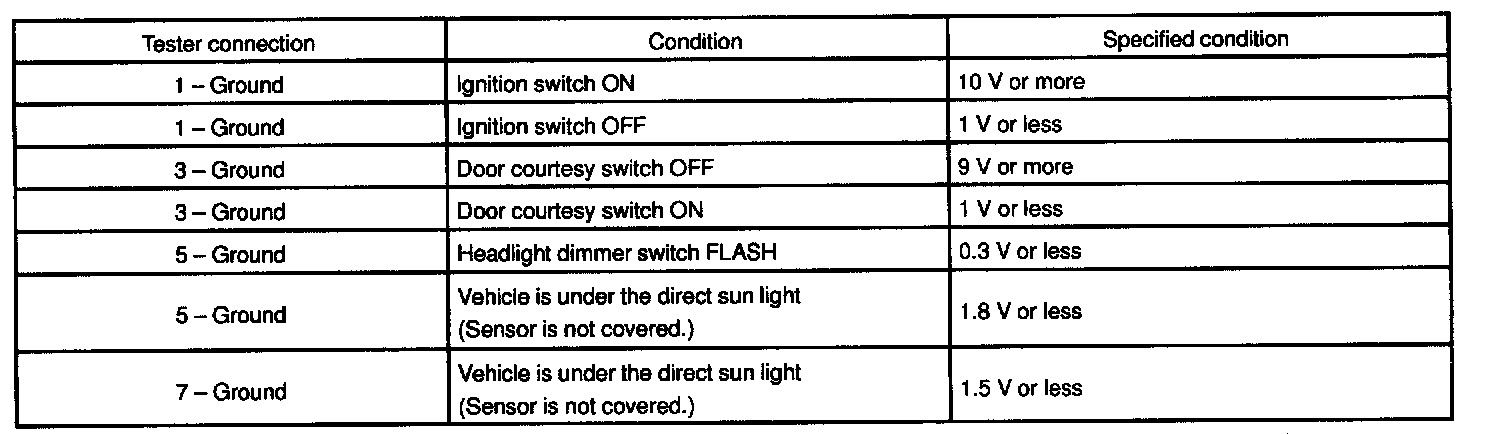
If circuit is as specified, try replacing the sensor with a new one. If the circuits is not as specified, inspect the circuit connected to other parts.