Disassembly and Reassembly
DISASSEMBLY1. REMOVE THERMISTOR
a. Disconnect the connector clamp.
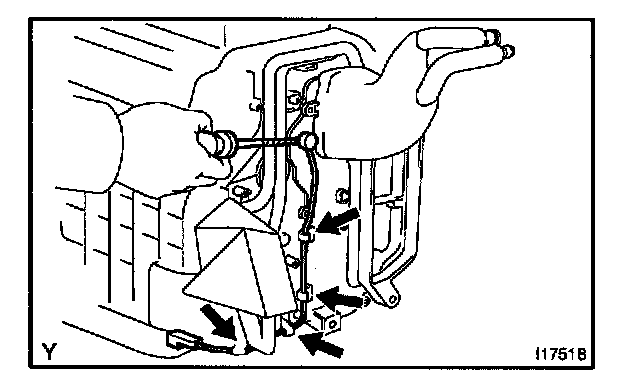
b. Release the 4 claws and remove the harness from the plate.
c. Using a screwdriver, pull out the thermistor from the A/C unit case.
HINT: Tape the screwdriver tip before use.
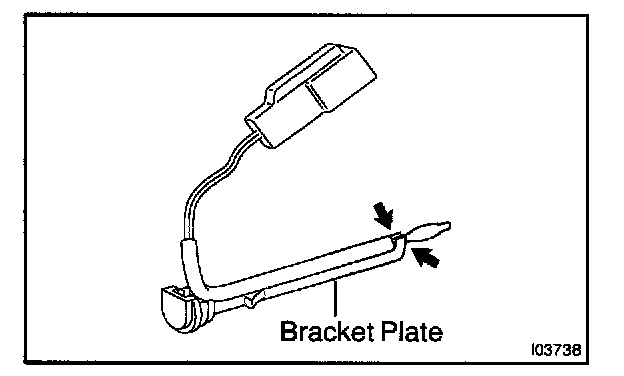
d. Release the 2 claws and remove the thermistor from the bracket plate.
2. REMOVE EVAPORATOR
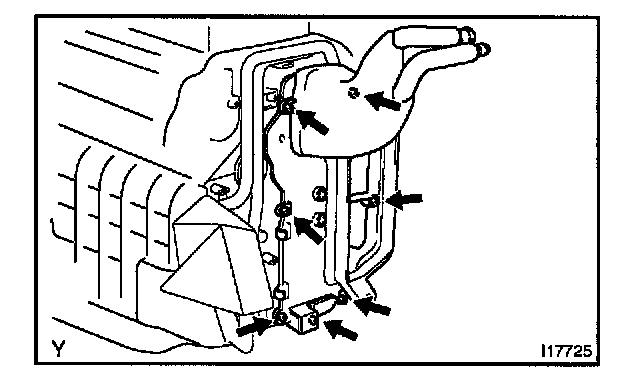
a. Remove the 7 screws.
b. Pull out the evaporator from the A/C unit case.
c. Remove the packing.
3. REMOVE EXPANSION VALVE
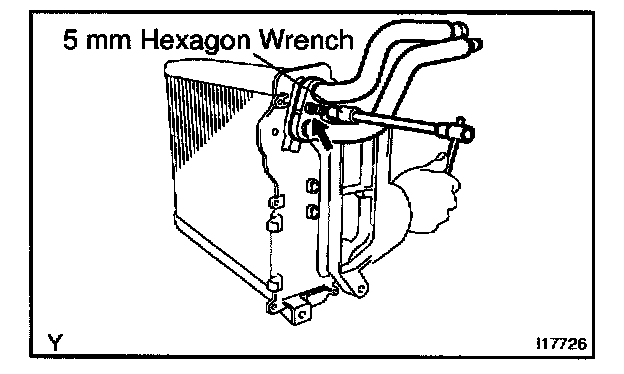
a. Remove the evaporator cover.
b. Using a 5 mm hexagon wrench, remove the 2 bolts, and separate the expansion valve and evaporator.
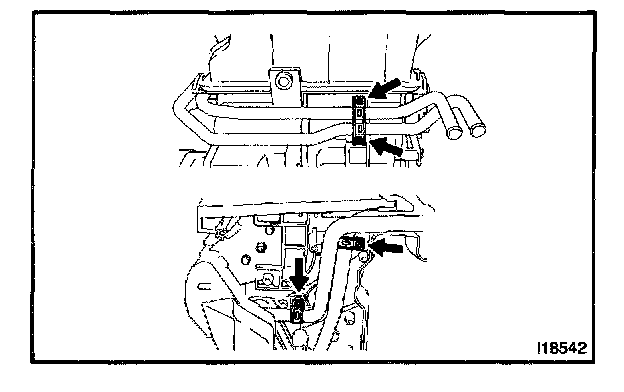
4. REMOVE HEATER RADIATOR
a. Remove the 4 screws and 3 clamps.
b. Remove the passenger air duct subassembly.
c. Pull out the heater radiator from the A/C unit case.
REASSEMBLY
1. INSTALL HEATER RADIATOR
a. Push into the heater radiator to the A/C unit case.
b. Install the 4 screws and 3 clamps.
c. Install the passenger air duct subassembly.
2. INSTALL EXPANSION VALVE
a. Coat 4 new O-rings with the compressor oil.
b. Using a 5 mm hexagon wrench, install the expansion valve to the evaporator with the 2 bolts.
Torque: 3.5 N.m (36 kg.cm, 31 in.lb)
3. INSTALL EVAPORATOR
a. Install the evaporator with the 7 screws.
b. Wrap the packing.
If evaporator was replaced, add compressor oil to the compressor.
Add 40 cc (1.4 ft.oz.)
Compressor oil: ND-OIL 8 or equivalent
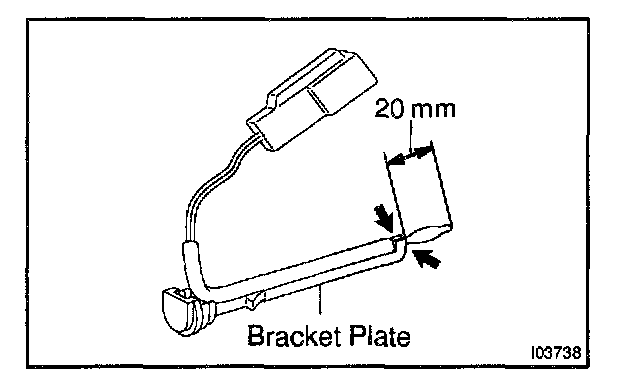
4. INSTALL THERMISTOR
a. Install the thermistor to the bracket plate as shown in the illustration.
b. Push into the thermistor to the A/C unit case.
c. Connect the connector clamp.