Blower Assembly
Blower Assy:

OVERHAUL
1. REMOVE INSTRUMENT PANEL SUB-ASSY W/PASSENGER AIRBAG ASSY
HINT: Refer to the instructions for removal of the instrument panel sub-assy W/ passenger airbag assy.
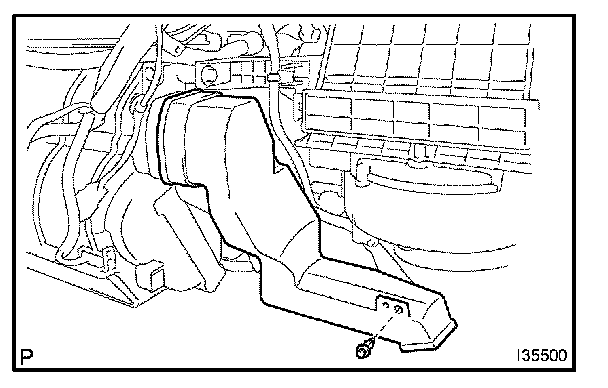
2. REMOVE HEATER TO FOOT DUCT NO.1
a. Remove the clip and the heater to foot duct No.1.
3. REMOVE ECM
4. REMOVE STEREO COMPONENT AMPLIFIER ASSY (W/ STEREO COMPONENT AMPLIFIER)
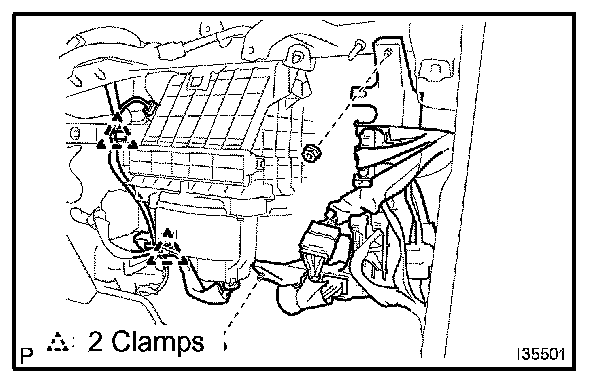
5. REMOVE BLOWER ASSY
a. Release the 2 clamps, the 2 nuts and the wire harness.
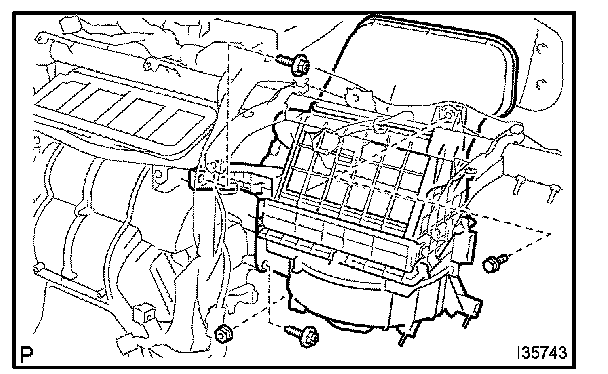
b. Remove the bolt, the 2 screws and the nut.
c. Remove the blower assy.
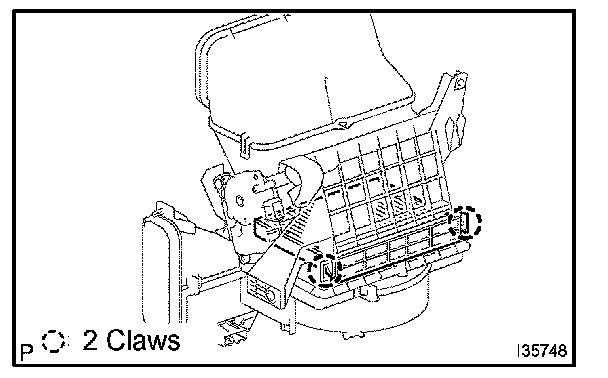
6. REMOVE AIR REFINER ELEMENT
a. Release the 2 claw fittings and remove the air filter sub-assy.
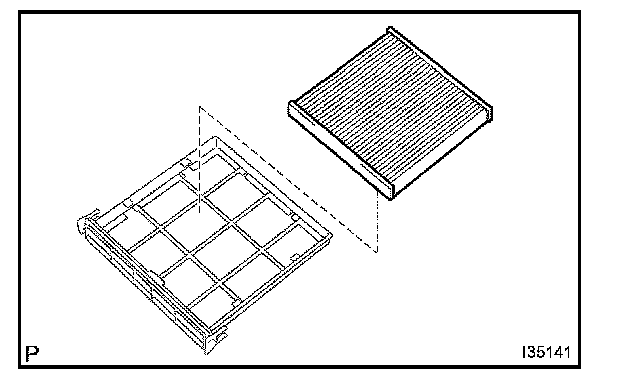
b. Remove the air refiner element from the air filter cover plate.
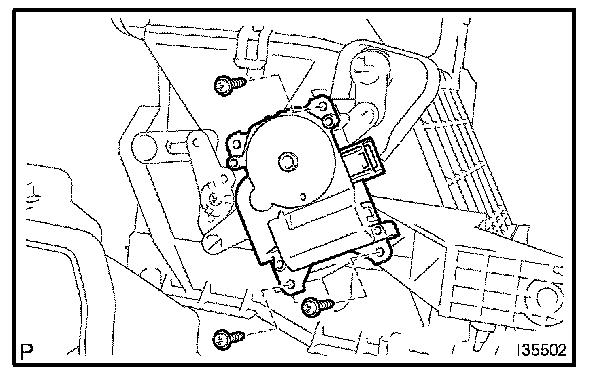
7. REMOVE COOLING UNIT DAMPER SERVO SUB-ASSY
a. Remove the 3 screws and the cooling unit damper servo sub-assy.
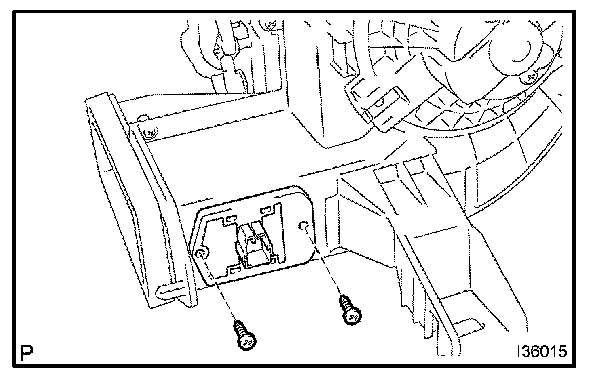
8. REMOVE BLOWER RESISTOR (MANUAL AIR CONDITIONING)
a. Remove the 2 screws and the blower resistor.
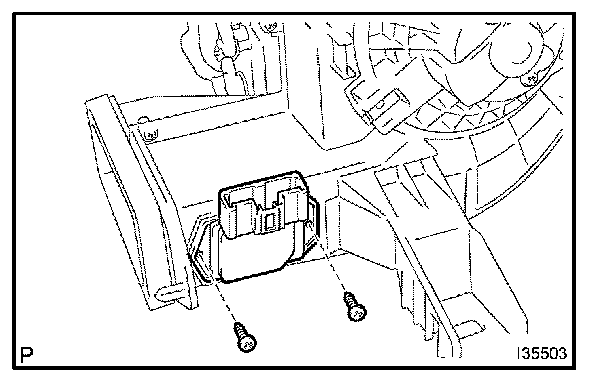
9. REMOVE BLOWER MOTOR CONTROL (AUTO AIR CONDITIONING)
a. Remove the 2 screws and the blower motor control.
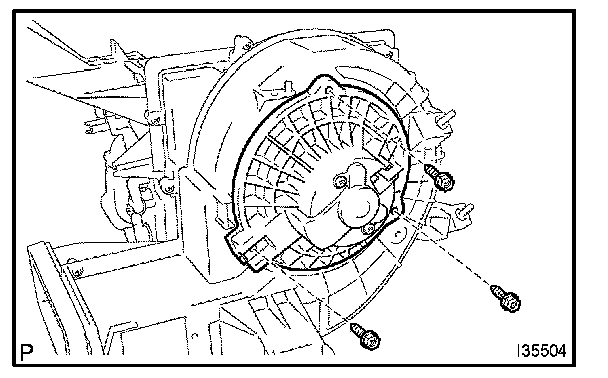
10. REMOVE BLOWER W/FAN MOTOR SUB-ASSY
a. Remove the 3 screws and the blower W/ fan motor sub-assy.
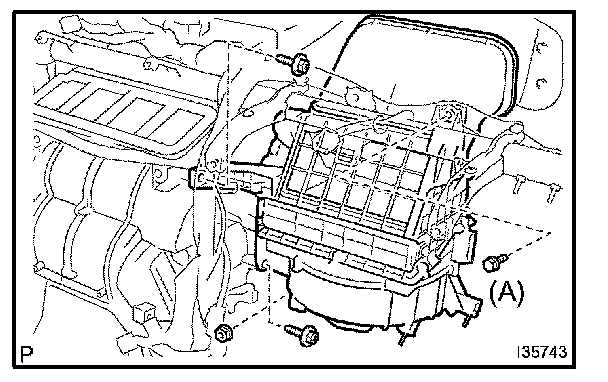
11. INSTALL BLOWER ASSY
a. Install the blower assy.
b. Install the bolt, the 2 screws and the nut.
Torque: 9.8 Nm (100 kgf.cm, 87 in.lbf) (bolt A)
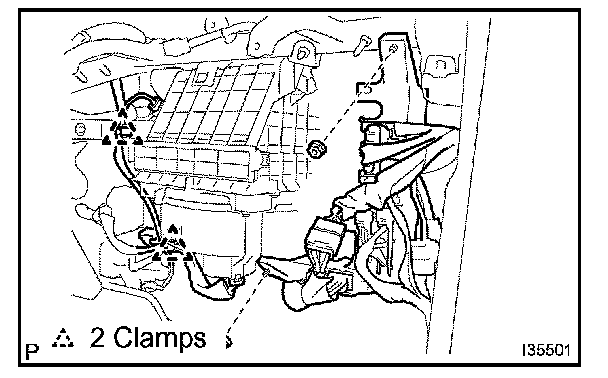
c. Install the 2 clamps and 2 nuts and wire harness.
12. INSTALL INSTRUMENT PANEL SUB-ASSY W/PASSENGER AIRBAG ASSY