Condenser HVAC: Service and Repair
Cooler Condenser Core:

REPLACEMENT
1. DISCHARGE REFRIGERANT FROM REFRIGERATION SYSTEM
SST 07110-58060 (07117-58080, 07117-58090, 07117-78050, 07117-88060, 07117-88070, 07117-88080)
2. REMOVE FRONT FENDER LINER LH
3. REMOVE FRONT FENDER LINER RH
4. REMOVE FRONT BUMPER COVER
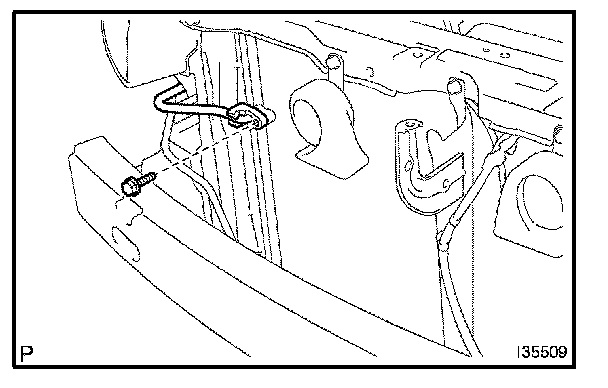
5. DISCONNECT DISCHARGE HOSE SUB-ASSY
a. Remove the bolt and disconnect the discharge hose sub-assy from the cooler condenser core.
b. Remove the O-ring from the discharge hose sub-assy.
NOTE: Seal the opening of the disconnected parts using vinyl tape to prevent moisture and foreign matters from entering.
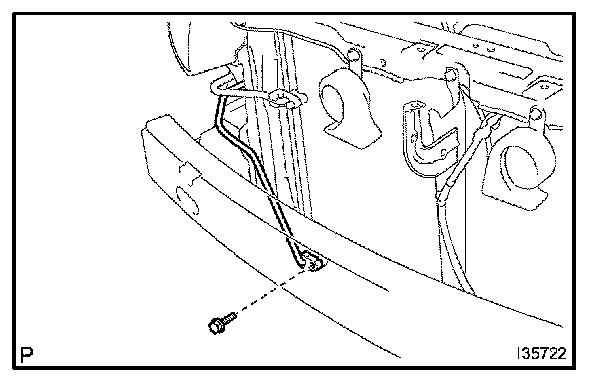
6. DISCONNECT COOLER REFRIGERANT LIQUID PIPE A
a. Remove the bolt and disconnect the cooler refrigerant liquid pipe A from the cooler condenser core.
b. Remove the O-ring from the cooler refrigerant liquid pipe A.
NOTE: Seal the opening of the disconnected parts using vinyl tape to prevent moisture and foreign matters from entering.
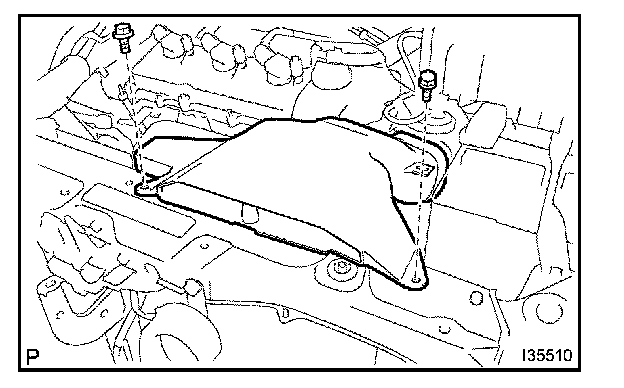
7. REMOVE AIR CLEANER INLET NO.2
a. Remove the 2 bolts and the air cleaner inlet No.2.
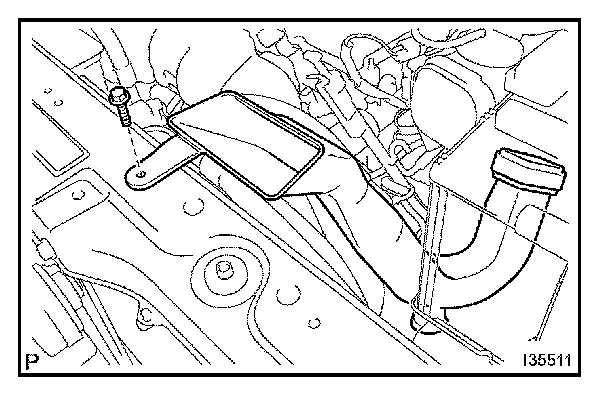
8. REMOVE AIR CLEANER INLET NO.1
a. Remove the bolt and disconnect air cleaner inlet No.1.
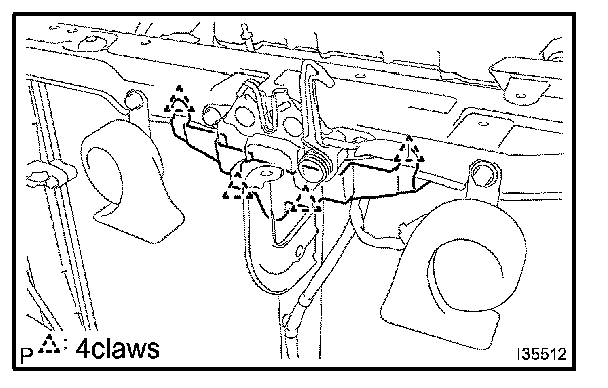
9. REMOVE HOOD LOCK RELEASE LEVER PROTECTOR
a. Release the 4 claw fittings and remove the hood lock release lever protector.
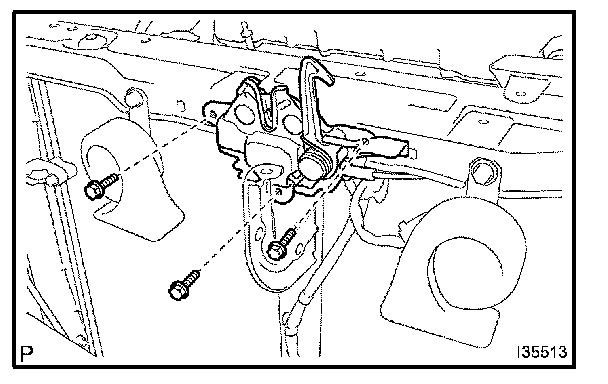
10. REMOVE HOOD LOCK ASSY
a. Remove the 3 bolts and disconnect hood lock assy.
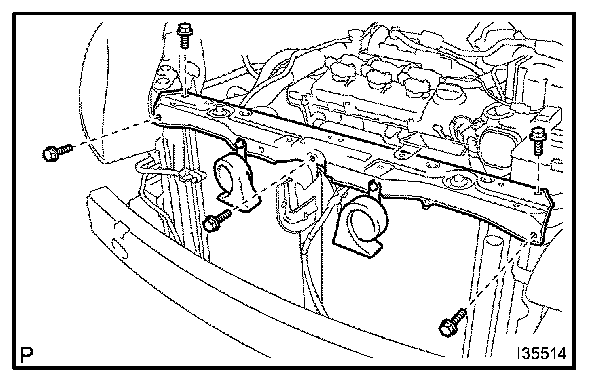
11. REMOVE RADIATOR SUPPORT SUB-ASSY UPPER
a. Disconnect the horn connectors.
b. Remove the 5 bolts and radiator support sub-assy upper.
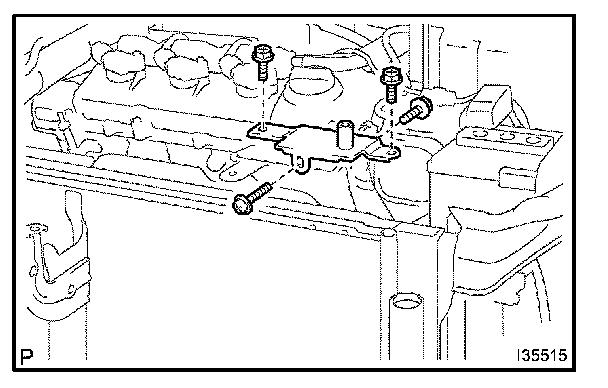
12. REMOVE RADIATOR SUPPORT SUB-ASSY UPPER LH
a. Remove the 4 bolts and radiator support sub-assy upper LH.
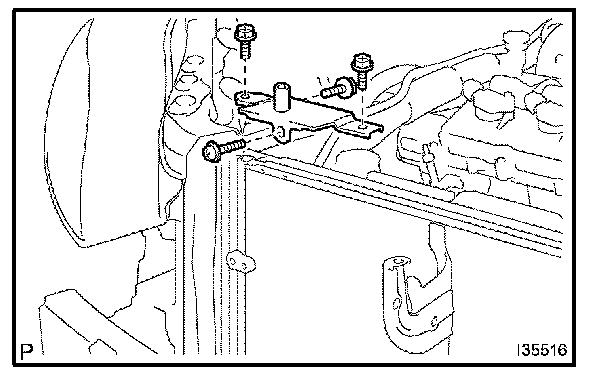
13. REMOVE RADIATOR SUPPORT SUB-ASSY UPPER RH
a. Remove the 4 bolts and radiator support sub-assy upper No.1.
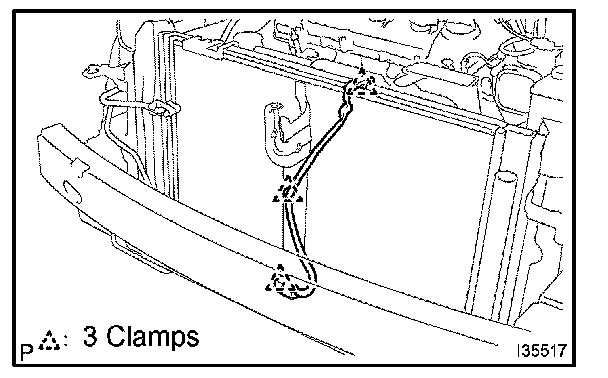
14. REMOVE COOLER CONDENSER CORE
a. Release the 3 clamps and disconnect the connector.
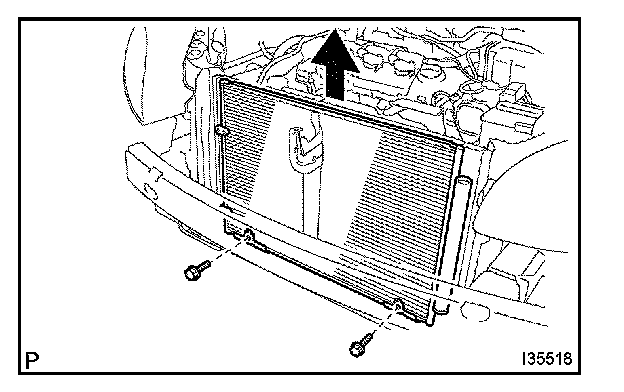
b. Remove the 2 bolts and cooler condenser core.
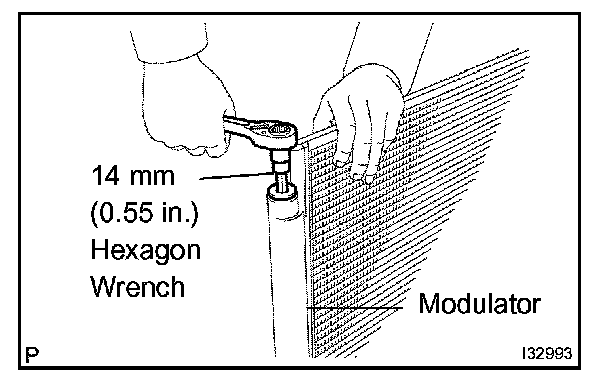
15. REMOVE COOLER DRYER
a. Using a hexagon wrench 14 mm (0.55 in.), remove the cap from the modulator.
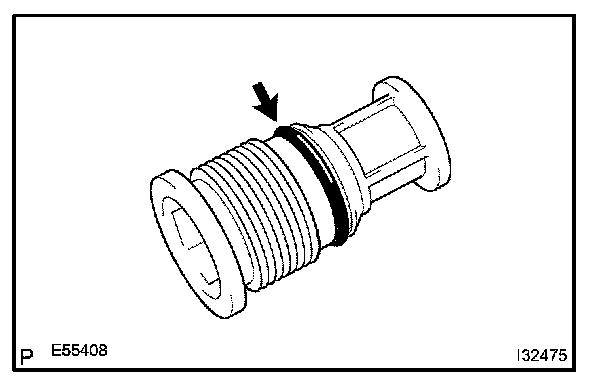
b. Remove the O-ring from the cap.
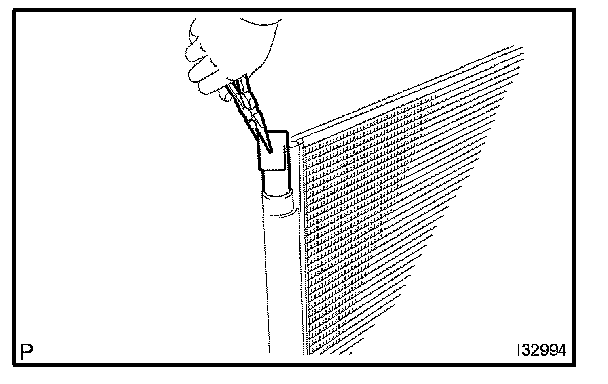
c. Using needle nose pliers, remove the cooler dryer.
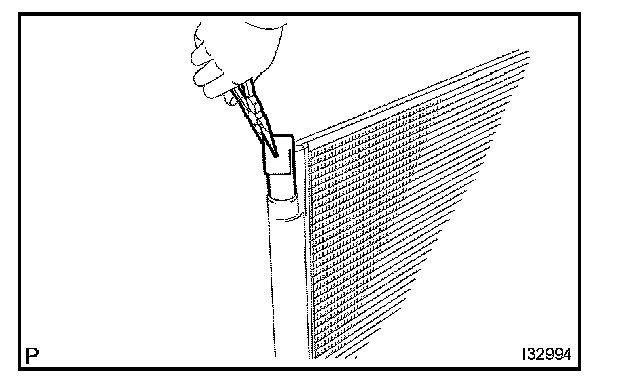
16. INSTALL DRYER
a. Using needle nose pliers, install the cooler dryer.
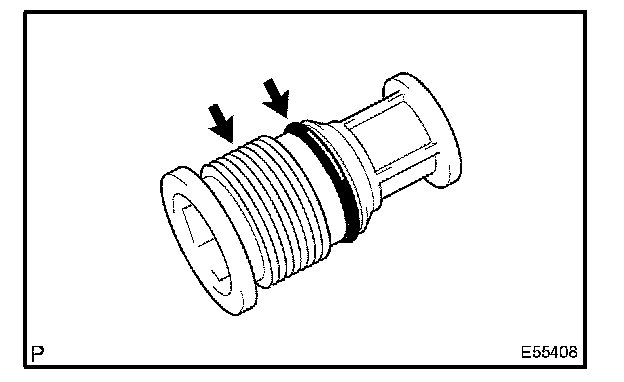
b. Install a new O-ring on the cap.
c. Sufficiently apply compressor oil to the fitting surfaces of the O-ring and the cap.
Compressor oil: ND-OIL 8 or equivalent
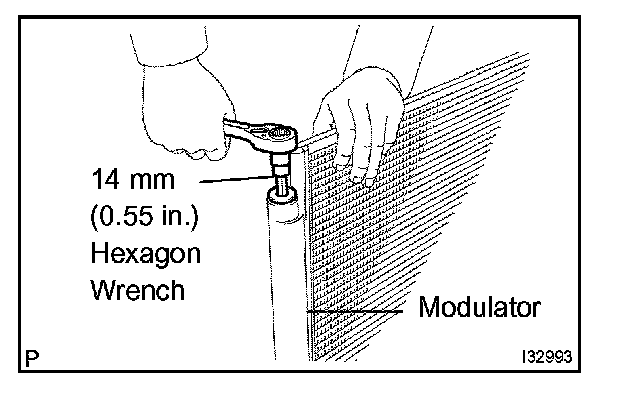
d. Using a hexagon wrench 14 mm (0.55 in.), install the cap to the cooler condenser assy.
Torque: 2.9 Nm (30 kgf.cm, 25 in.lbf)
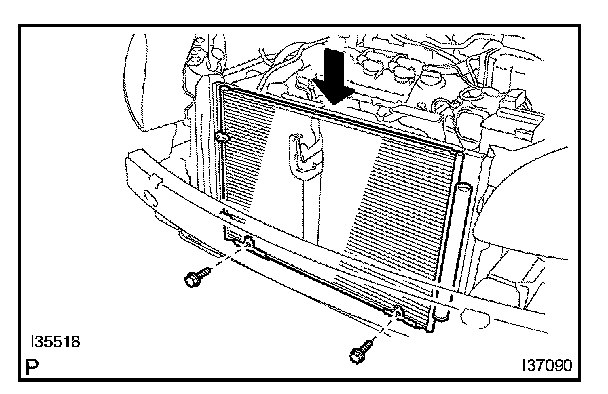
17. INSTALL COOLER CONDENSER CORE
a. Install the cooler condenser core with the 2 bolts.
Torque: 3.9 Nm (40 kgf.cm, 35 in.lbf)
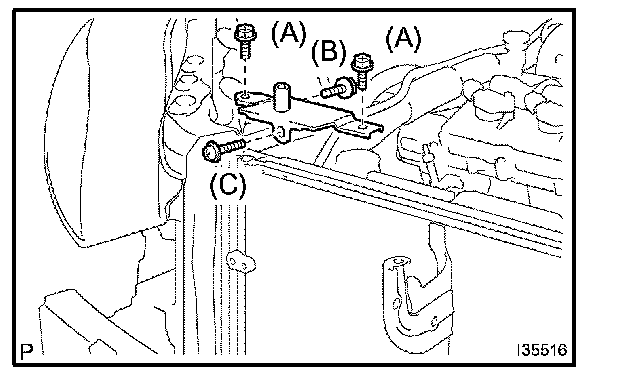
18. INSTALL RADIATOR SUPPORT SUB-ASSY UPPER RH
a. Install the radiator support sub-assy upper with the 4 bolts.
Torque:
5.0 Nm (51 kgf.cm, 44 in.lbf) (A)
7.0 Nm (71 kgf.cm, 62 in.lbf) (B)
3.9 Nm (40 kgf.cm, 35 in.lbf) (C)
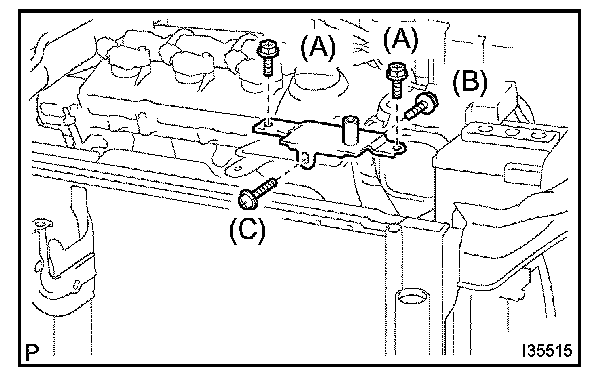
19. INSTALL RADIATOR SUPPORT SUB-ASSY UPPER LH
a. Install the radiator support sub-assy upper LH with the 4 bolts.
Torque:
5.0 Nm (51 kgf.cm, 47 in.lbf) (A)
7.0 Nm (71 kgf.cm, 62 in.lbf) (B)
3.9 Nm (40 kgf.cm, 35 in.lbf) (C)
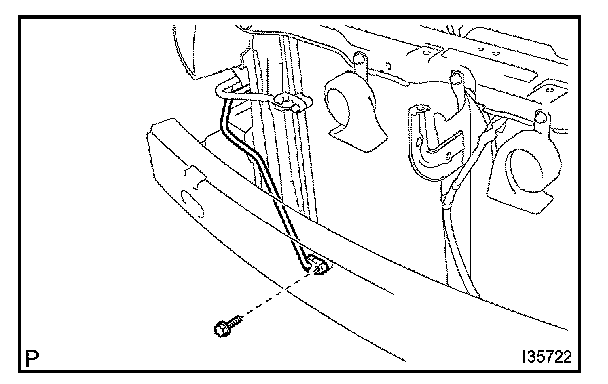
20. INSTALL COOLER REFRIGERANT LIQUID PIPE A
a. Remove the attached vinyl tape from the pipe and the connecting part of the cooler condenser core.
b. Sufficiently apply compressor oil to a new O-ring and the fitting surface of the pipe joint.
Compressor oil: ND-OIL 8 or equivalent
c. Install the O-ring on the cooler refrigerant liquid pipe A.
d. Install the cooler refrigerant liquid pipe A on the cooler condenser core with the bolt.
Torque: 5.4 Nm (55 kgf.cm, 47 in.lbf)
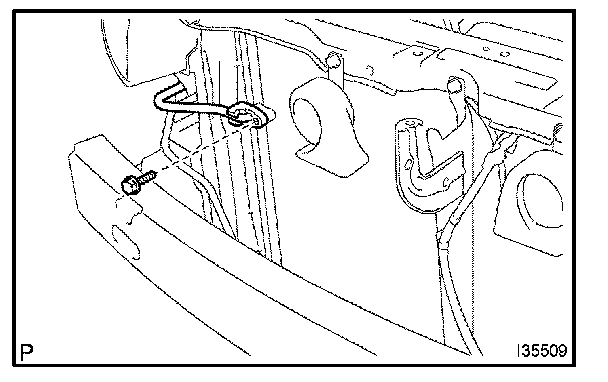
21. INSTALL DISCHARGE HOSE SUB-ASSY
a. Remove the attached vinyl tape from the tube and the connecting part of the cooler condenser core.
b. Sufficiently apply compressor oil to a new O-ring and the fitting surface of the hose joint.
Compressor oil: ND-OIL 8 or equivalent
c. Install the O-ring on the discharge hose sub-assy.
d. Install the discharge hose sub-assy on the cooler condenser core with the bolt.
Torque: 5.4 Nm (55 kgf.cm, 47 in.lbf)
22. CHARGE REFRIGERANT
SST 07110-58060 (07117-58060, 07117-58070, 07117-58080, 07117-58090, 07117-78050, 07117-88060, 07117-88070, 07117-88080)
Specified amount: 780 ± 30 g (27.5 ± 1.06 oz.)
23. WARM UP ENGINE
24. INSPECT LEAKAGE OF REFRIGERANT