Quarter Window Glass: Service and Repair
Side Window Assy Rear LH:

REPLACEMENT
HINT:
- The installation is in the reverse order of the removal.
- On the RH side, use the same procedures as on the LH side.
1. REMOVE REAR NO.1 SEAT ASSEMBLY LH
2. REMOVE RR WINDOW SIDE GARNISH ASSEMBLY LH
a. Rear door opening trim weather strip LH
b. Remove the rope hooks.
c. Remove the back door scuff plate.
d. Remove the roof headlining garnish rear.
e. Remove the rear door scuff plate.
f. Remove the quarter trim panel assembly LH.
g. Remove the RR window side garnish assembly No.2 LH.
h. Remove the RR window side garnish assembly LH.
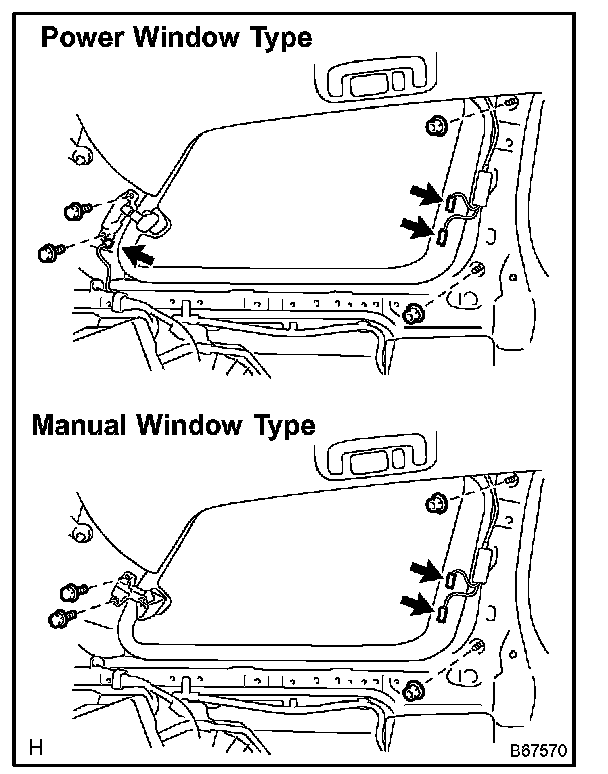
3. REMOVE SIDE WINDOW ASSEMBLY REAR LH
a. Disconnect the connectors.
b. Remove the 2 nuts and 2 bolts.
Torque:
Bolt: 5.5 Nm (56 kgf.cm, 49 in.lbf)
c. Remove the window.
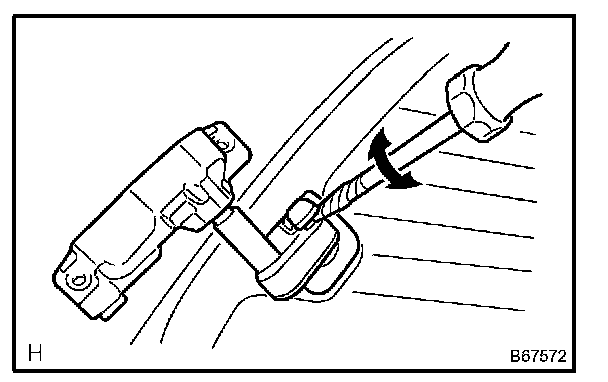
4. REMOVE POWER VENT WINDOW MOTOR ASSEMBLY LH (POWER WINDOW TYPE)
a. Using a screwdriver, remove the window motor.
5. REMOVE QUARTER WINDOW LOCK ASSEMBLY LH (MANUAL WINDOW TYPE)
a. Remove the screw and window lock.
6. REMOVE SIDE REAR WINDOW WEATHERSTRIP LH