Catalytic Converter: Service and Repair
REPLACEMENT1. REMOVE HEATED OXYGEN SENSOR (BANK 1)
a. Disconnect the heated oxygen sensor.
b. Remove the heated oxygen sensor.
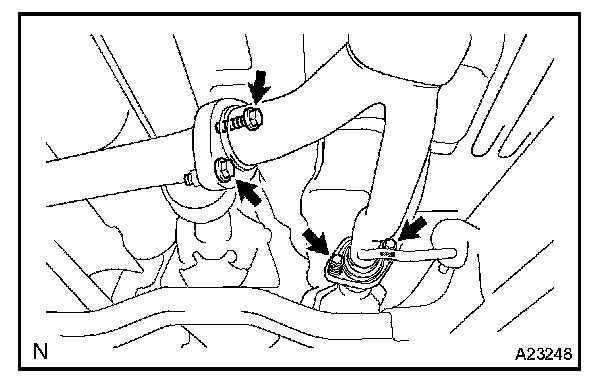
2. SEPARATE EXHAUST CENTER PIPE
Remove the 4 bolts and 2 springs from the exhaust center pipe.
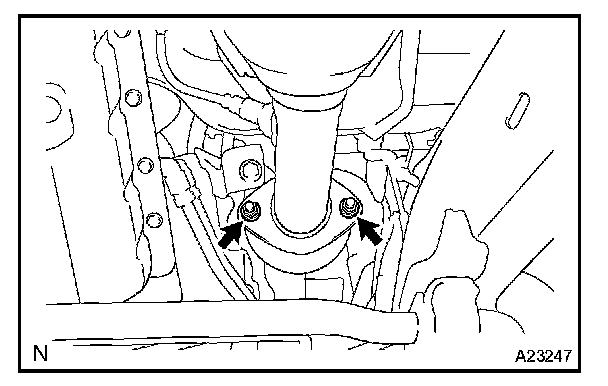
3. REMOVE RH FRONT EXHAUST PIPE
a. Remove the 2 nuts and RH front exhaust pipe.
b. Remove the 2 gaskets from the RH front exhaust pipe.
4. REMOVE HEATED OXYGEN SENSOR (BANK 2 OXYGEN SENSOR)
a. Disconnect the heated oxygen sensor connector.
b. Remove the heated oxygen sensor.
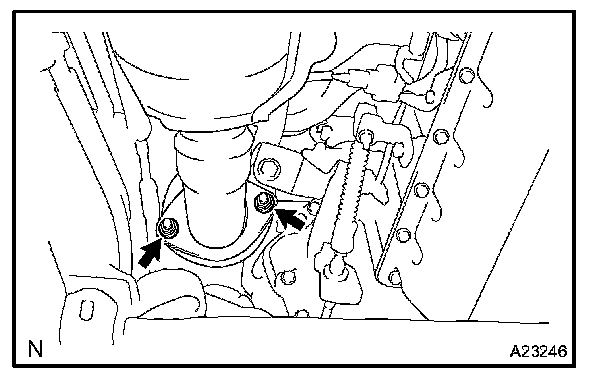
5. REMOVE LH FRONT EXHAUST PIPE
a. Remove the 2 nuts, exhaust pipe support and LH front exhaust pipe.
b. Remove the 2 gaskets from the LH front exhaust pipe.
6. REMOVE MANIFOLD STAY
Remove the 6 bolts and 2 manifold stays.
7. REMOVE A/F SENSOR (BANK 1)
a. Disconnect the A/F sensor connector.
b. Remove the A/F sensor.
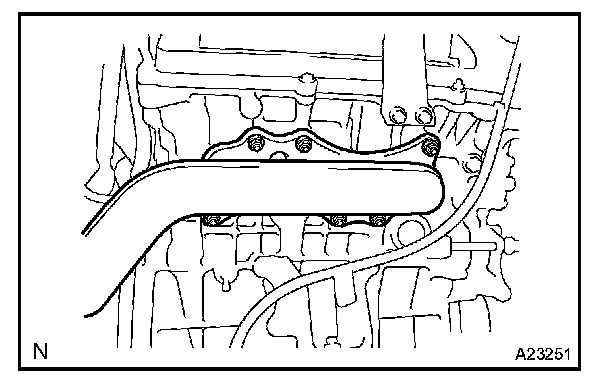
8. REMOVE EXHAUST MANIFOLD RH
Remove the 6 nuts, exhaust manifold RH and gasket.
9. REMOVE A/F SENSOR (BANK 2)
a. Disconnect the A/F sensor connector.
b. Remove the A/F sensor.
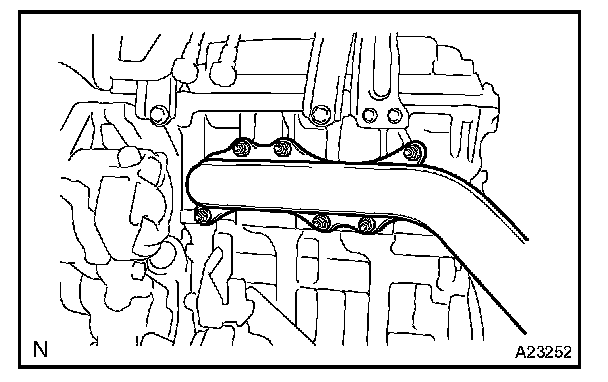
10. REMOVE EXHAUST MANIFOLD LH
Remove the 6 nuts, exhaust manifold LH and gasket.
11. INSTALL EXHAUST MANIFOLD RH
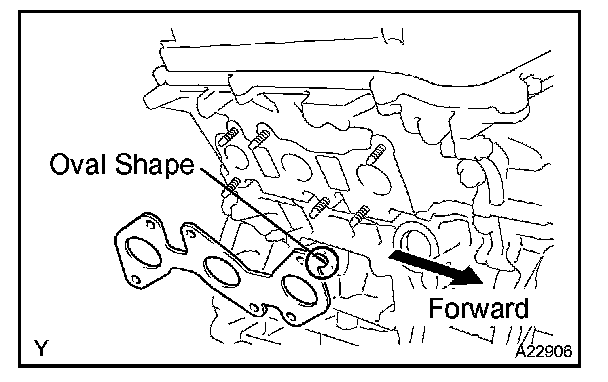
a. Set a new gasket to the RH cylinder head with the oval shape facing forward.
NOTE: Be careful of the installation direction.
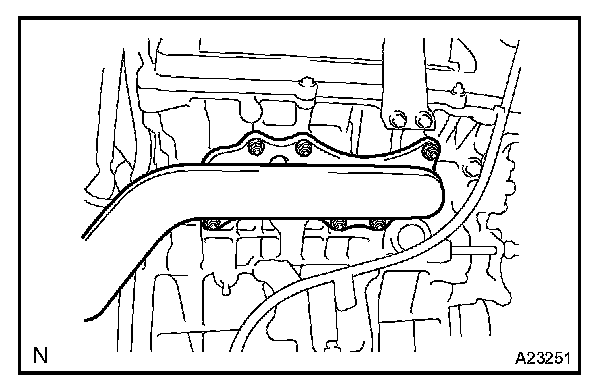
b. Install the exhaust manifold with the 6 nuts. Tighten the nuts uniformly in several steps.
Torque: 21 Nm (214 kgf.cm, 15 ft.lbf)
12. INSTALL A/F SENSOR (BANK 1)
a. Install the A/F sensor.
Torque: 44 Nm (450 kgf.cm, 33 ft.lbf)
b. Connect the A/F sensor connector.
13. INSTALL EXHAUST MANIFOLD LH
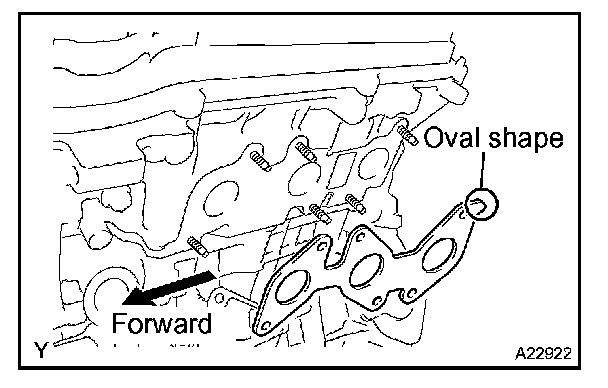
a. Set a new gasket to the LH cylinder head with the oval shape facing backward.
NOTE: Be careful of the installation direction.
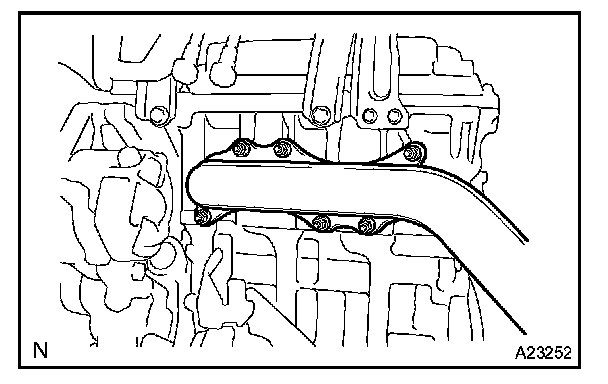
b. Install the exhaust manifold with the 6 nuts. Tighten the nuts uniformly in several steps.
Torque: 21 Nm (214 kgf.cm, 15 ft.lbf)
14. INSTALL A/F SENSOR (BANK 2)
a. Install the A/F sensor.
Torque: 44 Nm (450 kgf.cm, 33 ft.lbf)
b. Connect the A/F sensor connector.
15. INSTALL MANIFOLD STAY
Install the 2 manifold stays with the 6 bolts.
Torque: 40 Nm (408 kgf.cm, 30 ft.lbf)
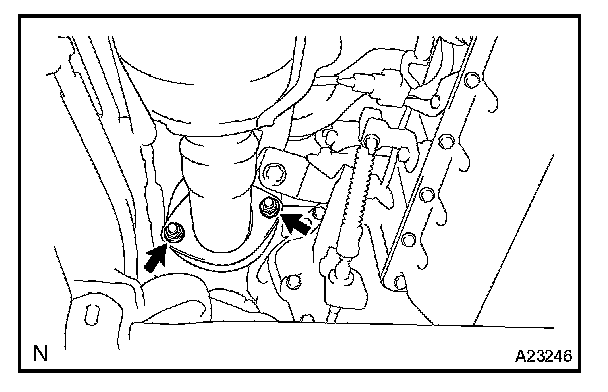
16. INSTALL LH FRONT EXHAUST PIPE
a. Install 2 new gaskets to the LH front exhaust pipe.
b. Install the LH front exhaust pipe with 2 new nuts.
Torque: 62 Nm (630 kgf.cm, 46 ft.lbf)
c. Install the exhaust pipe support.
17. INSTALL HEATED OXYGEN SENSOR (BANK 2 OXYGEN SENSOR)
a. Install the heated oxygen sensor.
Torque: 44 Nm (450 kgf.cm, 33 ft.lbf)
b. Connect the heated oxygen sensor connector.
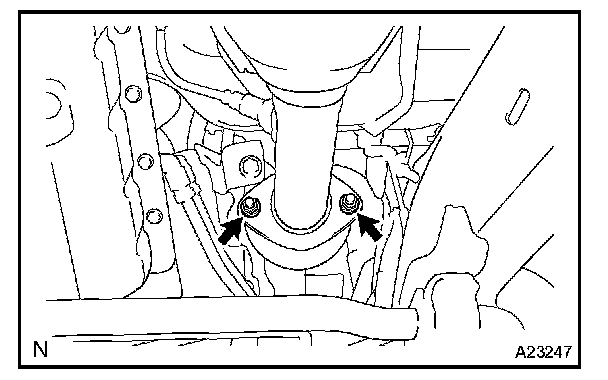
18. INSTALL RH FRONT EXHAUST PIPE
a. Install 2 new gaskets to the RH front exhaust pipe.
b. Install the RH front exhaust pipe with 2 new nuts.
Torque: 62 Nm (630 kgf.cm, 46 ft.lbf)
19. INSTALL HEATED OXYGEN SENSOR (BANK 1 OXYGEN SENSOR)
a. Install the heated oxygen sensor.
Torque: 44 Nm (450 kgf.cm, 33 ft.lbf)
b. Connect the heated oxygen sensor connector.
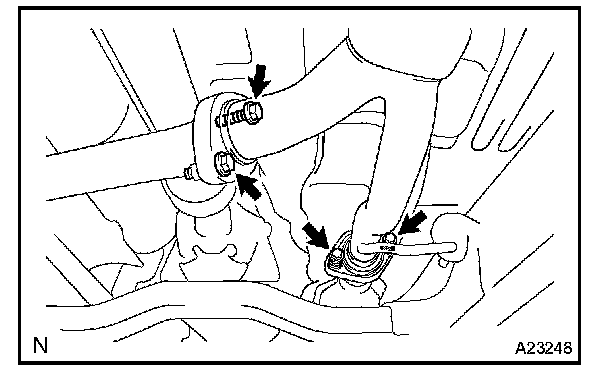
20. CONNECT EXHAUST CENTER PIPE
a. Install the 2 bolts.
Torque: 48 Nm (489 kgf.cm, 35 ft.lbf)
b. Install the 2 bolts and springs.
Torque: 43 Nm (440 kgf.cm, 32 ft.lbf)