Part 2
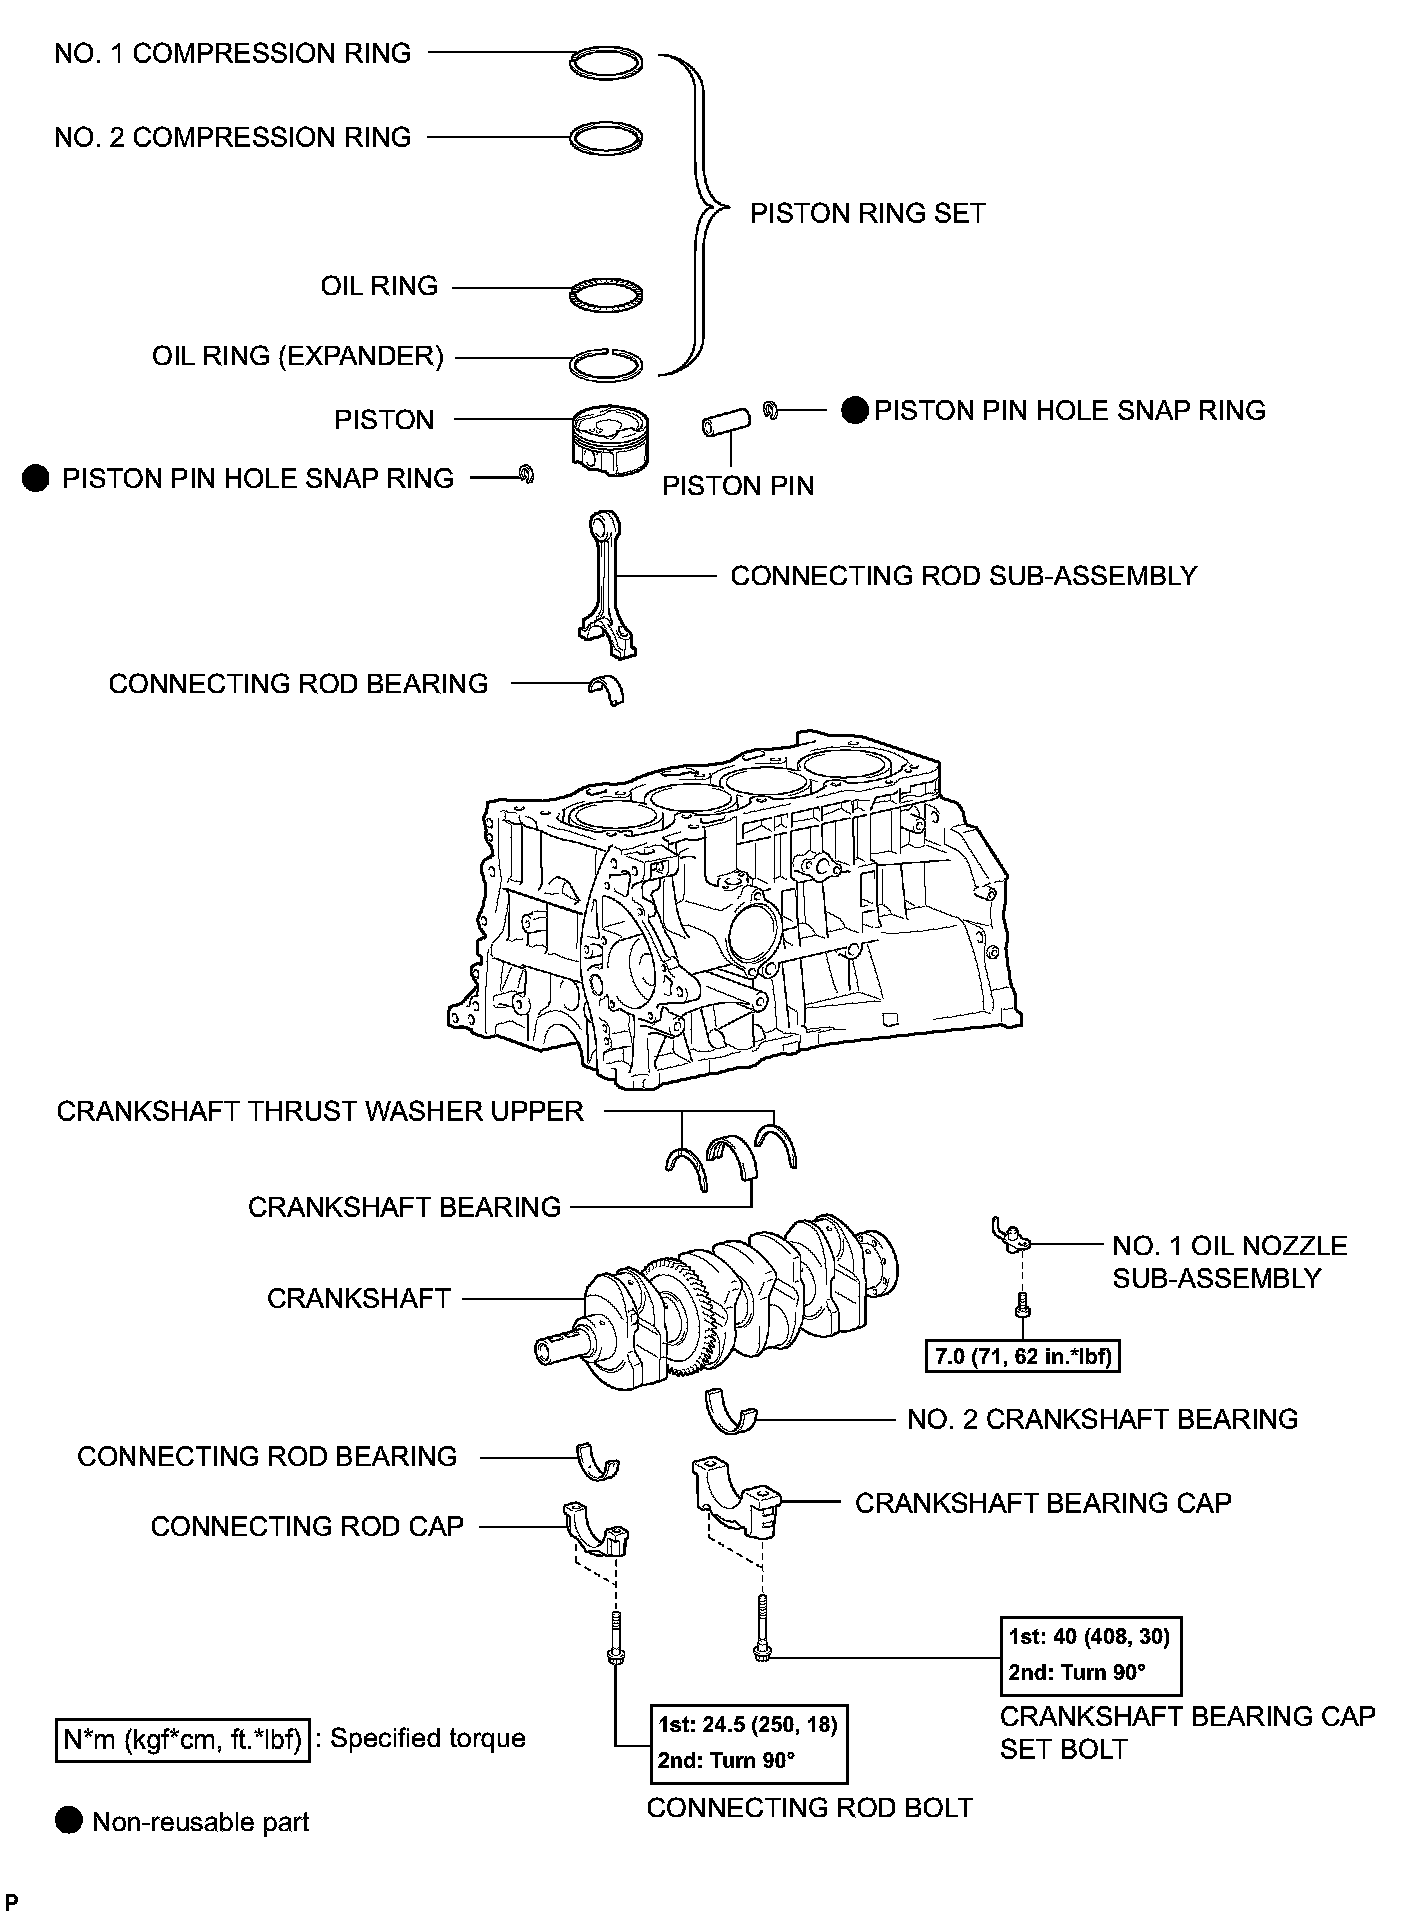
ENGINE UNITEngine Unit Components:
Engine Unit Components:
Engine Unit Components:
Engine Unit Components:
Engine Unit Components:
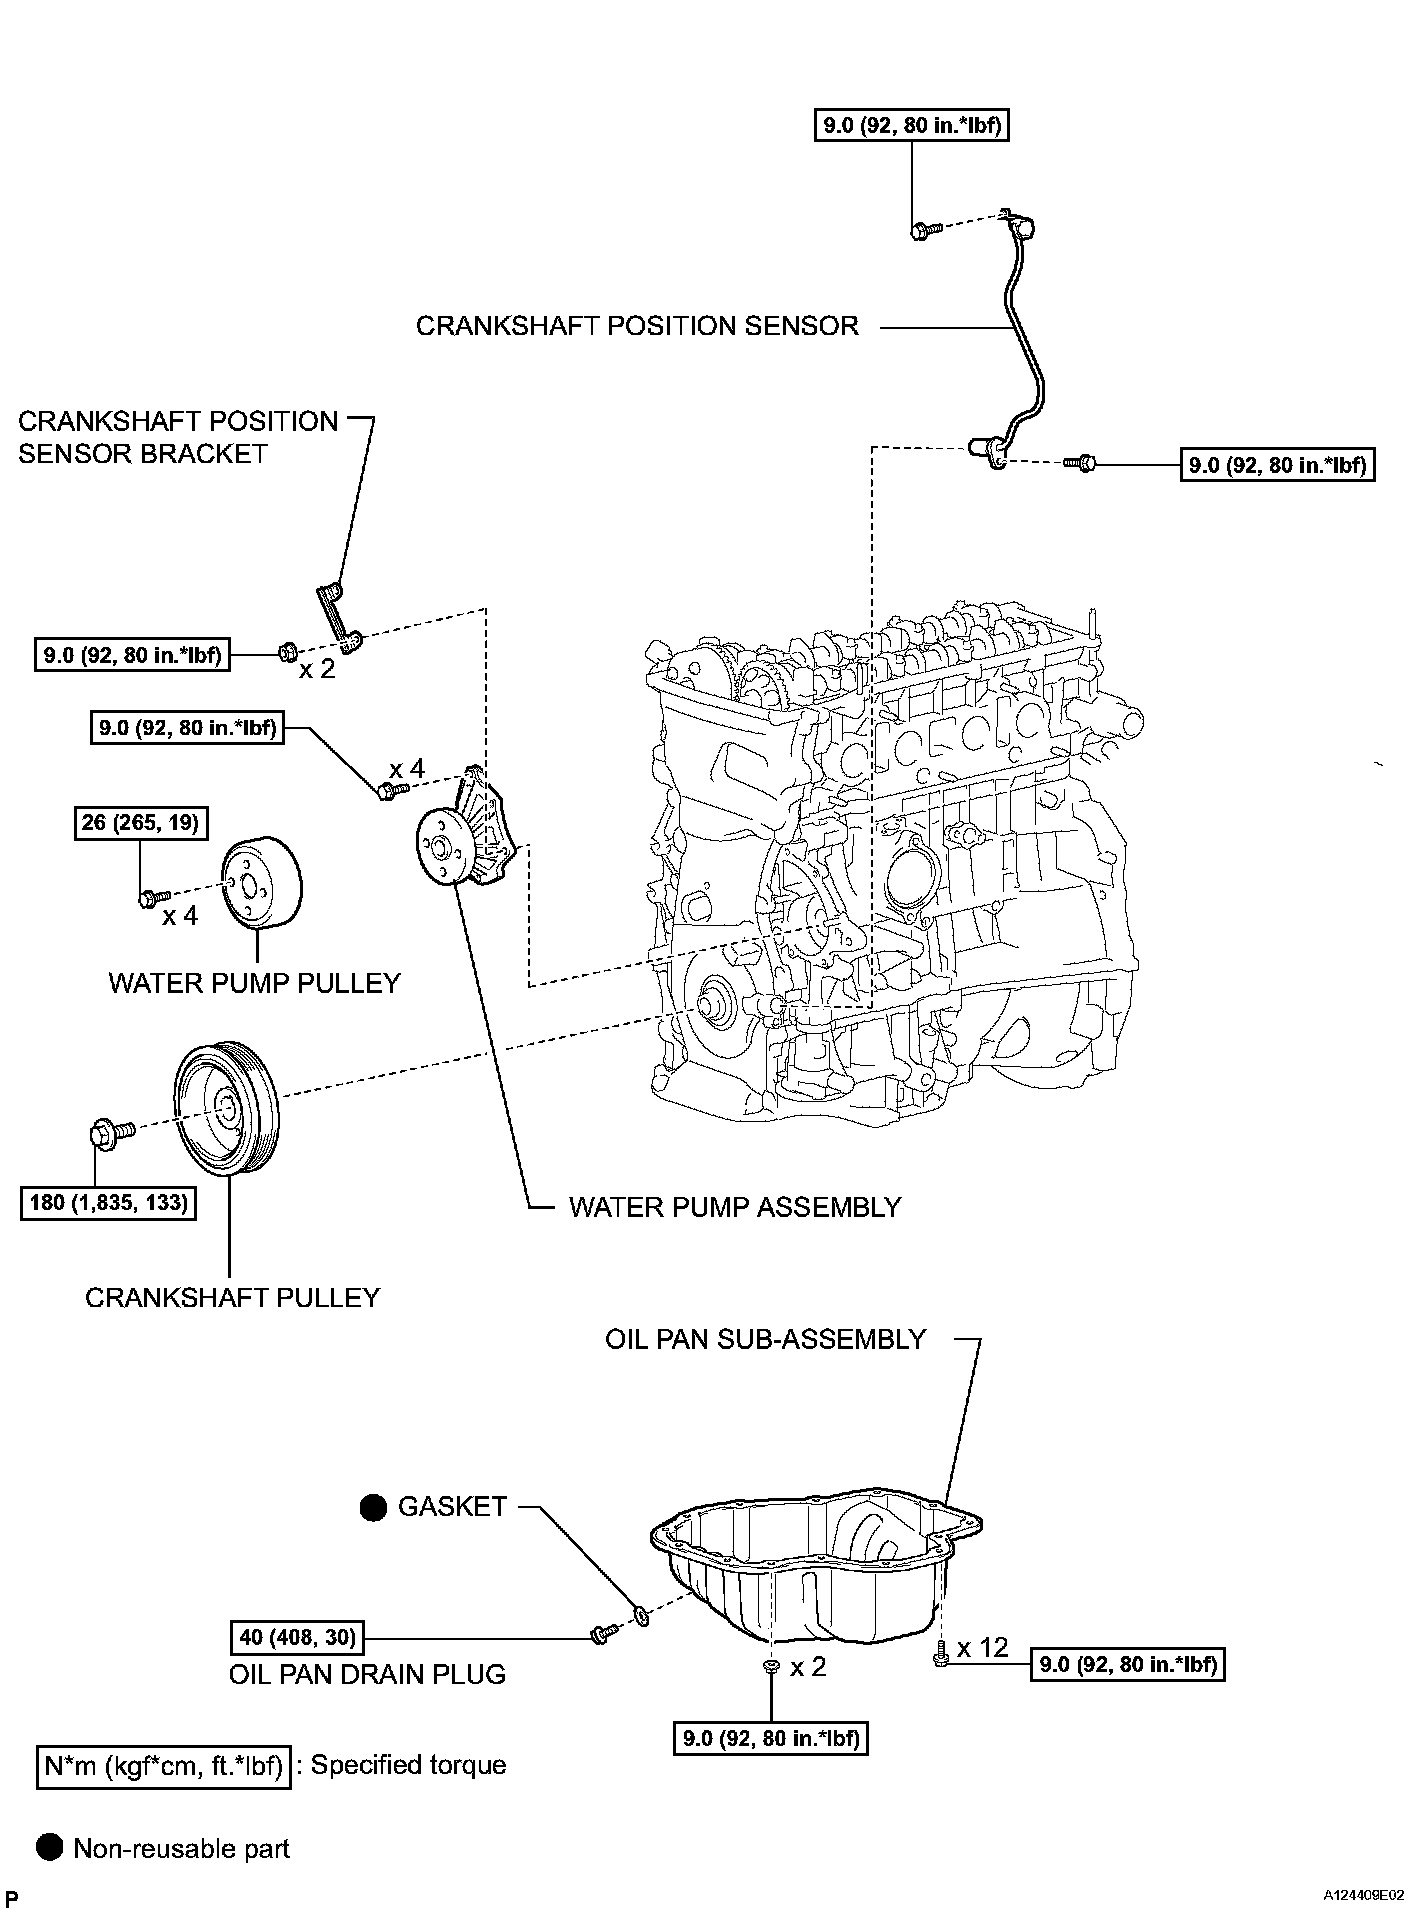
Engine Unit Components:
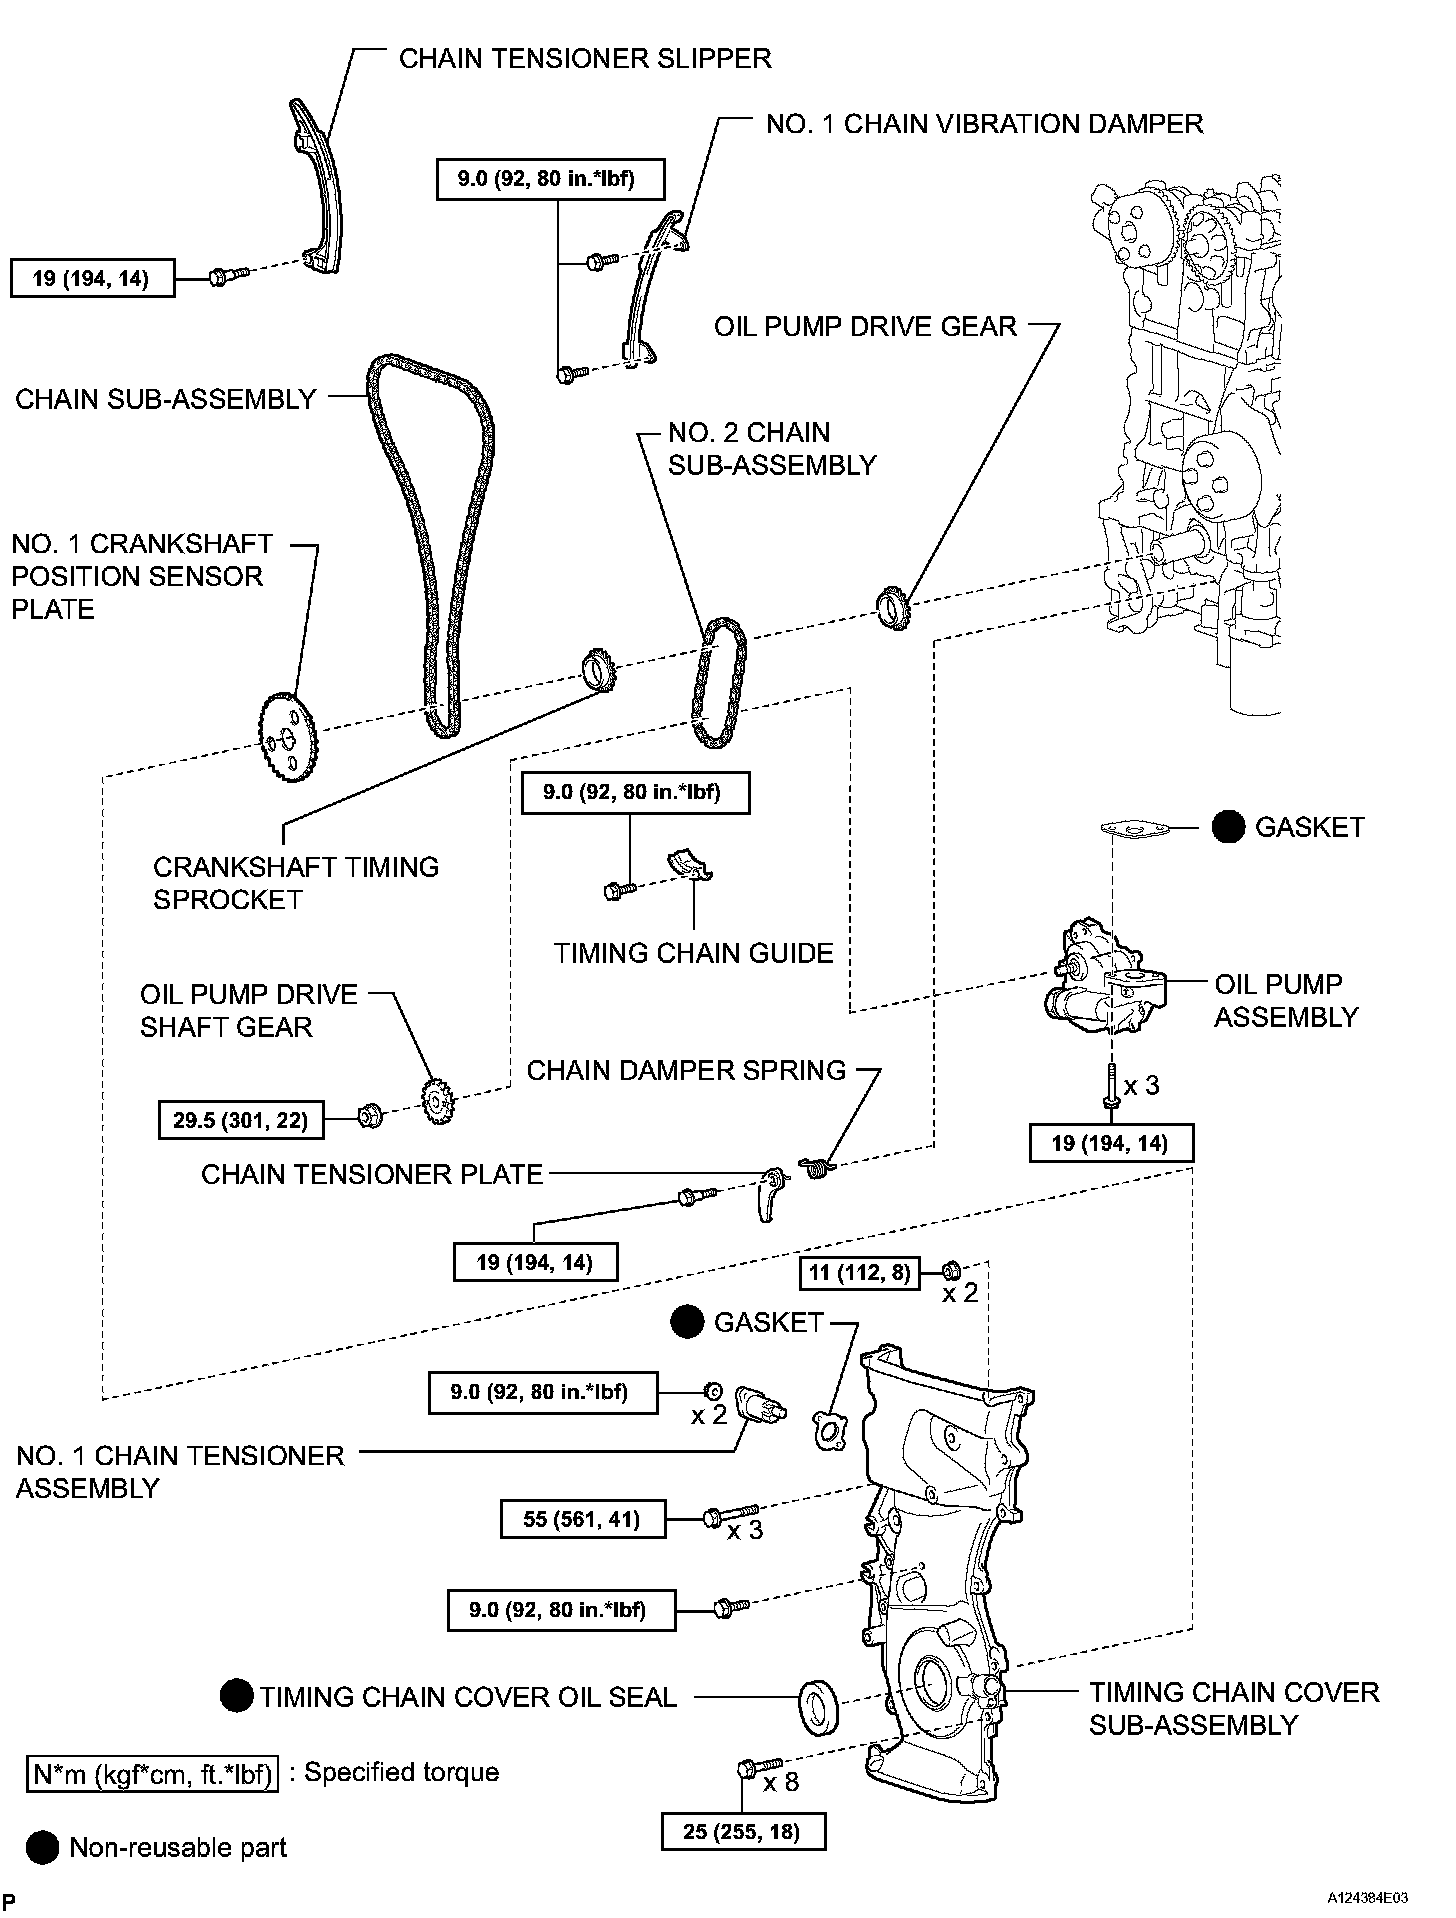
Engine Unit Components:
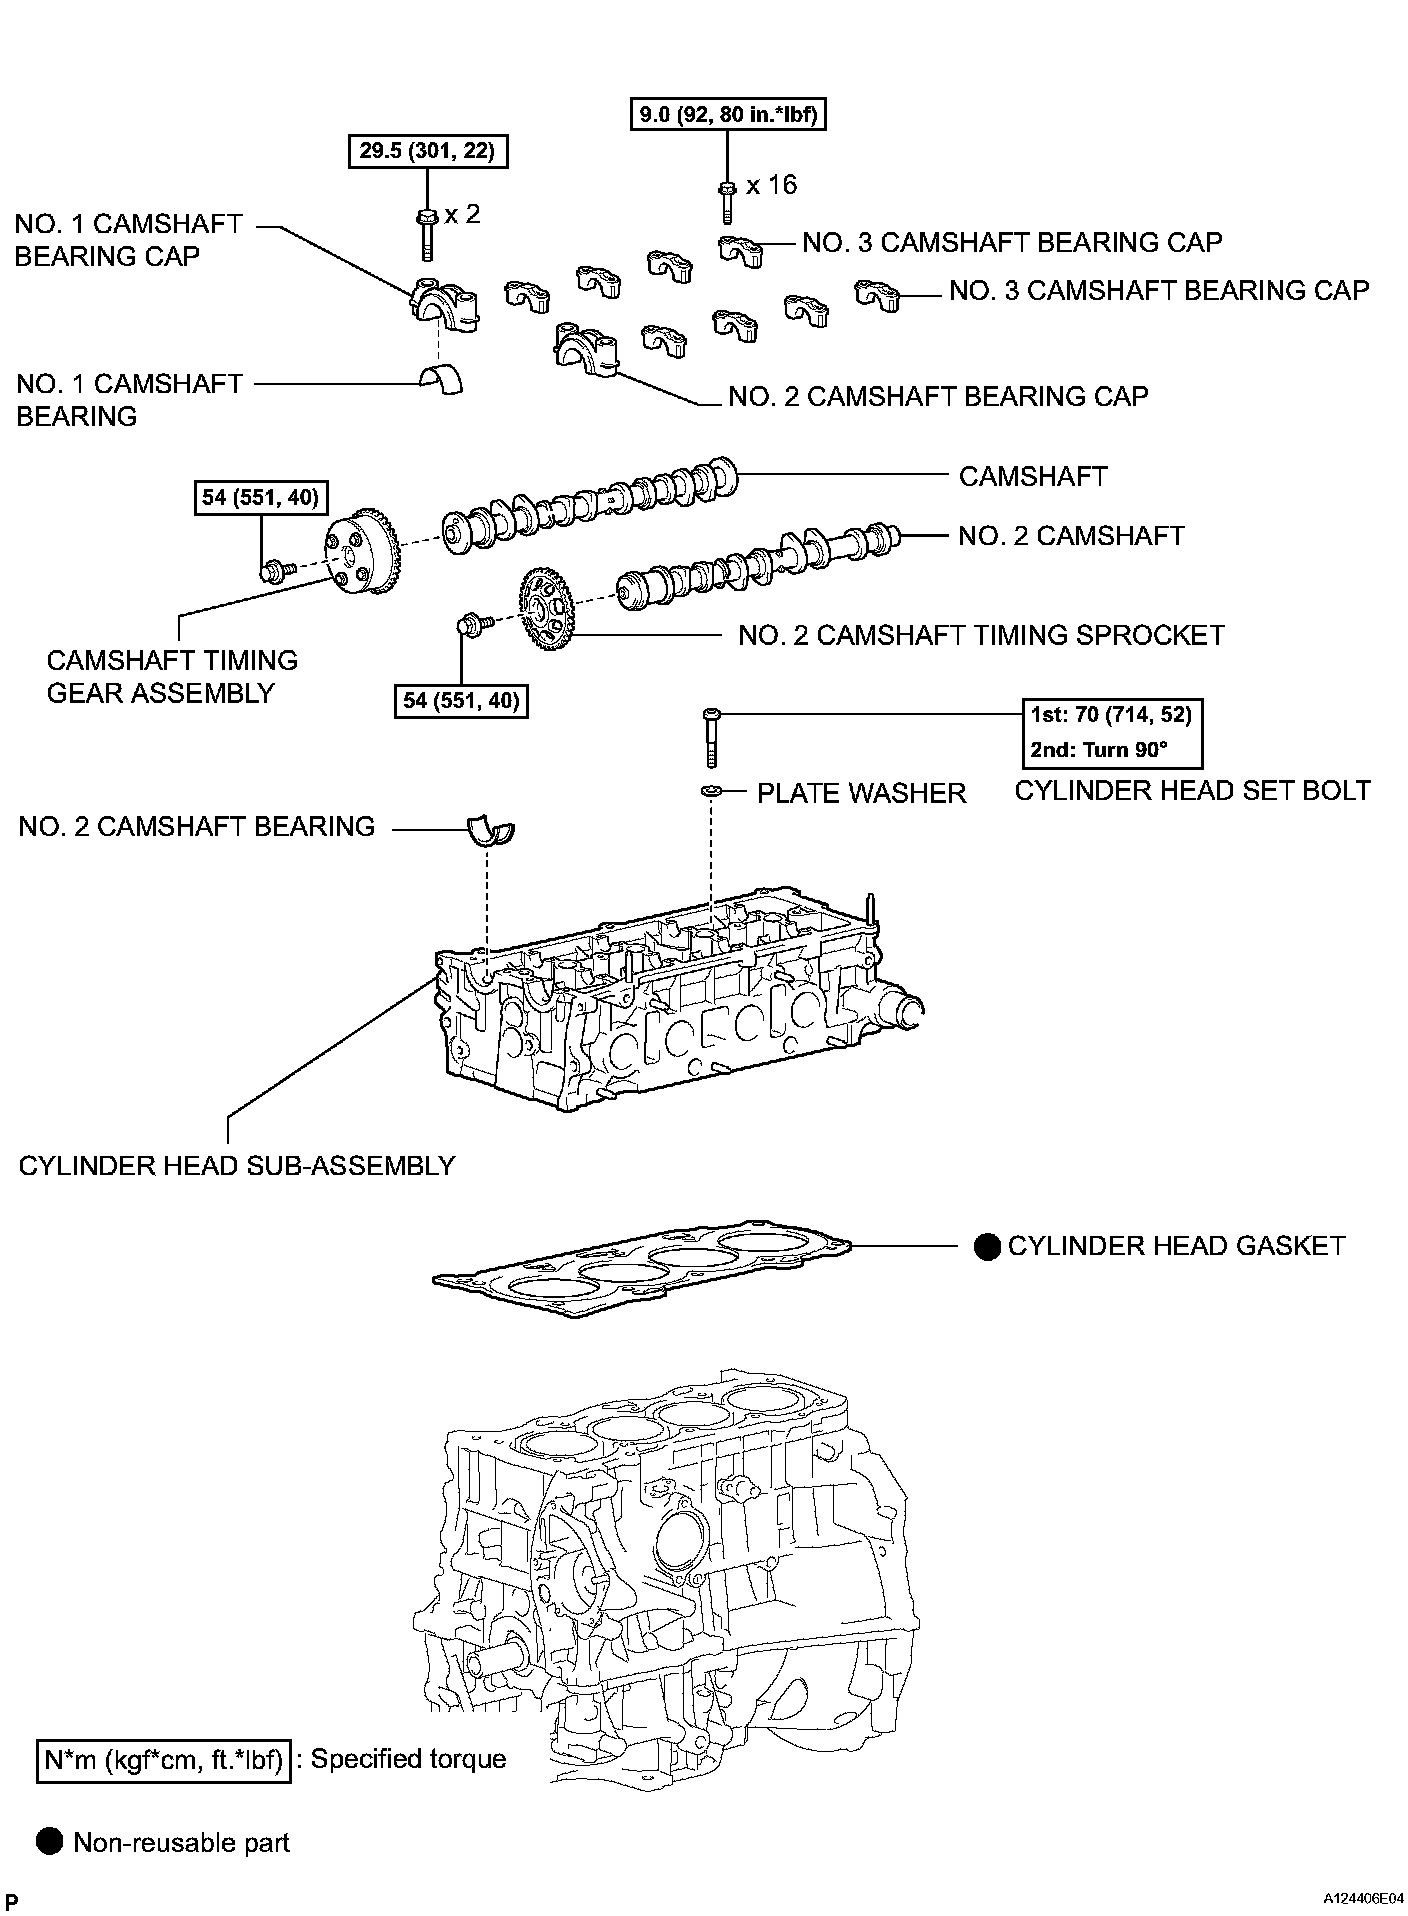
Engine Unit Components:
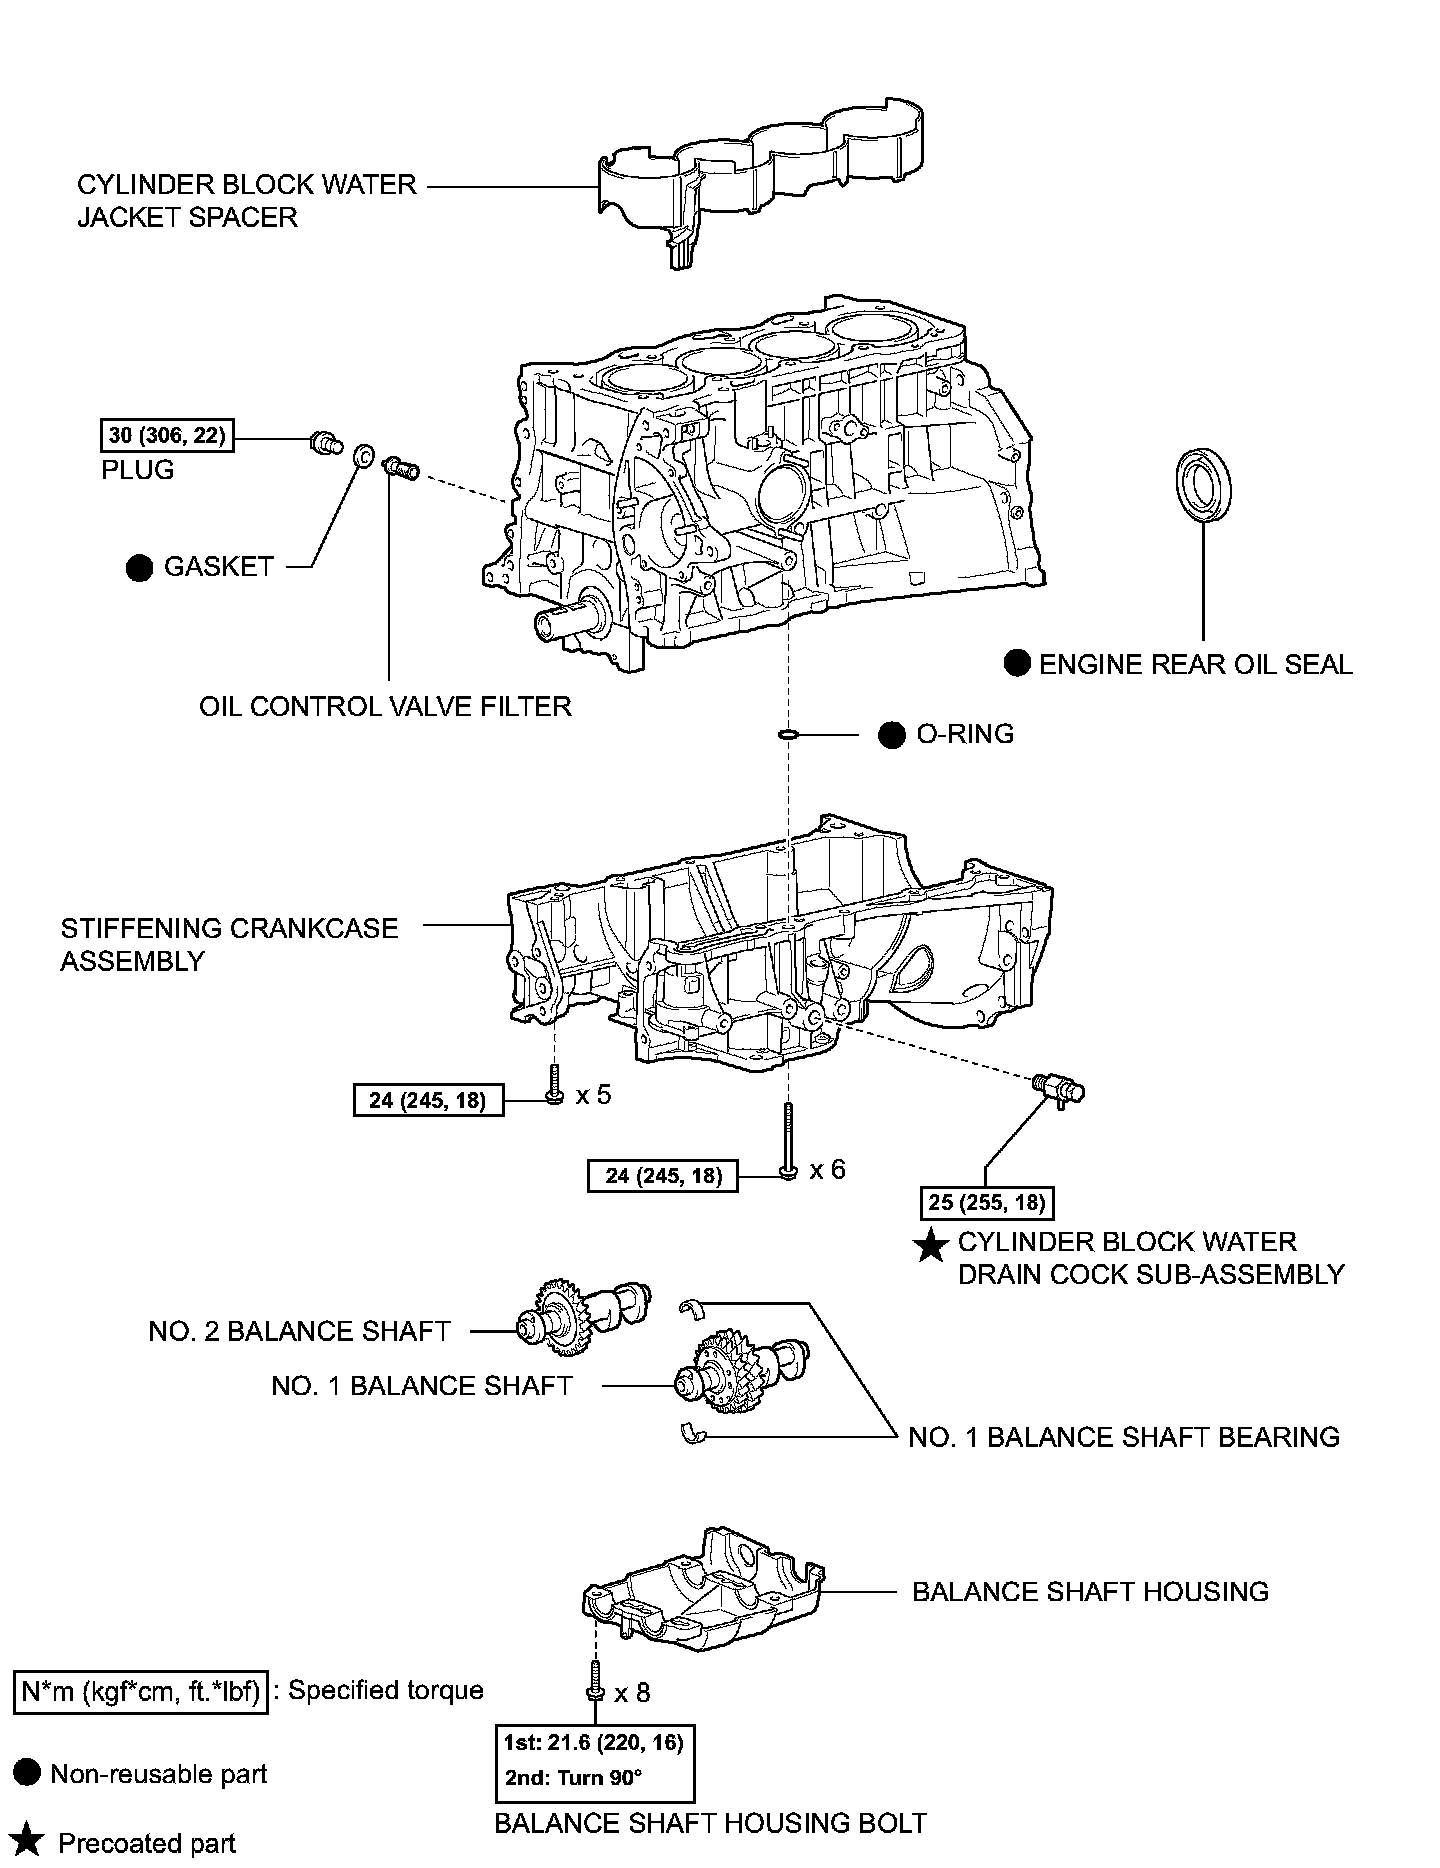
Engine Unit Components:
REASSEMBLY (Continued)
41. INSTALL WATER PUMP PULLEY
42. INSTALL CRANKSHAFT POSITION SENSOR
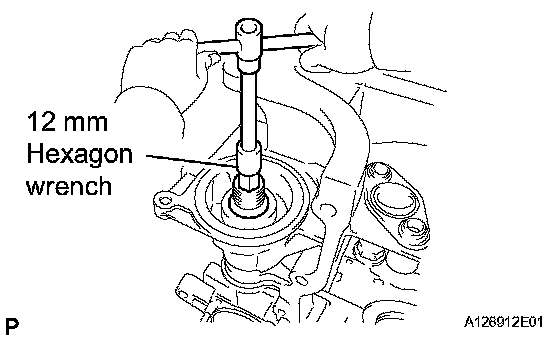
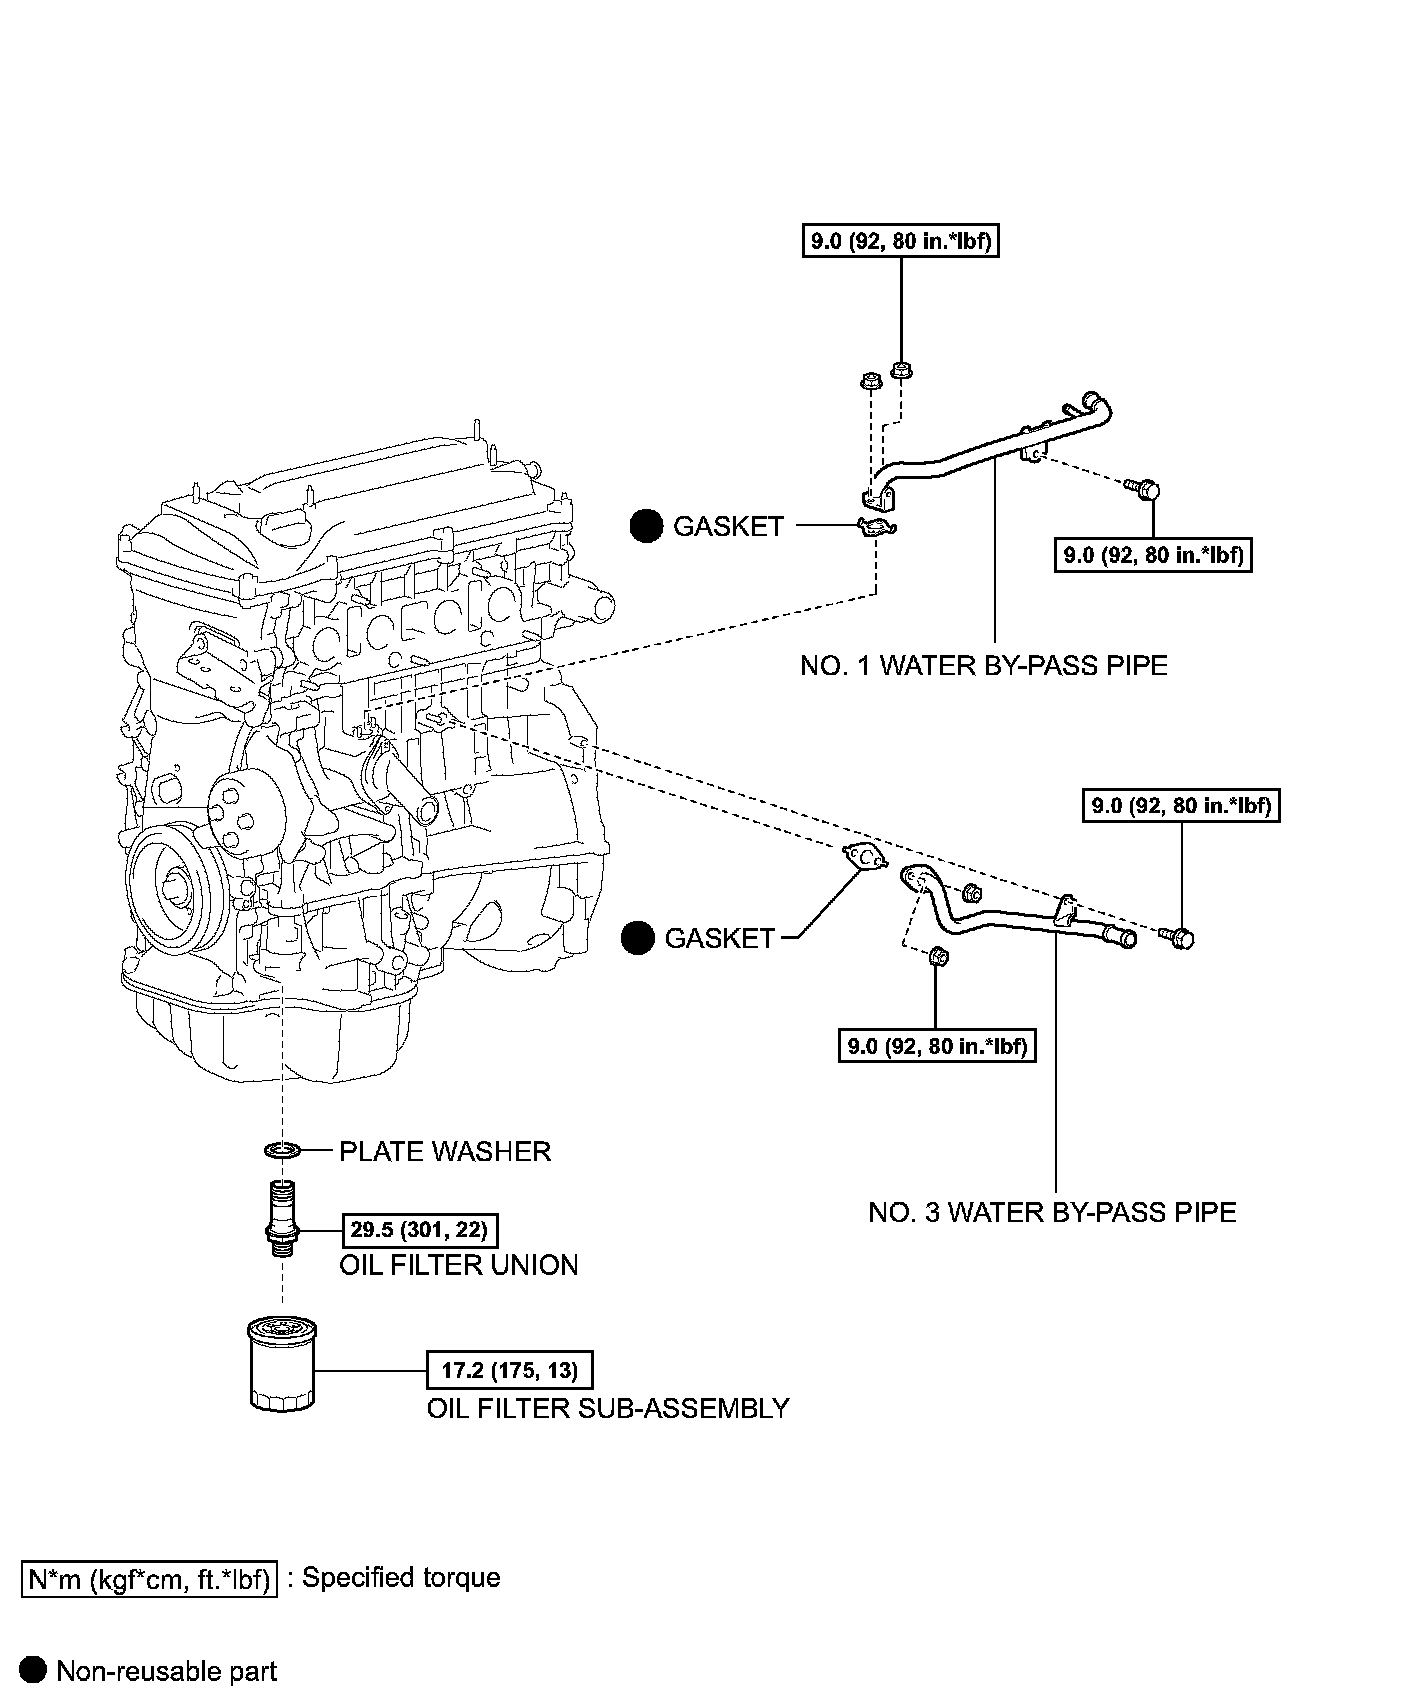
43. INSTALL OIL FILTER UNION
a. Using a 12 mm hexagon wrench, install the oil filter union.
Torque: 29.5 Nm (301 kgf-cm, 22 ft. lbs.)
44. INSTALL OIL FILTER SUB-ASSEMBLY
45. SET NO. 1 CYLINDER TO TDC/COMPRESSION
46. CHECK VALVE CLEARANCE
47. ADJUST VALVE CLEARANCE
48. INSTALL CAMSHAFT
49. INSTALL NO. 2 CAMSHAFT
50. INSTALL NO. 1 CHAIN TENSIONER ASSEMBLY
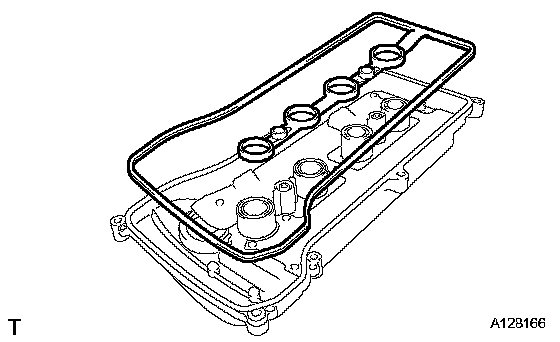
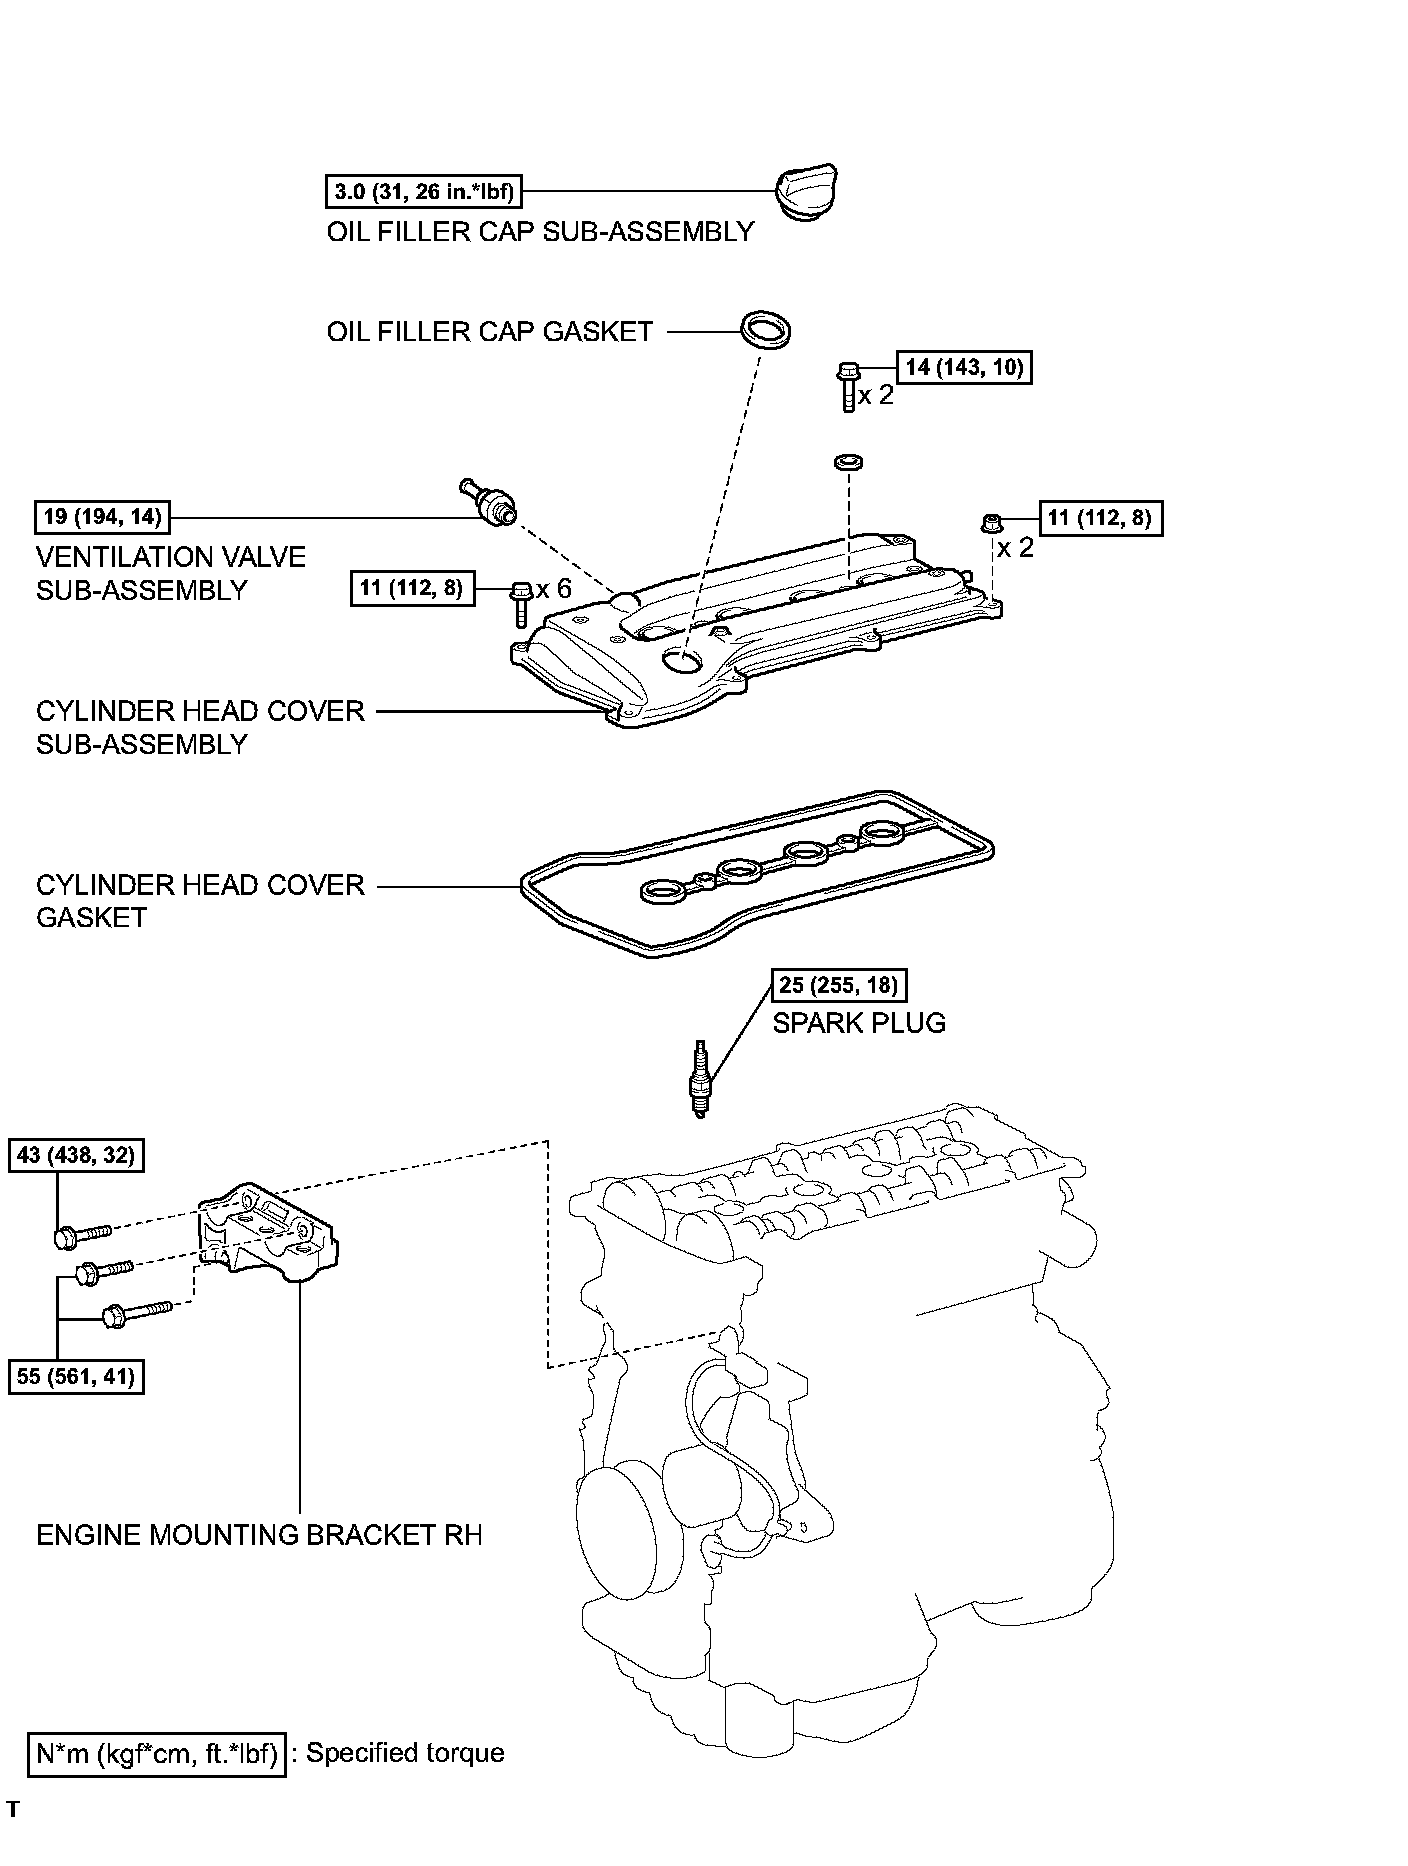
51. INSTALL CYLINDER HEAD COVER GASKET
a. Install the gasket onto the cylinder head cover.
52. INSTALL CYLINDER HEAD COVER SUB-ASSEMBLY
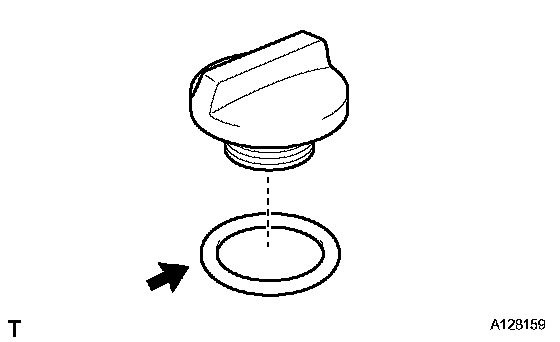
53. INSTALL OIL FILLER CAP SUB-ASSEMBLY
a. Install the gasket to the cap.
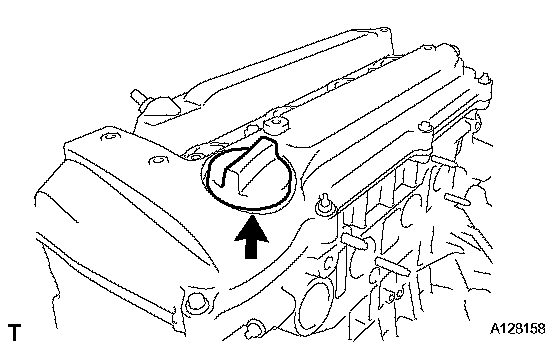
b. Install the oil filler cap.
Torque: 3.0 Nm (31 kgf-cm, 26 inch lbs.)
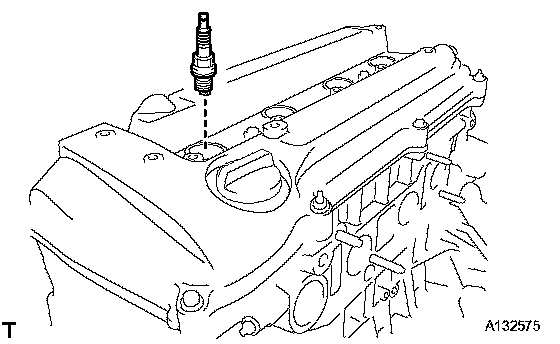
54. INSTALL SPARK PLUG
Torque: 25 Nm (254 kgf-cm, 18 ft. lbs.)
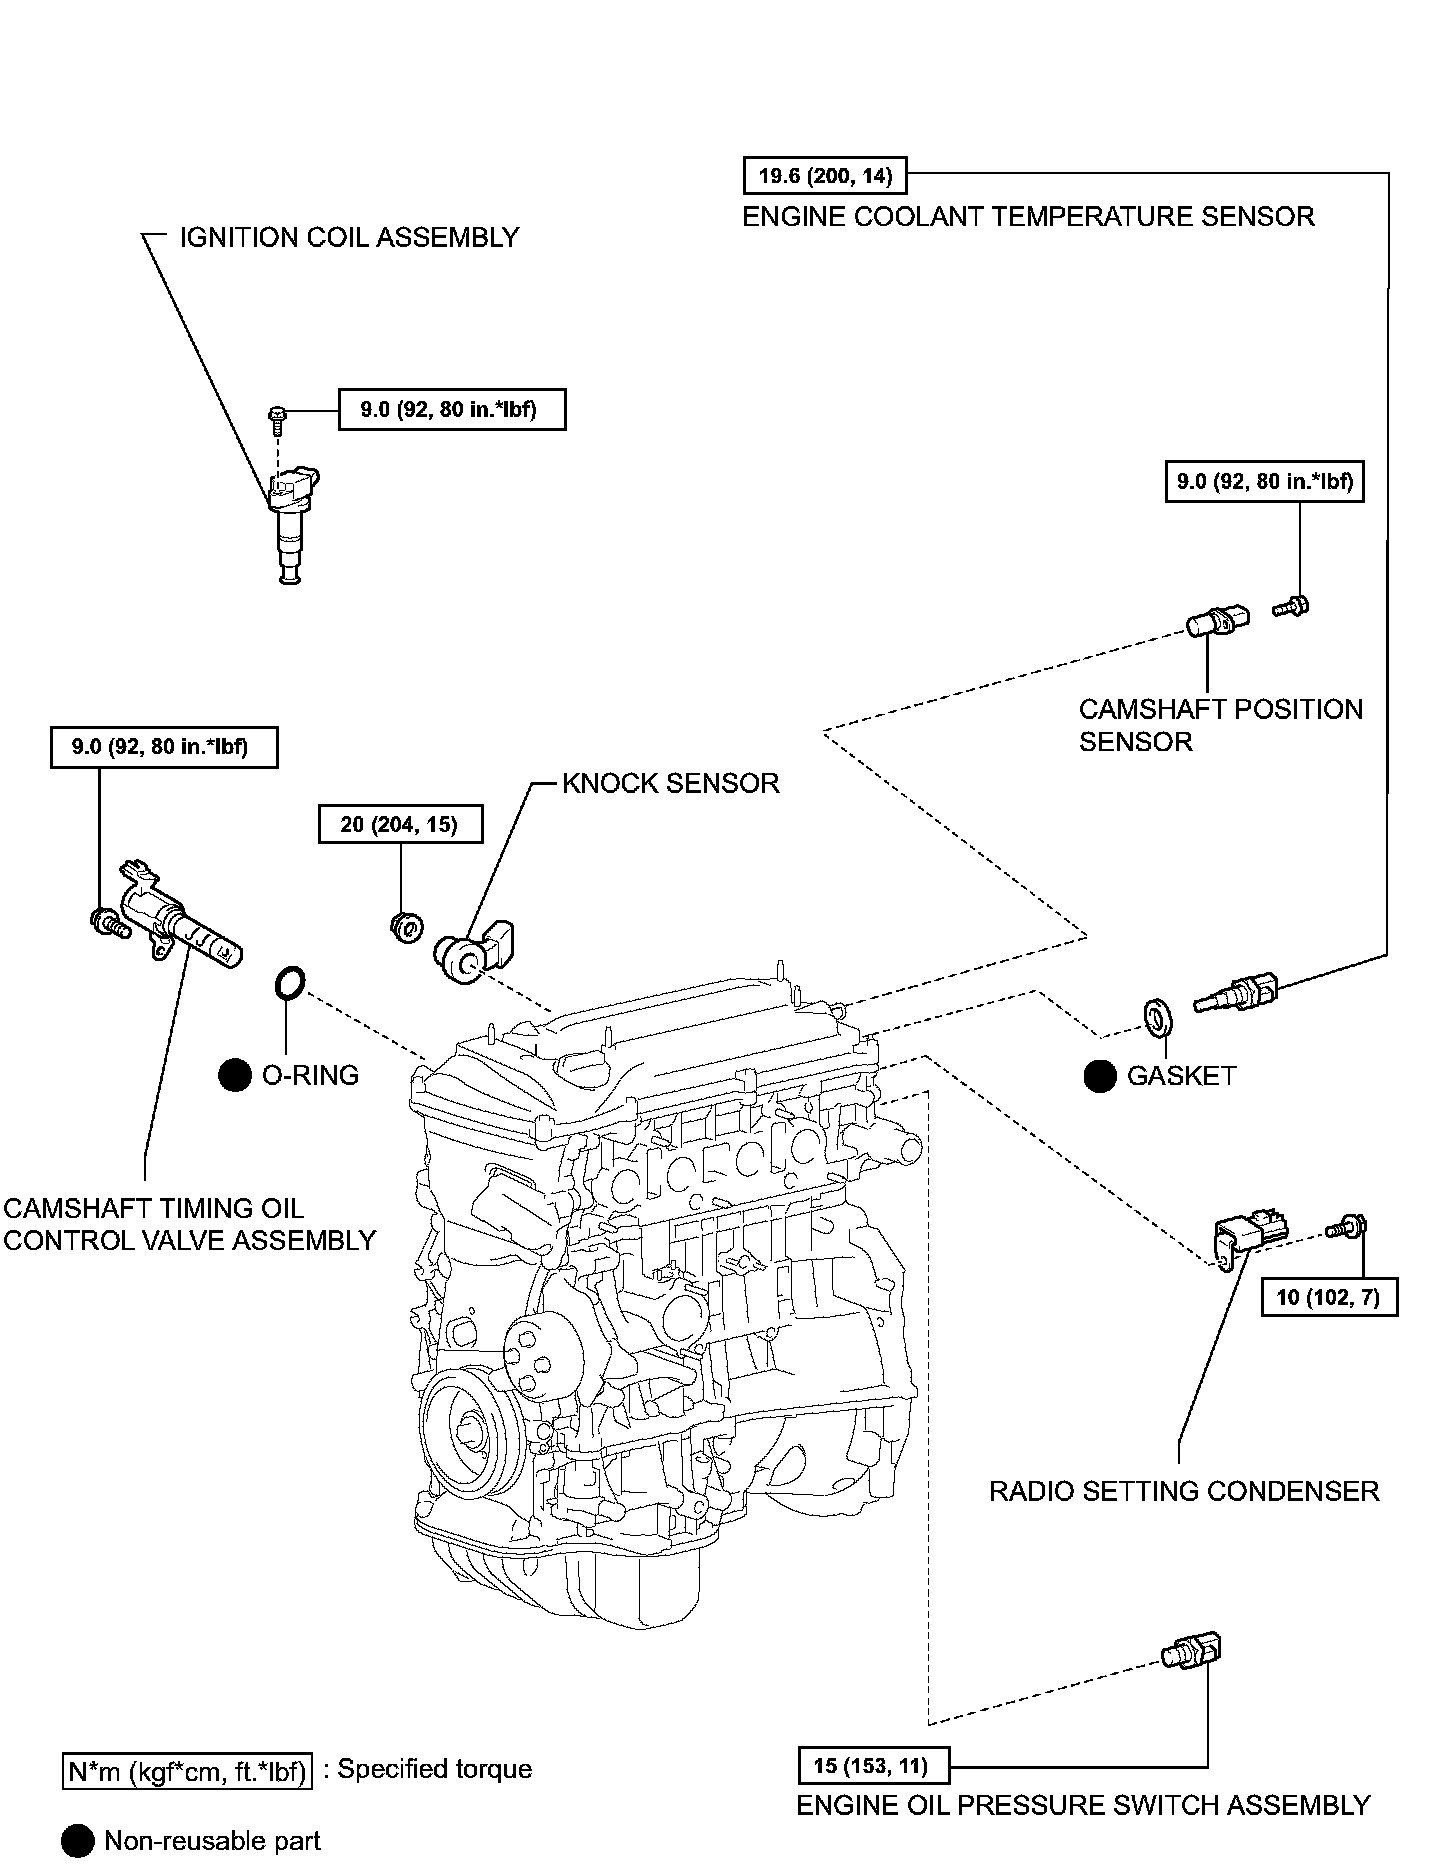
55. INSTALL IGNITION COIL ASSEMBLY
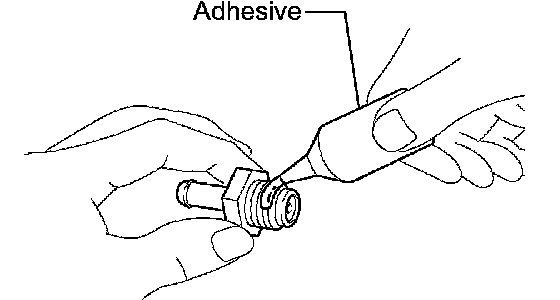
56. INSTALL VENTILATION VALVE SUB-ASSEMBLY
a. Apply adhesive to the threads of the ventilation valve.
Adhesive: Toyota Genuine Adhesive 1324, Three Bond 1324 or equivalent
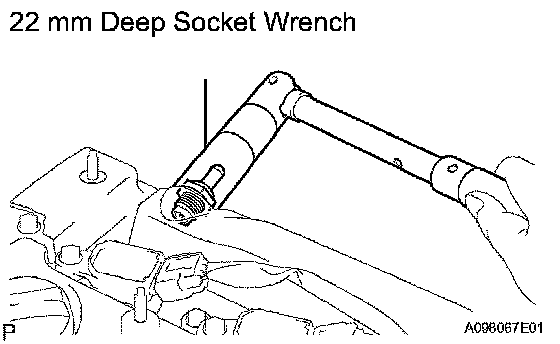
b. Using a 22 mm deep socket wrench, install the ventilation valve.
Torque: 19 Nm (194 kgf-cm, 14 ft. lbs.)
57. INSTALL OIL DIPSTICK GUIDE
58. INSTALL OIL DIPSTICK
59. INSTALL CAMSHAFT POSITION SENSOR
60. INSTALL ENGINE COOLANT TEMPERATURE SENSOR
61. INSTALL OIL PRESSURE SWITCH ASSEMBLY
62. INSTALL RADIO SETTING CONDENSER
63. INSTALL KNOCK SENSOR
64. INSTALL CAMSHAFT TIMING OIL CONTROL VALVE ASSEMBLY
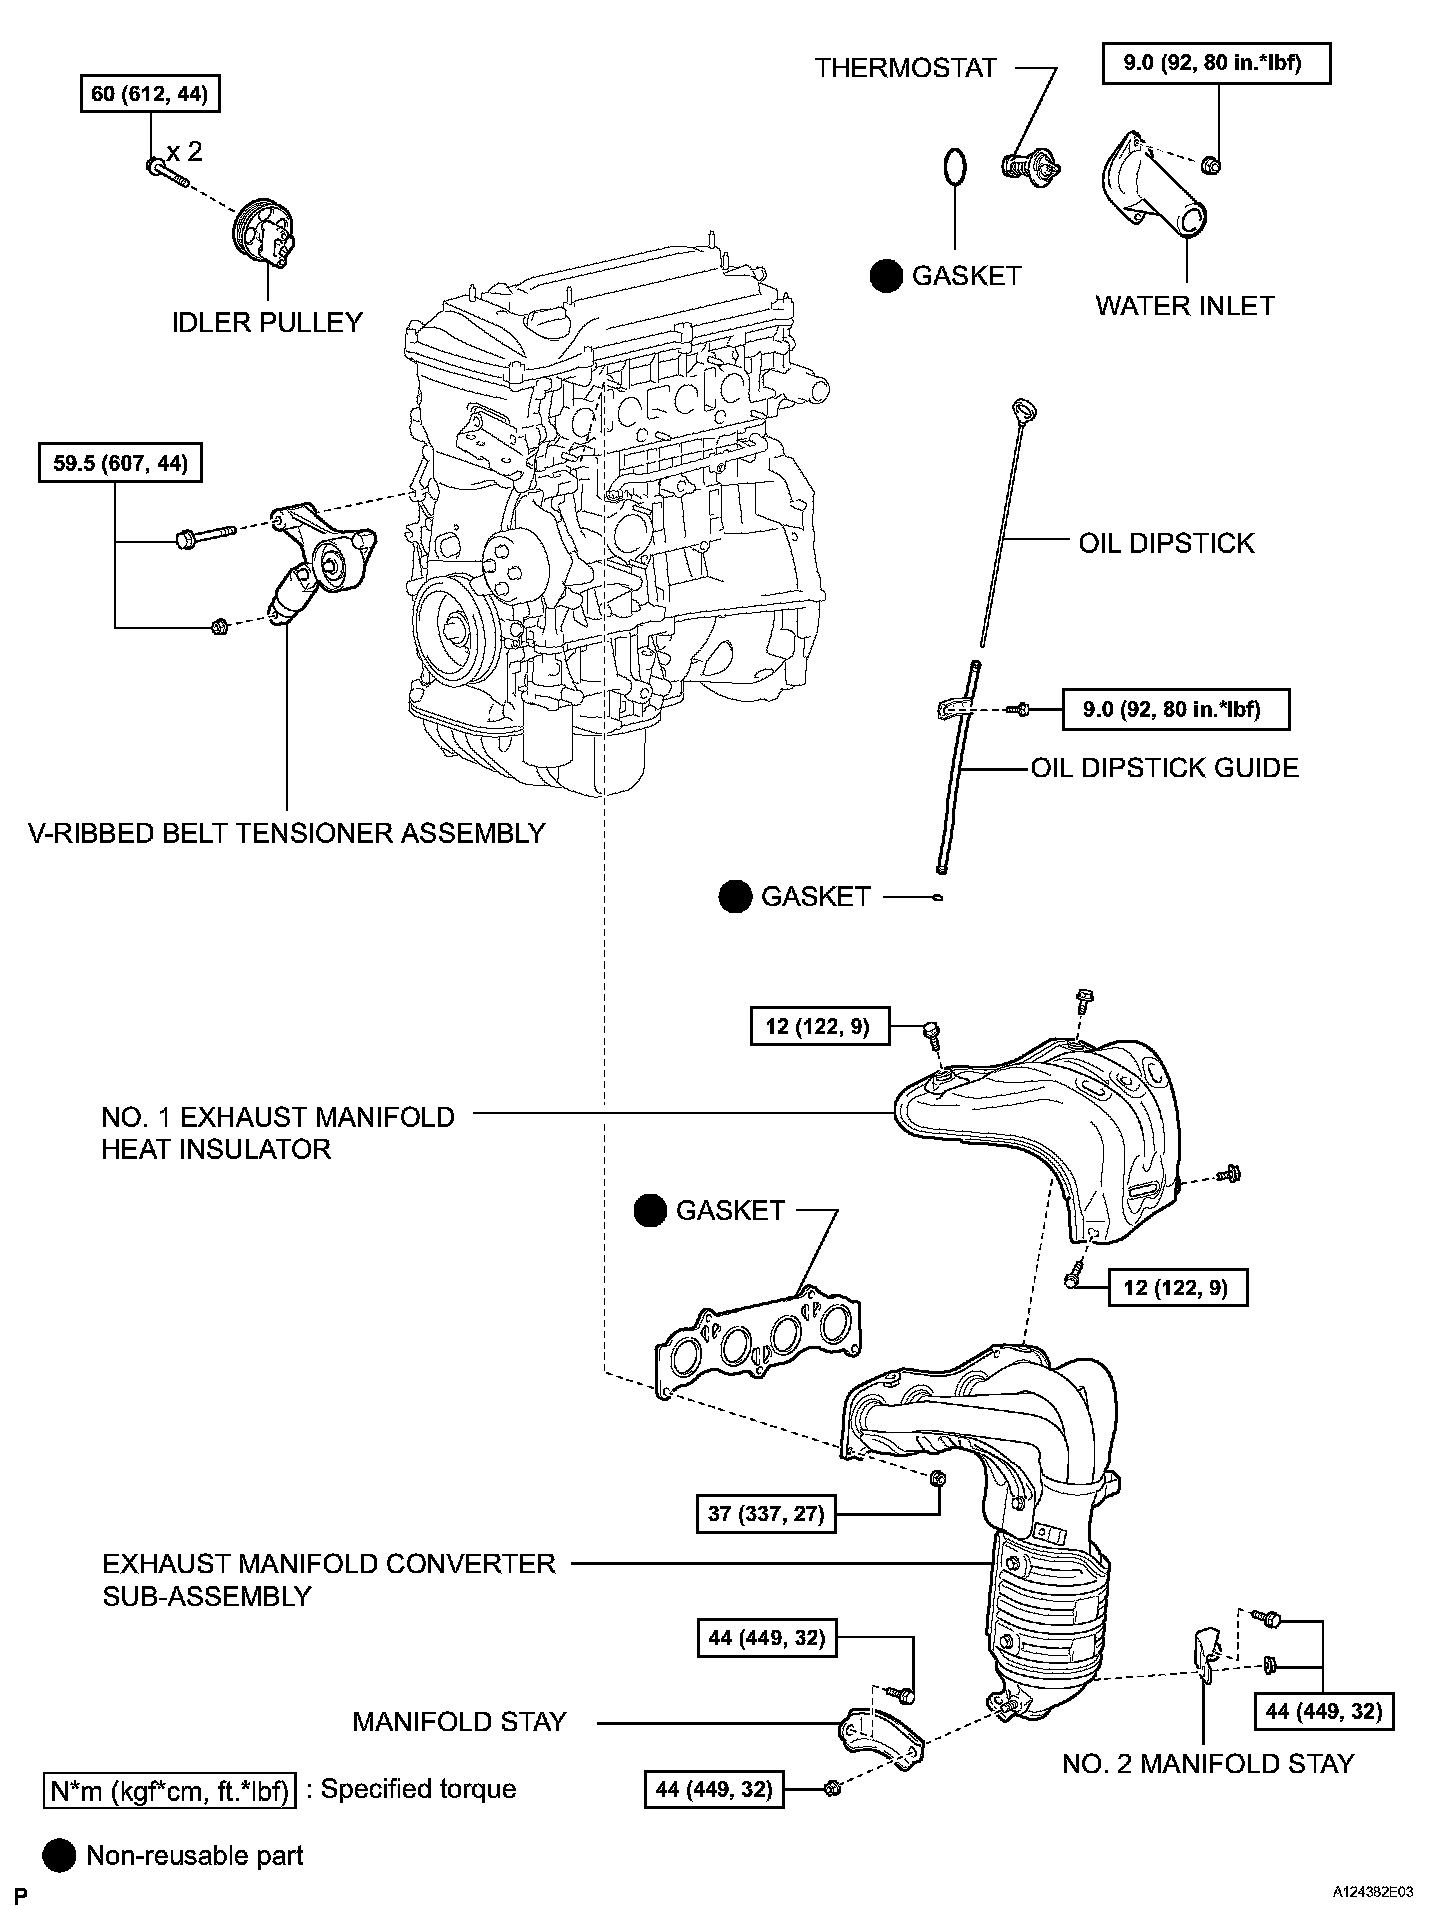
65. INSTALL V-RIBBED BELT TENSIONER ASSEMBLY
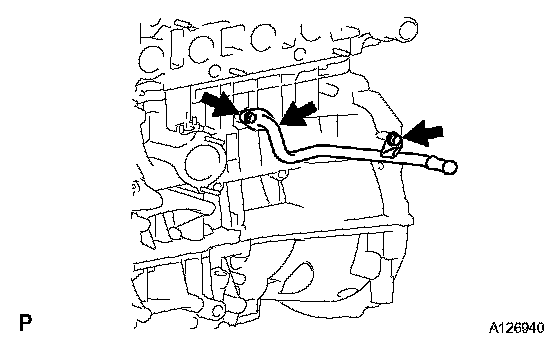
66. INSTALL NO. 3 WATER BY-PASS PIPE
a. Install a new gasket and pipe with the bolt and 2 nuts.
Torque: 9.0 Nm (92 kgf-cm, 80 inch lbs.)
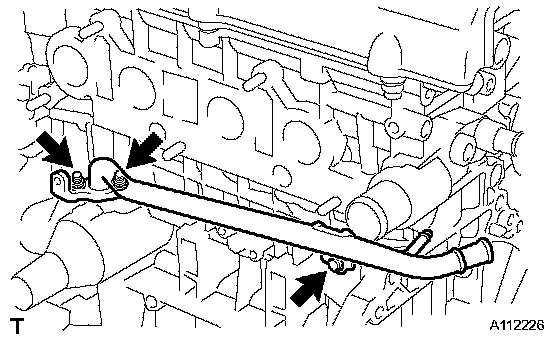
67. INSTALL NO. 1 WATER BY-PASS PIPE
a. Install anew gasket and the pipe with the bolt and 2 nuts.
Torque: 9.0 Nm (92 kgf-cm, 80 inch lbs.)
68. INSTALL THERMOSTAT
69. INSTALL WATER INLET
70. INSTALL EXHAUST MANIFOLD CONVERTER SUB-ASSEMBLY
71. INSTALL NO. 1 EXHAUST MANIFOLD HEAT INSULATOR
72. INSTALL NO. 2 MANIFOLD STAY
73. INSTALL MANIFOLD STAY
74. INSTALL IDLER PULLEY