Part 3
ENGINE ASSEMBLYCOMPONENTS:
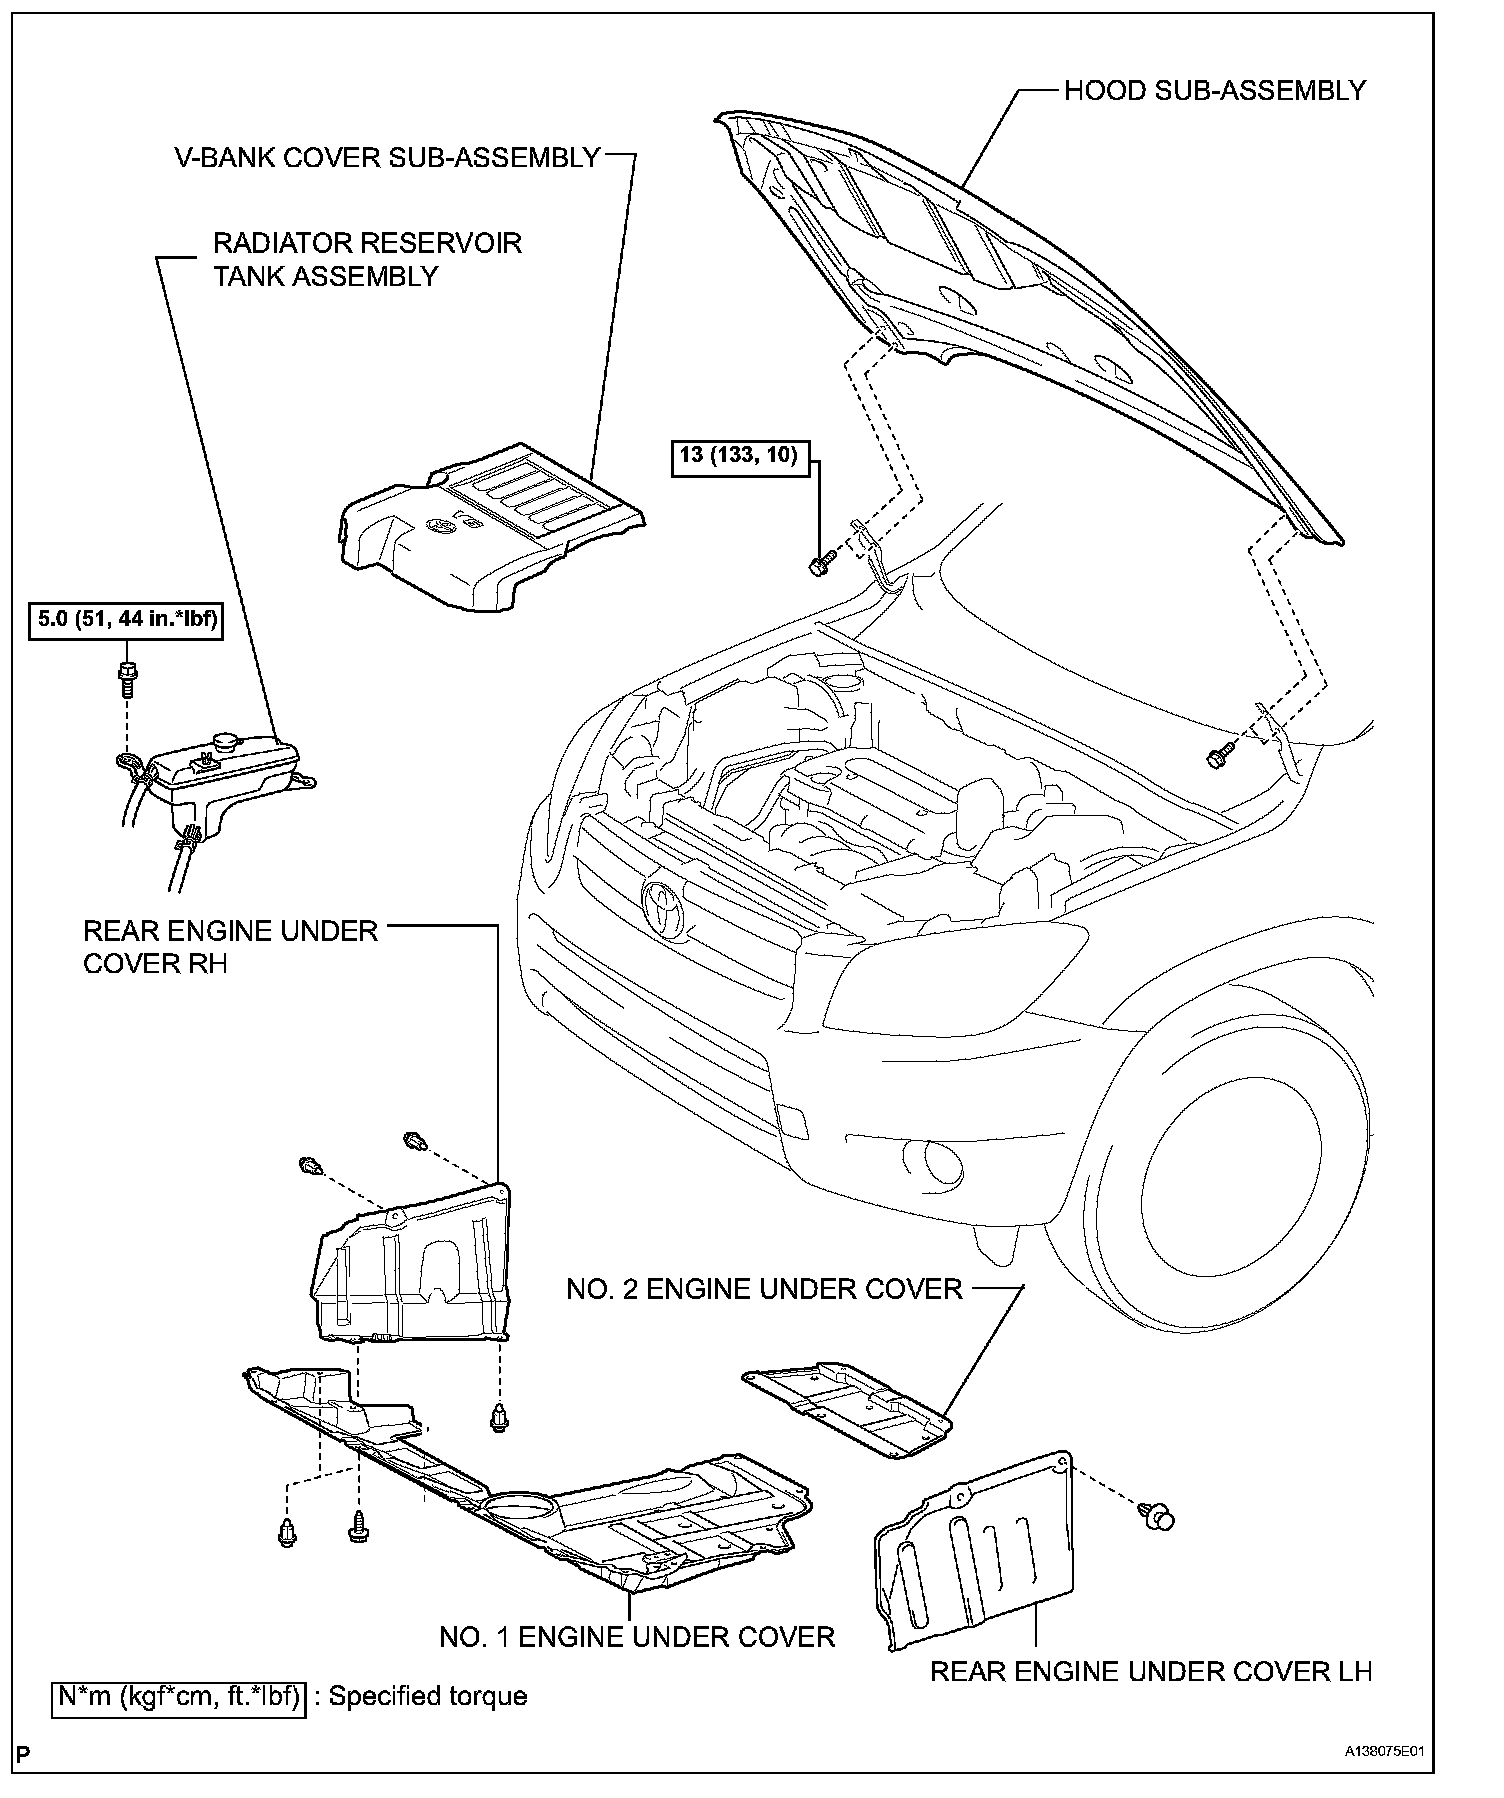
COMPONENTS:
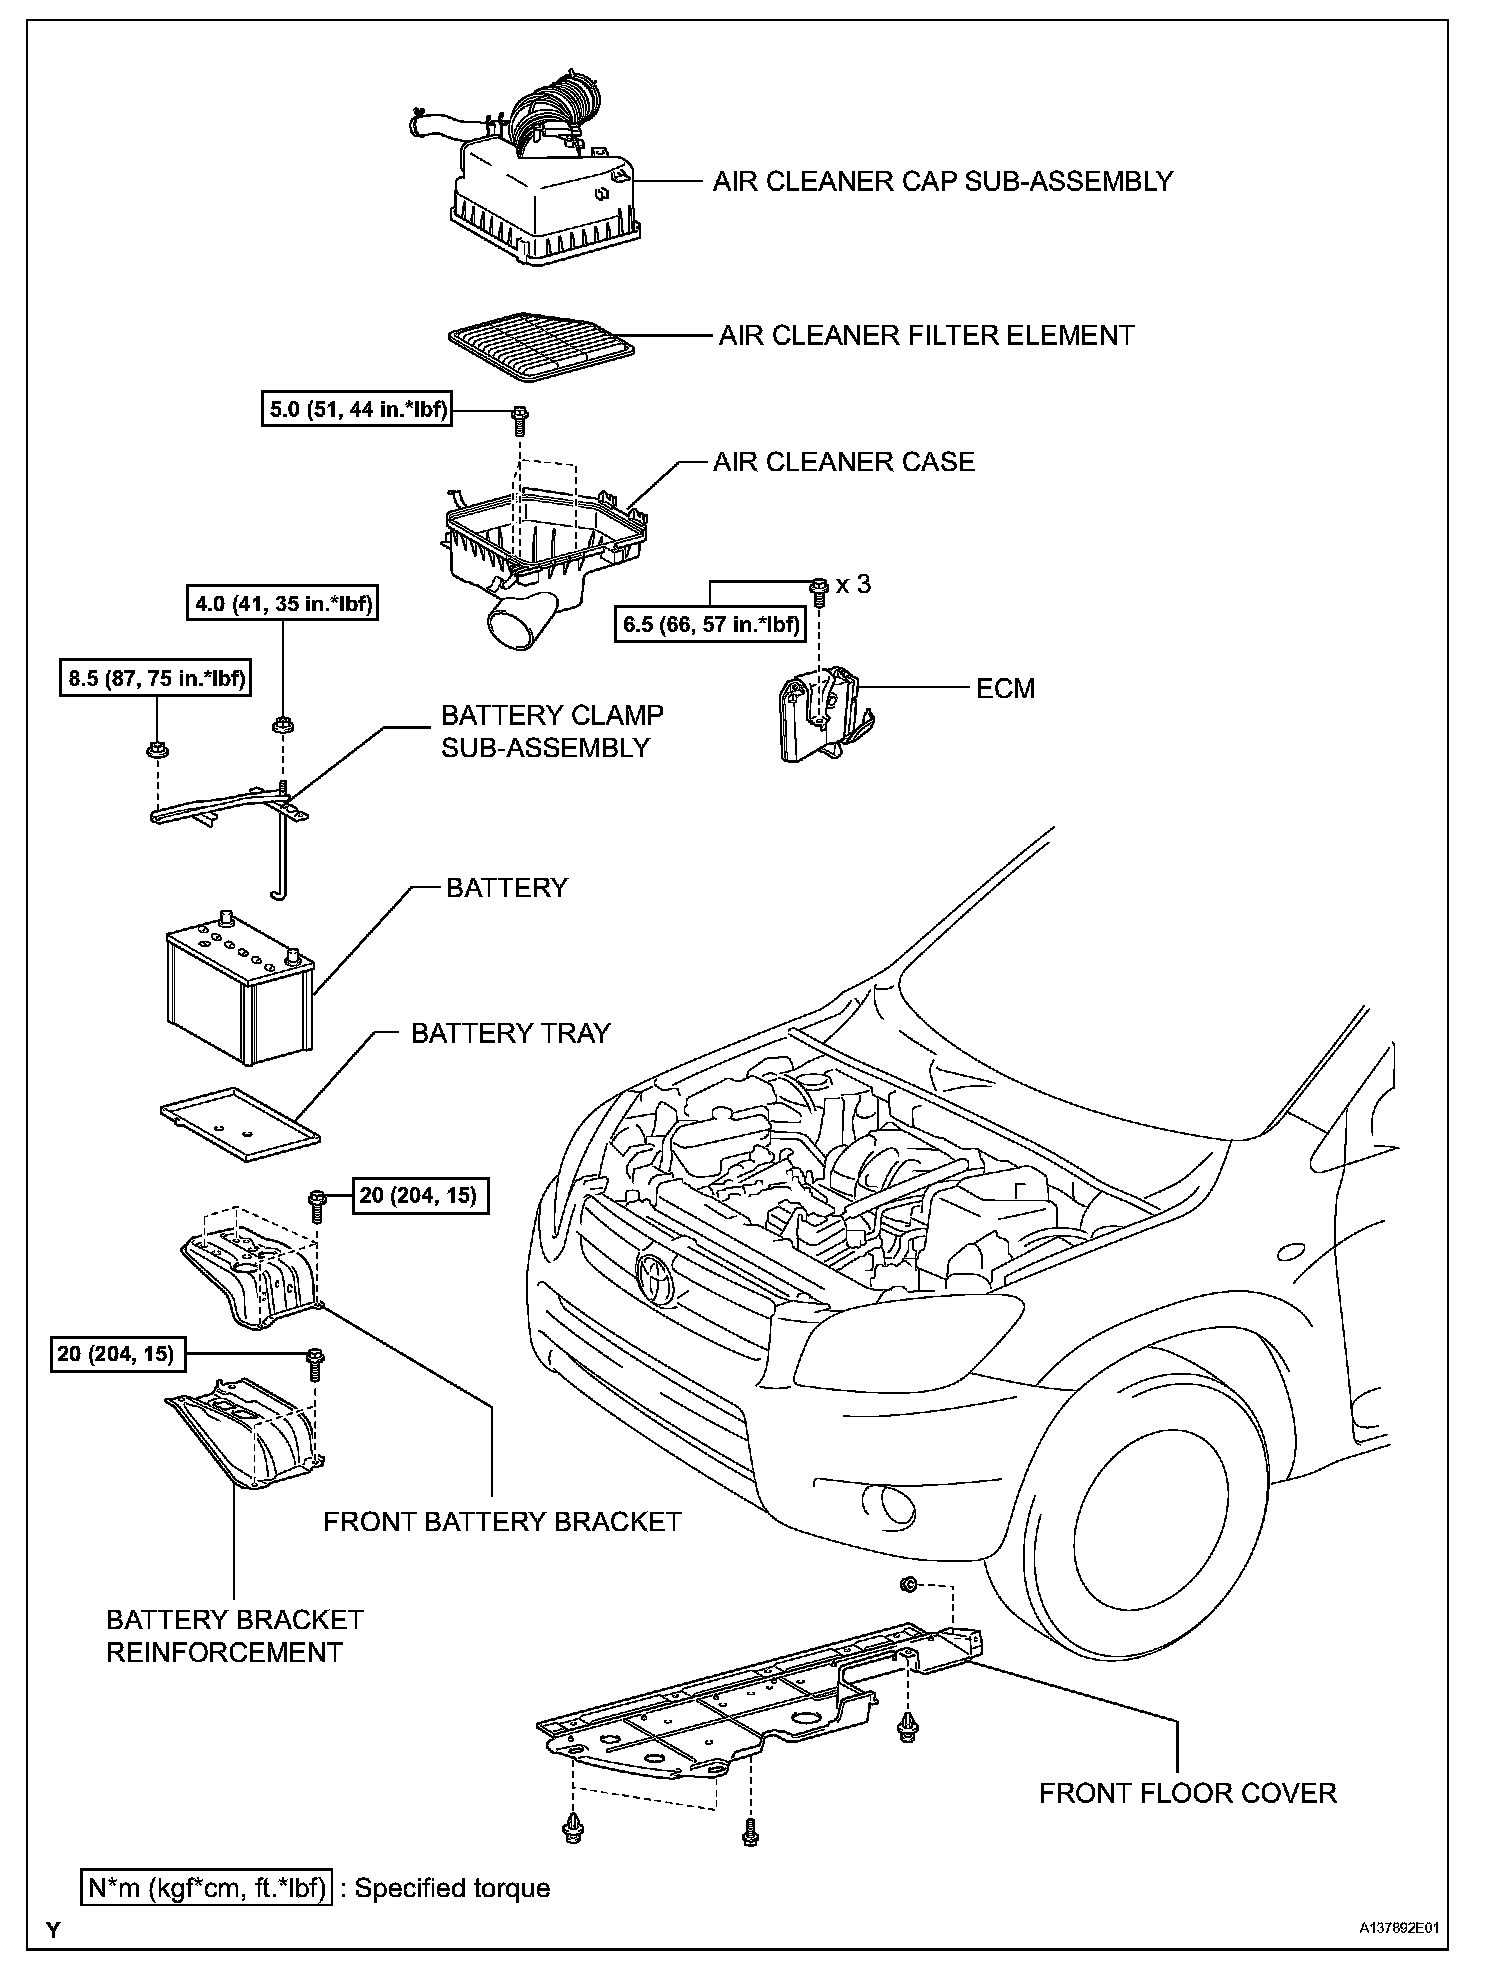
COMPONENTS:
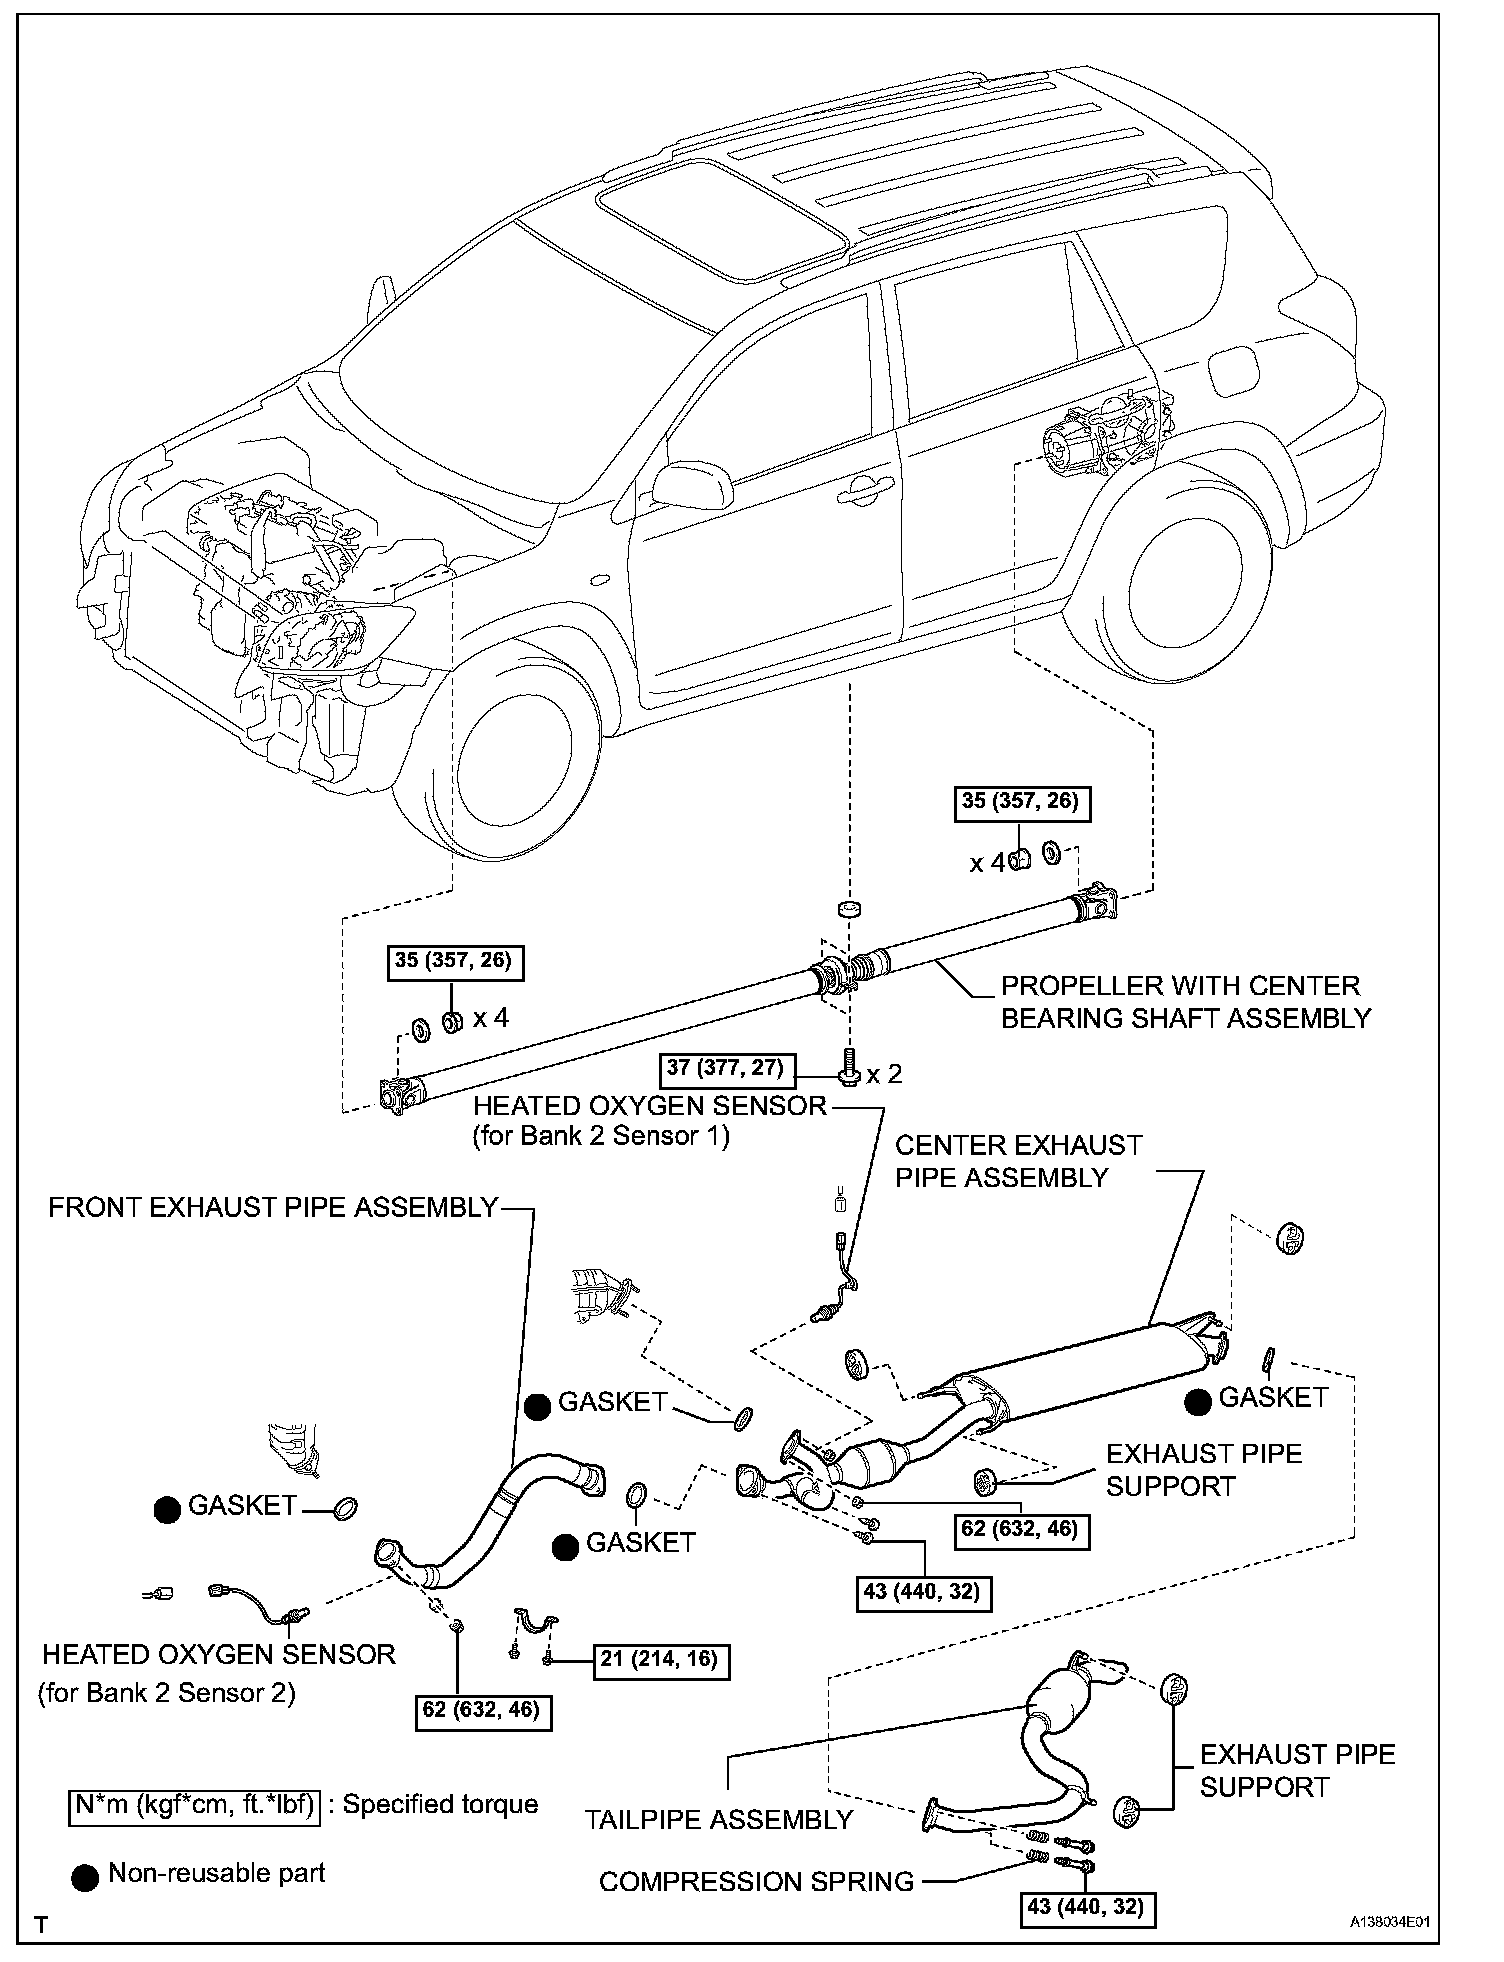
COMPONENTS:
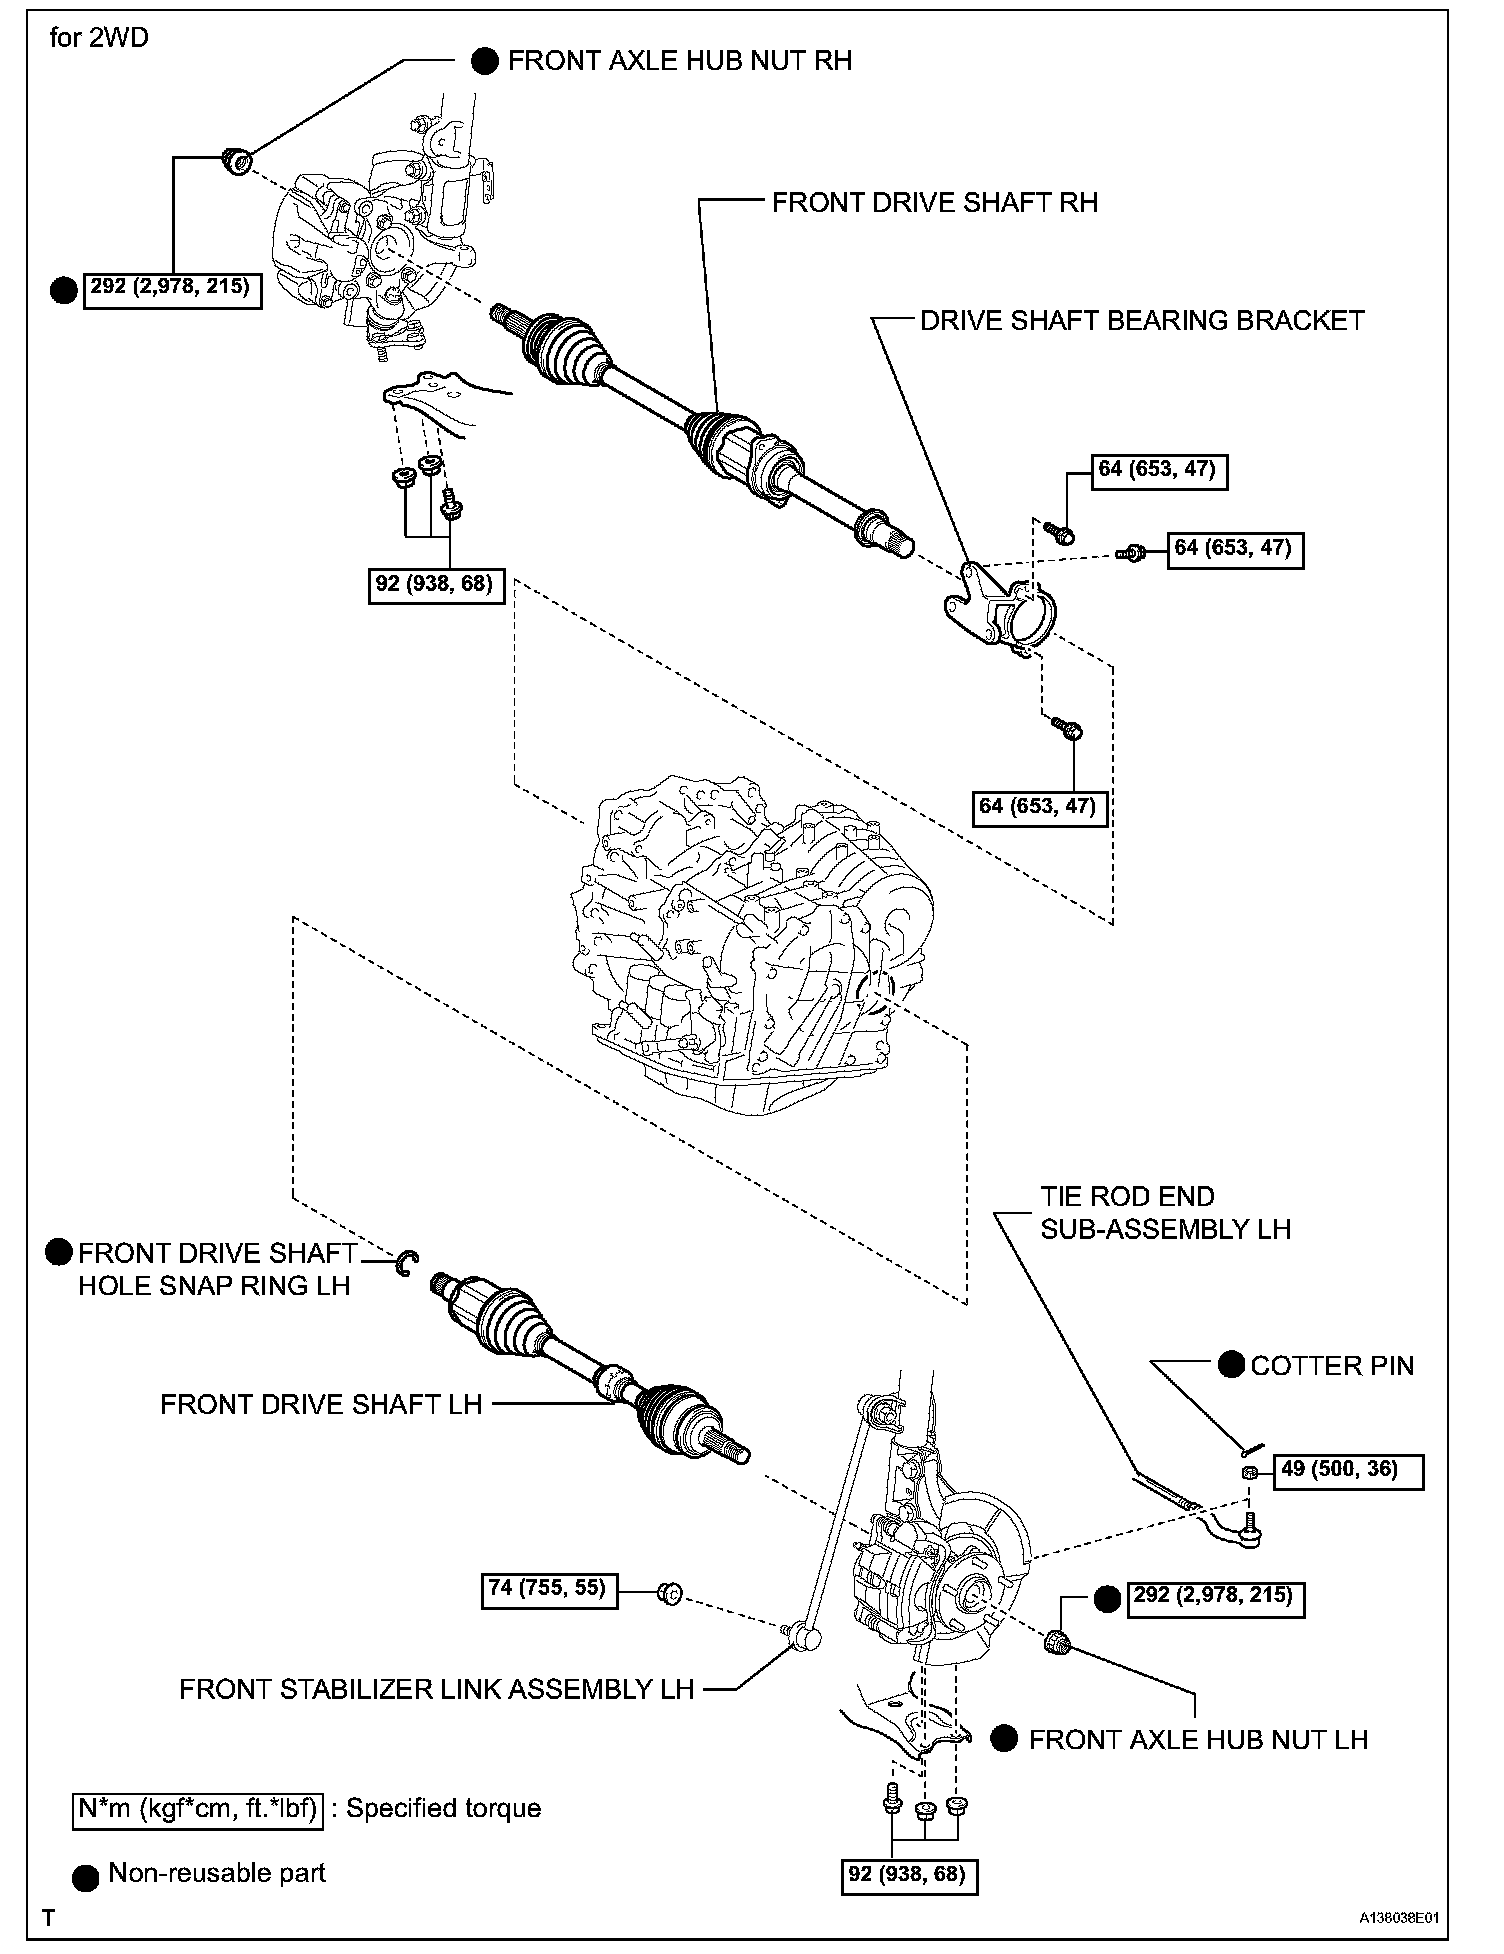
COMPONENTS:
COMPONENTS:
COMPONENTS:
COMPONENTS:
COMPONENTS:
COMPONENTS:
COMPONENTS:
INSTALLATION (STEPS 55-82)
55. INSTALL AIR CLEANER CAP SUB-ASSEMBLY
a. Install the air cleaner filter element onto the air cleaner case.
b. Insert the hinge part of the air cleaner cap into the air cleaner case, then hang the 2 hook clamps.
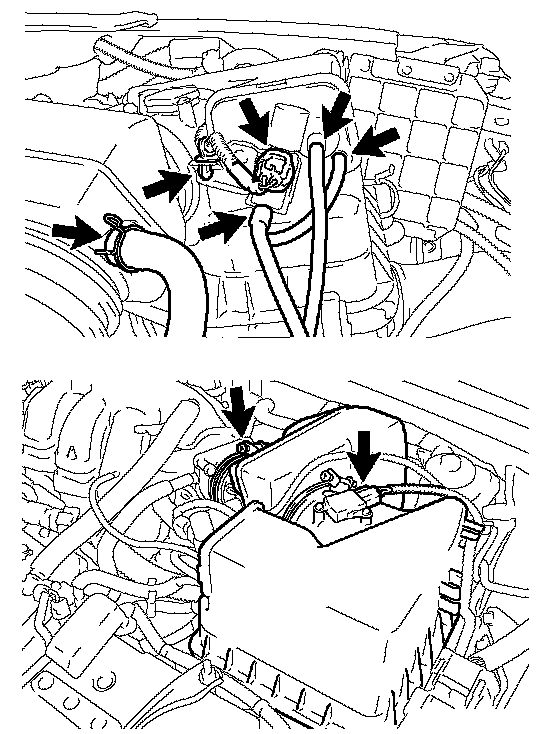
c. Tighten the No. 1 air cleaner hose clamp.
d. Connect the No. 2 ventilation hose to the air cleaner hose.
e. Connect the wire harness clamp and 3 vacuum hoses.
f. Connect the VSV (intake air control) connector.
g. Connect the mass air flow meter connector.
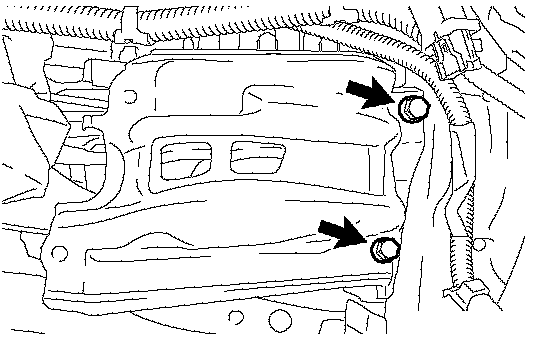
56. INSTALL BATTERY BRACKET REINFORCEMENT
a. Install the bracket reinforcement with the 2 bolts.
Torque: 19 Nm (194 kgf-cm, 14 ft. lbs.)
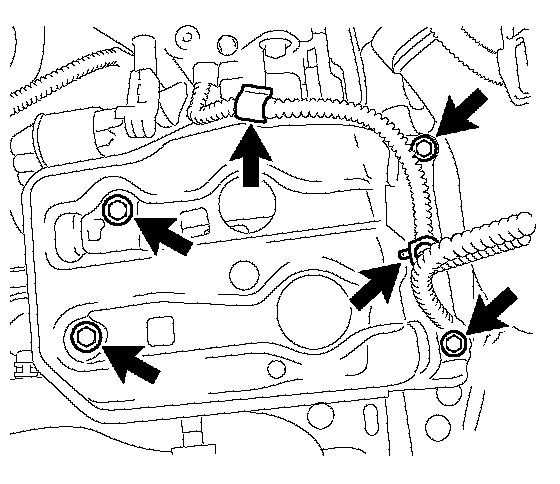
57. INSTALL FRONT BATTERY BRACKET
a. Install the bracket front with the 4 bolts.
Torque: 19 Nm (194 kgf-cm, 14 ft. lbs.)
b. Attach the 2 wire harness clamps.
58. INSTALL BATTERY
59. REMOVE BATTERY CLAMP SUB-ASSEMBLY
a. Attach the hook of the battery clamp to the battery bracket front.
b. Temporarily tighten the nut and install the bolt.
c. Adjust the battery clamp's position.
d. Fully tighten the nut and bolt.
Torque: 5.0 Nm (51 kgf-cm, 44 inch lbs.)
e. Attach the 2 wire harness clamps.
60. CONNECT CABLE TO NEGATIVE BATTERY TERMINAL
61. INSTALL HOOD SUB-ASSEMBLY
a. Install the hood.
b. Adjust the hood.
62. ADD AUTOMATIC TRANSAXLE FLUID
a. 2WD: Add automatic transmission fluid.
b. 4WD: Add automatic transmission fluid.
63. ADD TRANSFER OIL (for 4WD)
64. ADD ENGINE OIL
65. ADD ENGINE COOLANT
66. CHARGE REFRIGERANT
67. CHECK FOR LEAKAGE OF REFRIGERANT
68. CHECK FOR ENGINE OIL LEAKS
69. CHECK FOR ENGINE COOLANT LEAKS
70. CHECK FOR FUEL LEAKS
71. INSPECT EXHAUST GAS LEAKS
72. INSPECT SHIFT LEVER POSITION
a. 2WD: Inspect the shift lever position.
b. 4WD: Inspect the shift lever position.
73. ADJUST TRANSMISSION CONTROL CABLE
a. 2WD: Adjust the shift lever position.
b. 4WD: Adjust the shift lever position.
74. INSTALL FRONT FLOOR COVER
75. INSTALL NO. 2 ENGINE UNDER COVER
a. Install the under cover with the 2 clips.
76. INSTALL REAR ENGINE UNDER COVER LH
a. Install the under cover with the 2 clips.
77. INSTALL REAR ENGINE UNDER COVER RH
a. Install the under cover with the 2 clips.
78. INSTALL NO. 1 ENGINE UNDER COVER
a. Install the under cover with the 4 bolts and 12 clips.
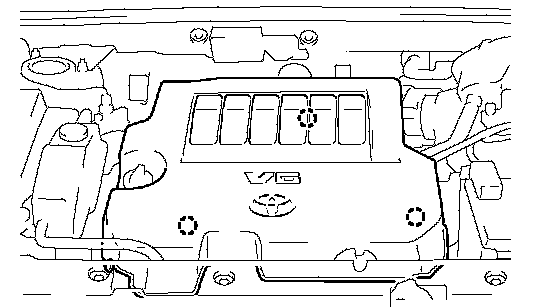
79. INSTALL V-BANK COVER SUB-ASSEMBLY
a. Attach the 3 clips to install the engine cover.
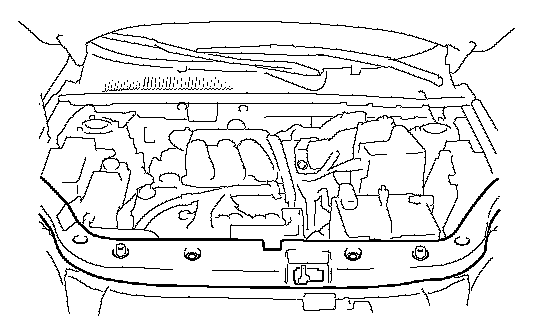
80. INSTALL RADIATOR SUPPORT OPENING COVER
a. Install the cover with the 9 clips.
81. ADJUST FRONT WHEEL ALIGNMENT
a. Adjust the front wheel alignment.
82. INSPECT IDLE SPEED