Oil Pan, Engine
Oil PanOIL PAN SUB-ASSEMBLY
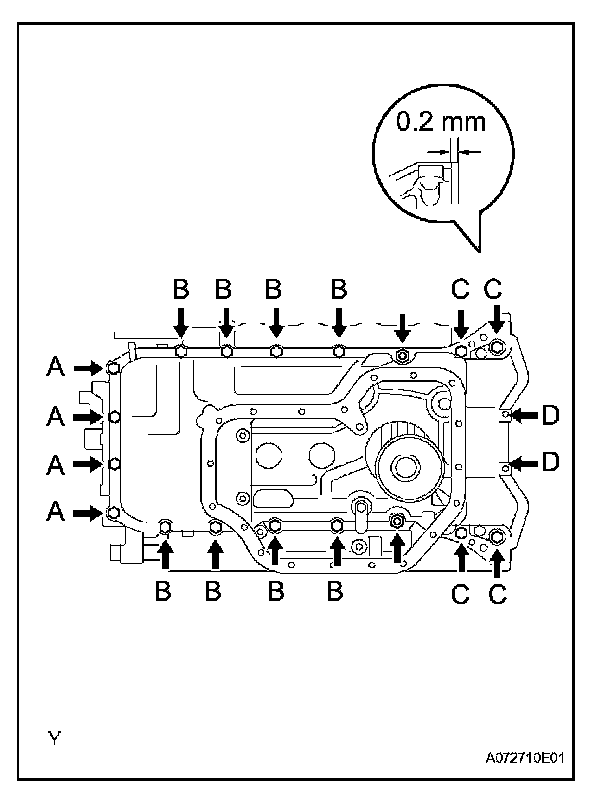
Temporarily install the oil pan with the 18 bolts and 2 nuts.
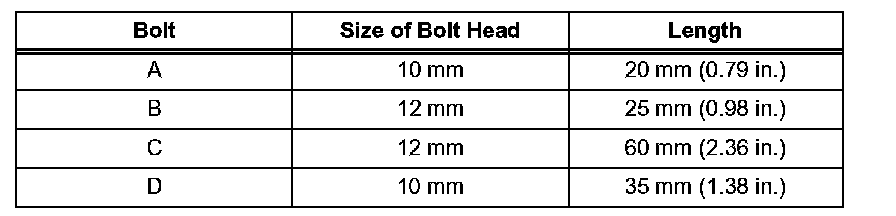
HINT: The following chart is the reference for the oil pump bolt length.
Set the oil pan as shown in the illustration.
NOTICE: Make sure that the clearance between the rear end of the oil pan and cylinder block is 0.2 mm (0.008 in.) or less.
If the clearance is more than 0.2 mm (0.008 in.), the oil pan will be stretched.
Uniformly tighten the bolts and nuts diagonally.
Torque:
For bolts A and D 7.5 Nm (76 kgf/cm, 66 in. lbs.)
For bolts B, C and nut 28 Nm (286 kgf/cm, 21 ft. lbs.)
NO. 2 OIL PAN SUB-ASSEMBLY
Install the No. 2 oil pan with the 17 bolts and 2 nuts. Uniformly tighten the bolts and nuts in several steps.
Torque 7.5 Nm (76 kgf/cm, 66 in. lbs.)
Oil pan sub-assembly No. 2 x Drain plug 39 Nm (398 kgf/cm,29 ft. lbs.)