Drive Belt: Service and Repair
DRIVE BELTCOMPONENTS:
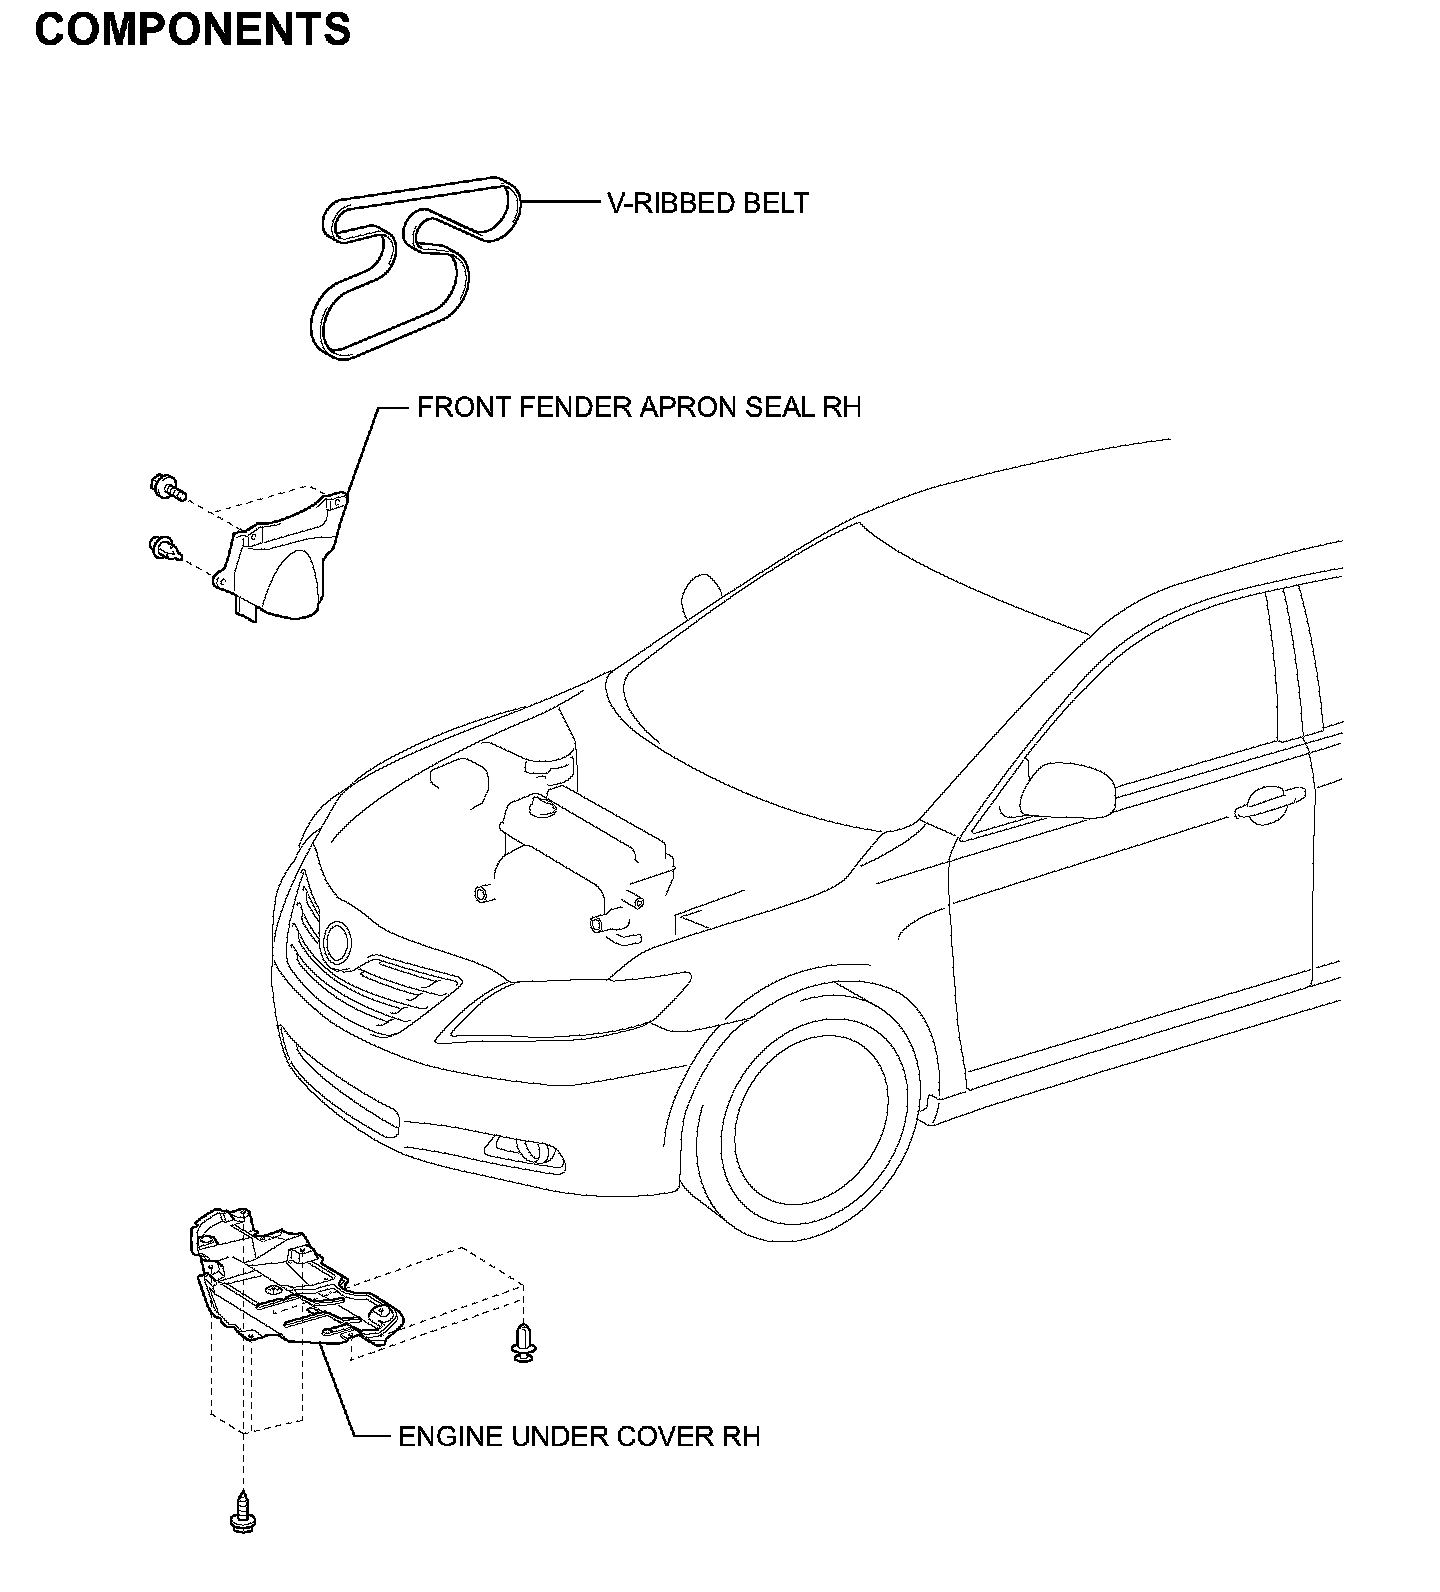
REMOVAL
1. REMOVE FRONT WHEEL RH
2. REMOVE ENGINE UNDER COVER RH
3. REMOVE FRONT FENDER APRON SEAL RH
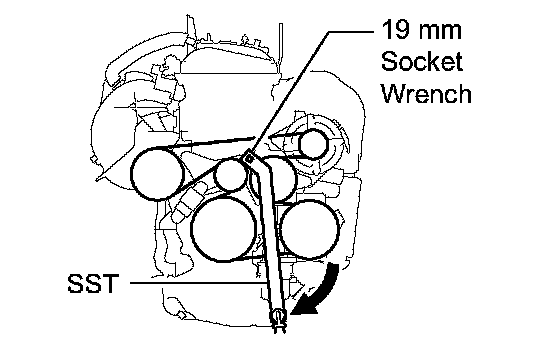
4. REMOVE V-RIBBED BELT
(a) Using SST and 19 mm socket wrench, loosen the V-ribbed belt tensioner arm clockwise, then remove the V-ribbed belt.
SST 09216-42010
NOTICE:
- Be sure to connect SST and the tools so that they are in line during use.
- When retracting the tensioner, turn it clockwise slowly for 3 seconds or more. Do not apply force rapidly.
- After the tensioner is fully retracted, do not apply force any more than necessary.
INSPECTION
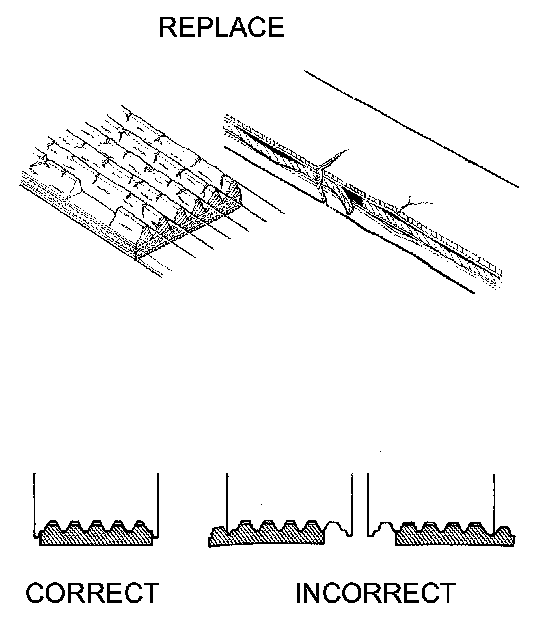
1. INSPECT V-RIBBED BELT
(a) Visually check the V-ribbed belt for excessive wear, frayed cords, etc. If any defect has been found, replace the V-ribbed belt.
HINT:
- Cracks on the rib side of a belt are considered acceptable. If the belt has chunks missing from the ribs, it should be replaced.
- A "new belt" is a belt which has been used for less than 5 minutes with the engine running.
- A "used belt" is a belt which has been used for 5 minutes or more with the engine running.
INSTALLATION

1. INSTALL V-RIBBED BELT
(a) Using SST and 19 mm socket wrench, loosen the V-ribbed belt tensioner arm clockwise, then install the V-ribbed belt.
SST 09216-42010
NOTICE:
- Be sure to connect SST and the tools so that they are in line during use.
- When retracting the tensioner, turn it clockwise slowly for 3 seconds or more. Do not apply force rapidly.
- After the tensioner is fully retracted, do not apply force any more than necessary.
(b) After installing the V-ribbed belt, check that it fits properly in the ribbed grooves. Check to confirm that the belt has not slipped out of the grooves on the bottom of the crank pulley by hand.
2. INSTALL FRONT FENDER APRON SEAL RH
3. INSTALL ENGINE UNDER COVER RH
4. INSTALL FRONT WHEEL RH
Torque: 103 Nm (1,050 kgf-cm, 76 ft. lbs.)