Removal and Replacement
Compressor And Magnetic Clutch:
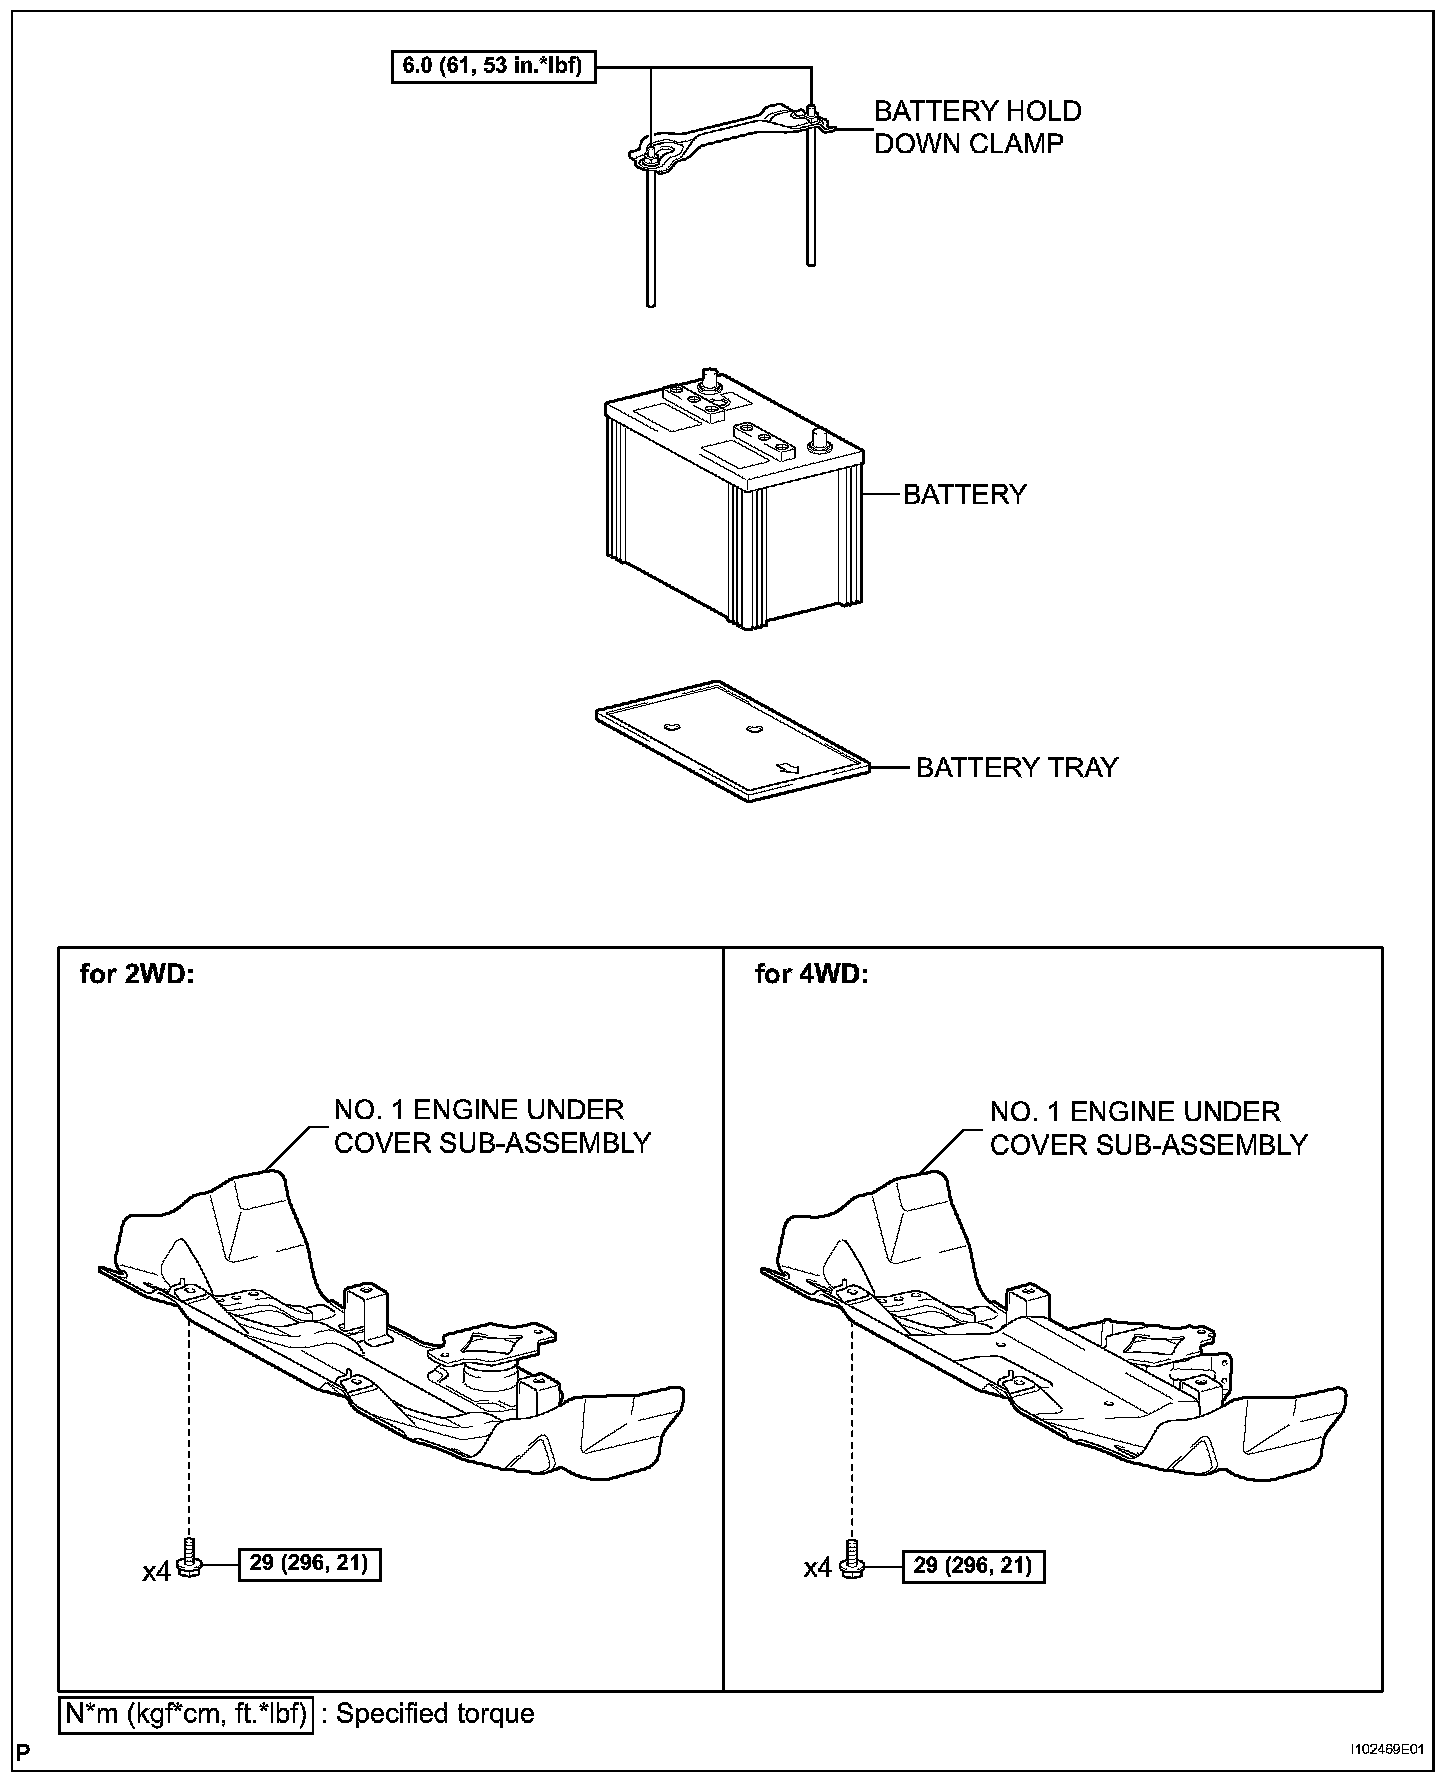
Compressor And Magnetic Clutch:
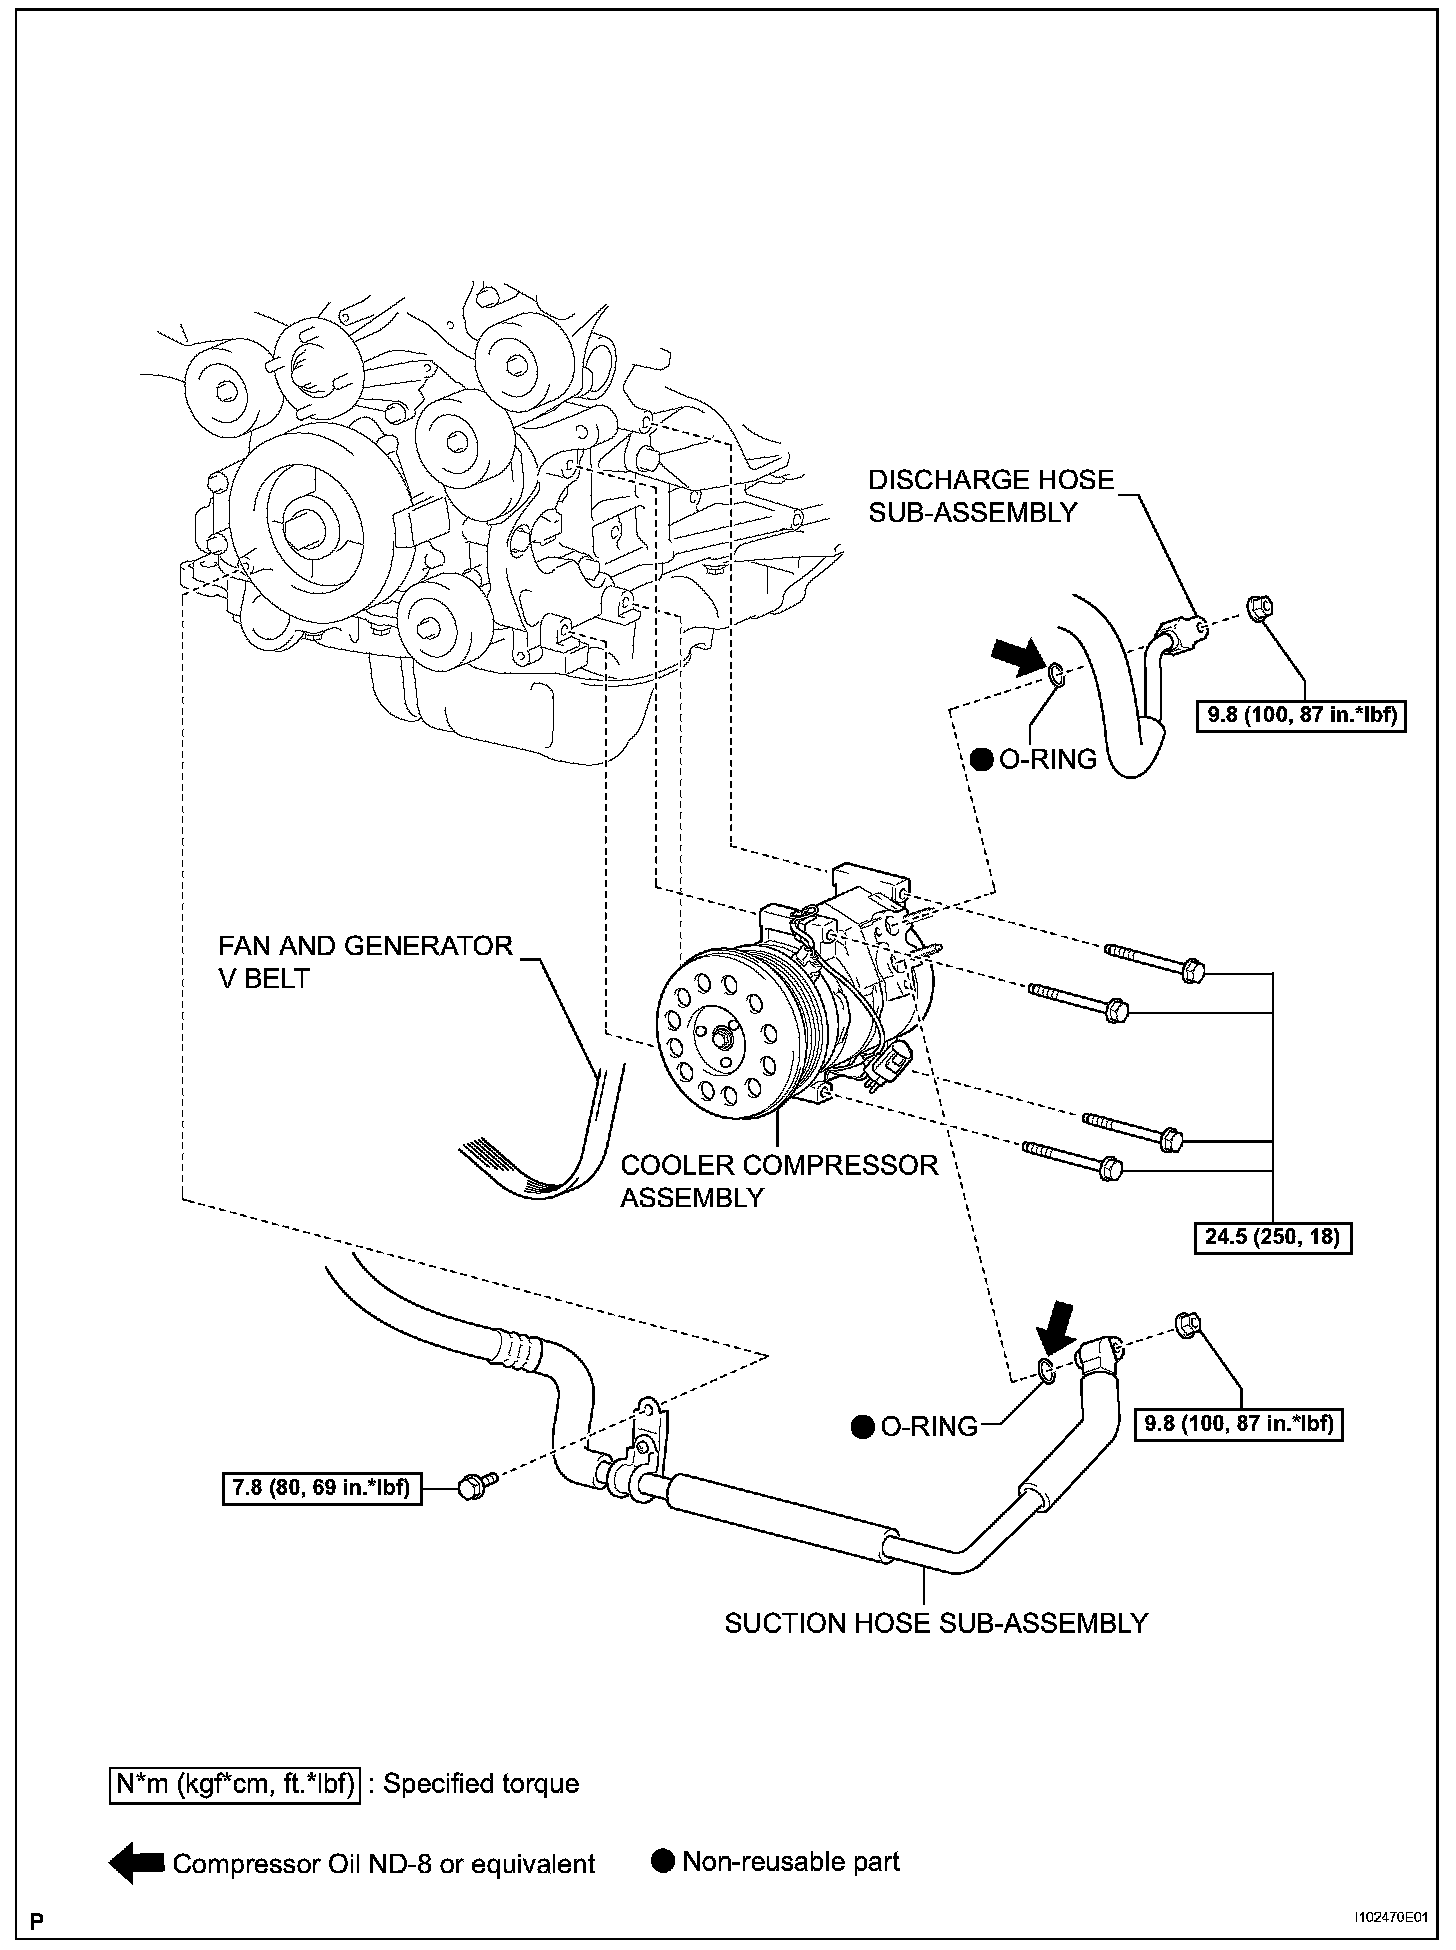
Compressor And Magnetic Clutch:
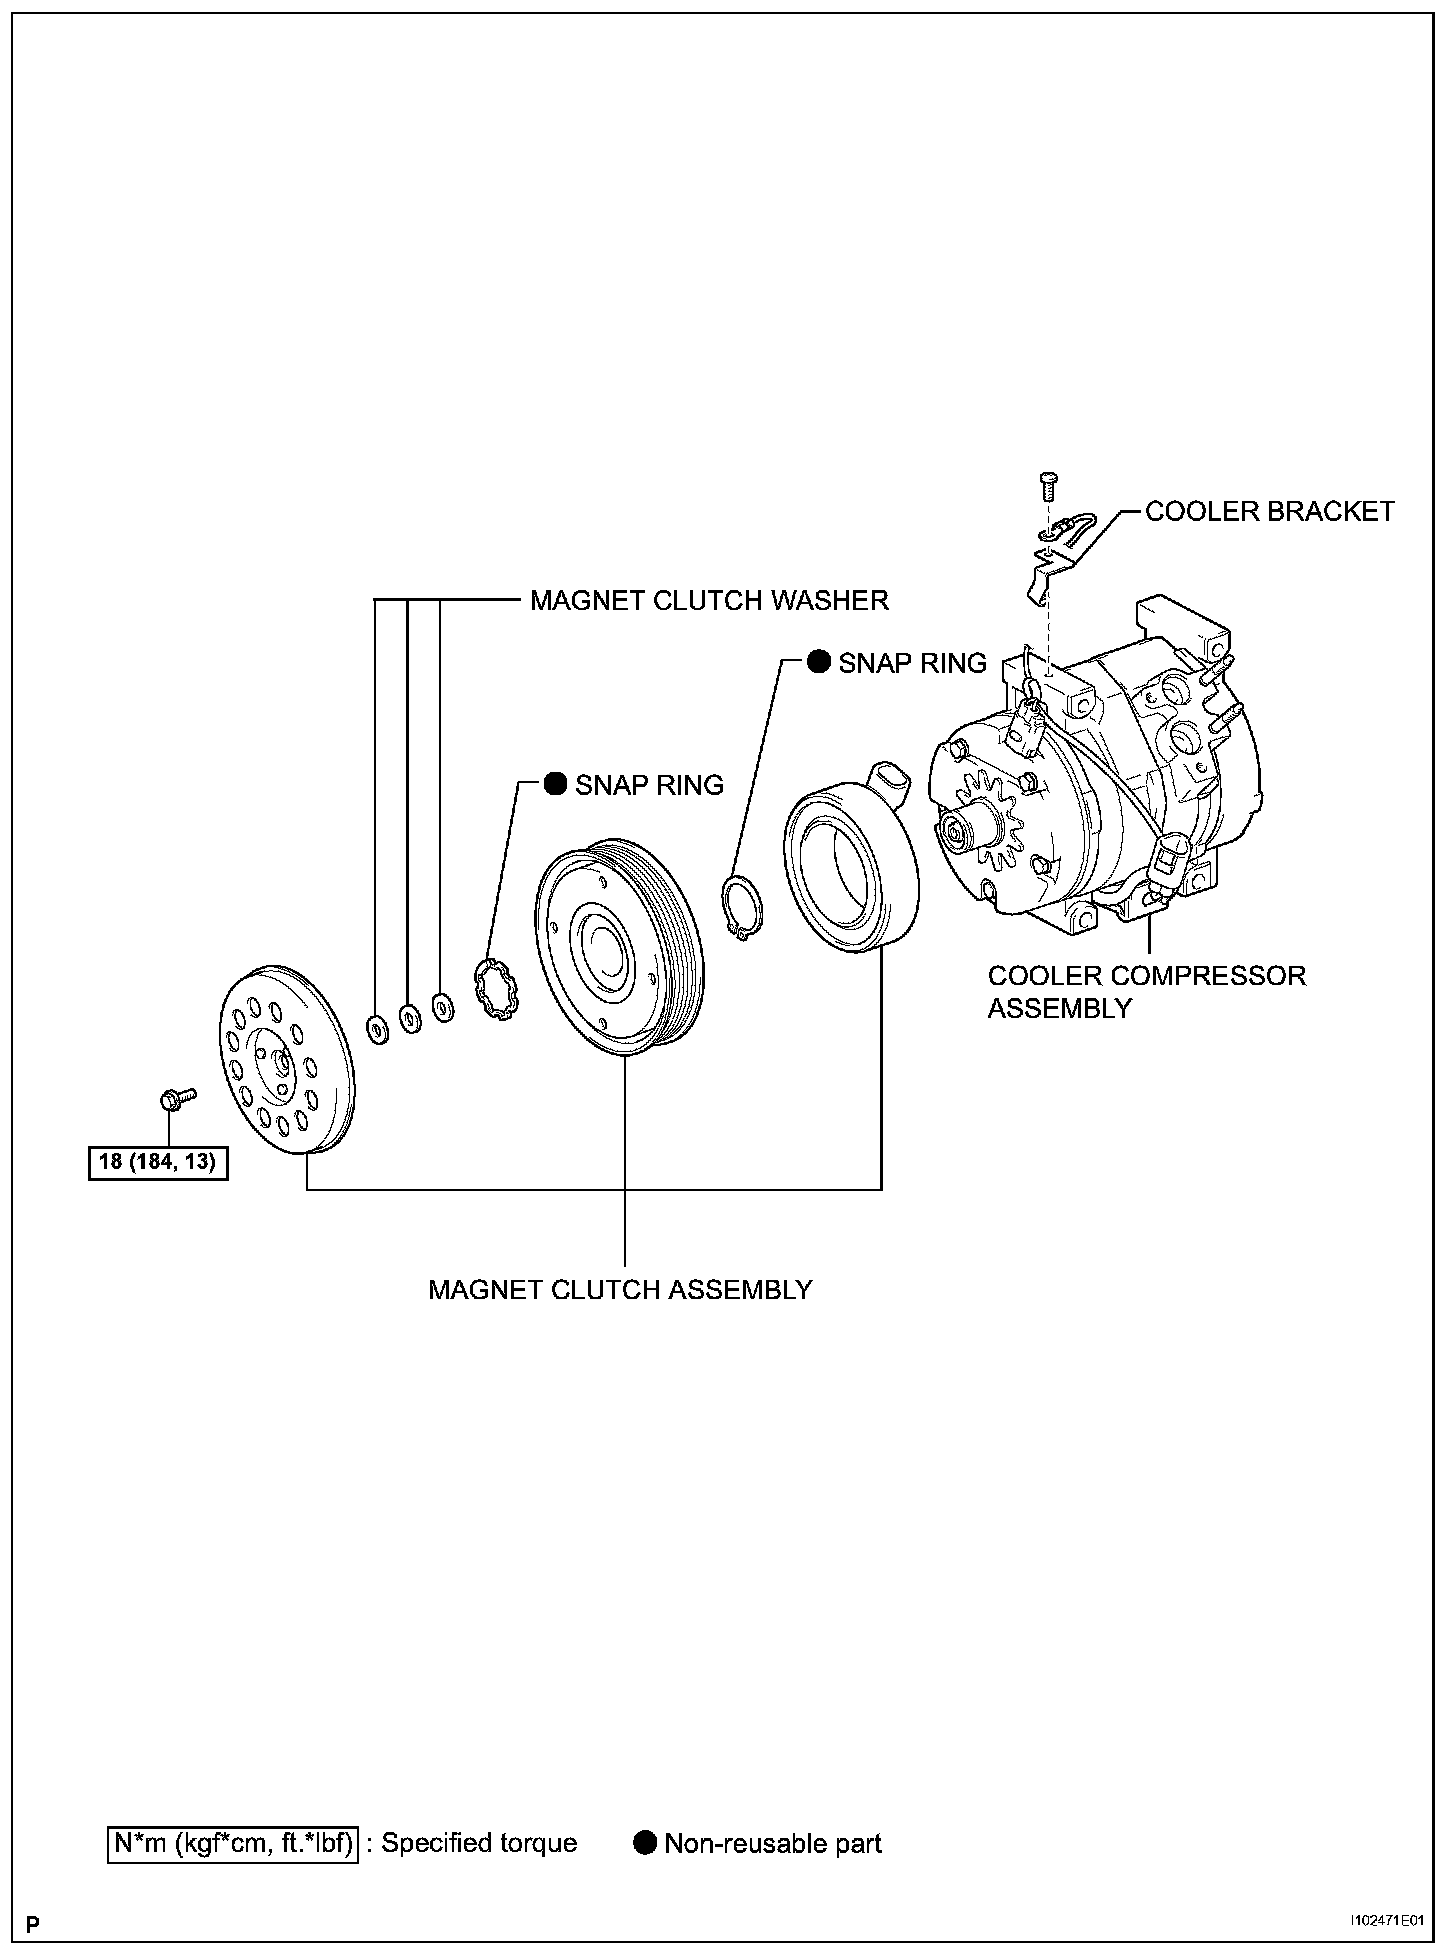
COMPRESSOR AND MAGNETIC CLUTCH
REMOVAL
1. DISCHARGE REFRIGERANT FROM REFRIGERATION SYSTEM
2. DISCONNECT CABLE FROM NEGATIVE BATTERY TERMINAL
3. REMOVE BATTERY HOLD DOWN CLAMP
4. REMOVE BATTERY
5. REMOVE BATTERY TRAY
6. REMOVE NO. 1 ENGINE UNDER COVER SUBASSEMBLY
7. REMOVE FAN AND GENERATOR V BELT
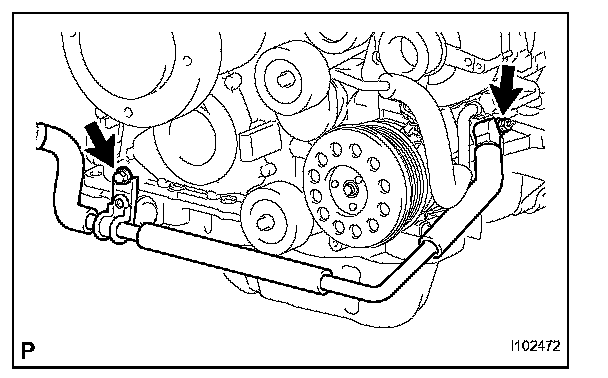
8. DISCONNECT SUCTION HOSE SUB-ASSEMBLY
a. Remove the bolt and separate the suction hose.
b. Remove the nut and disconnect the suction hose.
c. Remove the O-ring from the suction hose.
NOTE: Seal the openings of the disconnected parts using vinyl tape to prevent moisture and foreign matter from entering.
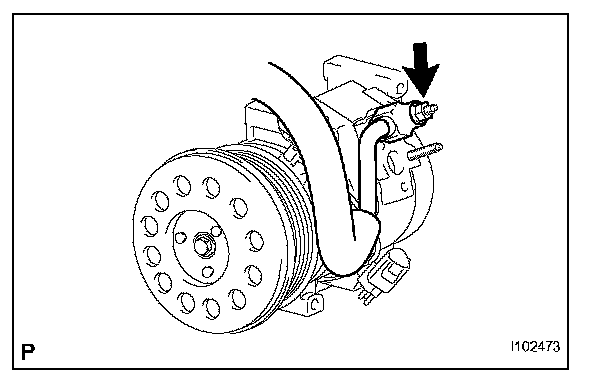
9. DISCONNECT DISCHARGE HOSE SUB-ASSEMBLY
a. Remove the nut and disconnect the discharge hose.
b. Remove the O-ring from the discharge hose.
NOTE: Seal the openings of the disconnected parts using vinyl tape to prevent moisture and foreign matter from entering.
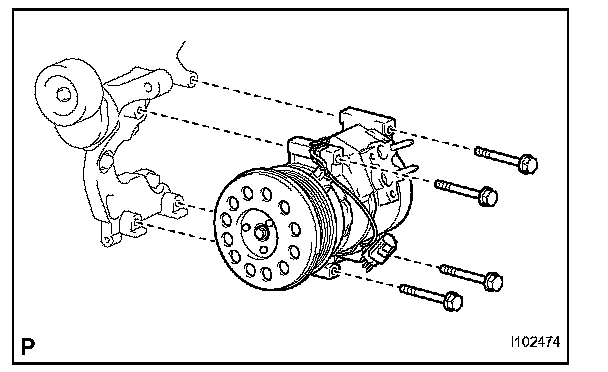
10. REMOVE COOLER COMPRESSOR ASSEMBLY
a. Disconnect the connector.
b. Remove the 4 bolts and compressor.
INSTALLATION
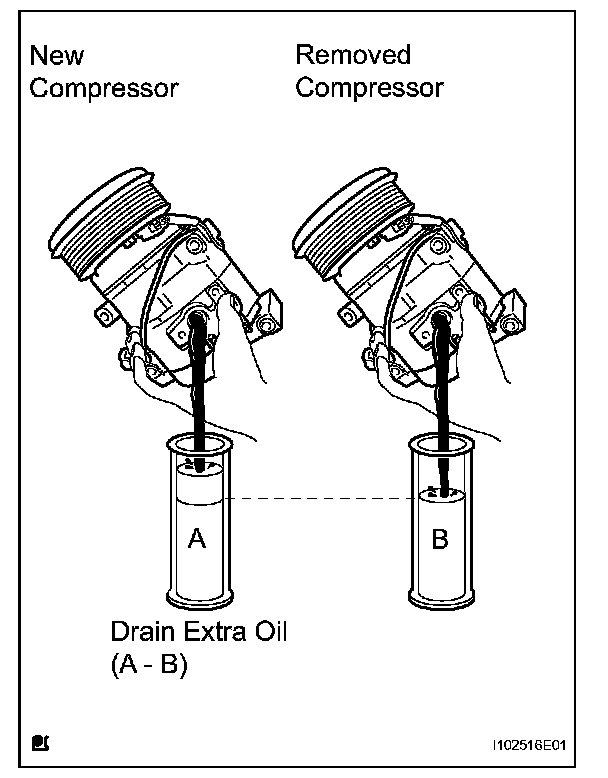
1. ADJUST COMPRESSOR OIL
a. When replacing the compressor with a new one, gradually discharge the refrigerant gas from the service valve. Then drain the following amount of oil from the new compressor before installation, so that the amount of oil contained in it is the same as that in the compressor to be replaced.
HINT: New compressors are filled with sufficient oil for the whole cycle. Therefore, it is necessary to drain residual oil from the condenser and cooling unit.
Standard: (The amount of oil inside a new compressor: 120 (+15) cc (4.1 (+0.51) fl.oz.)) - (The amount of oil remaining in the removed compressor) = The amount of oil to be removed when replacing the compressor
NOTE:
- When checking the compressor oil level, observe the precautions for cooler removal/ installation.
- If a new compressor is installed without removing the amount of oil remaining in the pipes of the vehicle, the amount of oil becomes too large. This prevents heat exchange in the refrigerant cycle and causes refrigeration failure.
- If the amount of oil remaining in the removed compressor is too small, check for oil leakage.
- Use ND-OIL8 compressor oil.
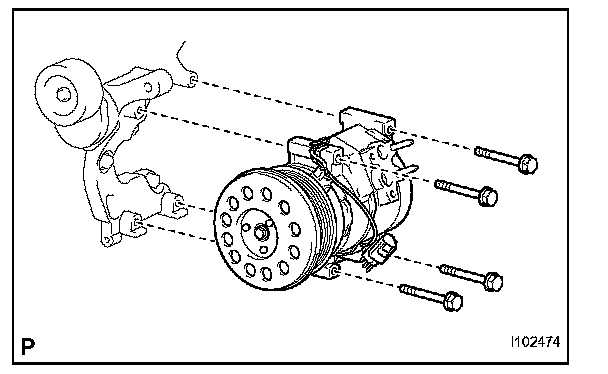
2. INSTALL COOLER COMPRESSOR ASSEMBLY
a. Install the compressor with the 4 bolts.
Torque: 24.5 N.m (250 kgf.cm, 18 ft.lbf)
b. Connect the connector.
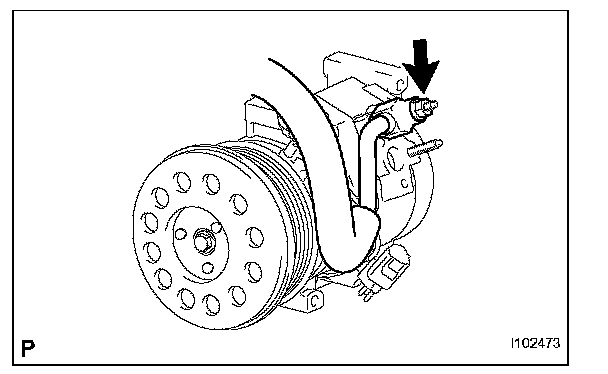
3. INSTALL DISCHARGE HOSE SUB-ASSEMBLY
a. Remove the attached vinyl tape from the hose.
b. Apply sufficient compressor oil (ND-OIL8) to a new O-ring and the fitting surface of the compressor.
Compressor oil: ND-OIL8 or the equivalent
c. Install the O-ring onto the discharge hose.
d. Install the discharge hose onto the compressor with the nut.
Torque: 9.8 N.m (100 kgf.cm, 87 in.lbf)
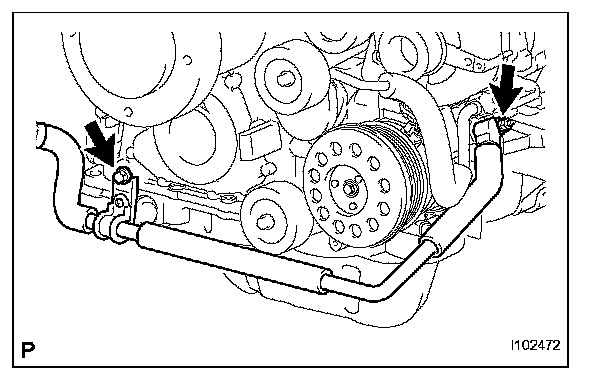
4. INSTALL SUCTION HOSE SUB-ASSEMBLY
a. Remove the attached vinyl tape from the hose.
b. Apply sufficient compressor oil (ND-OIL8) to a new O-ring and the fitting surface of the compressor.
Compressor oil: ND-OIL8 or the equivalent
c. Install the O-ring onto the suction hose.
d. Install the suction hose onto the compressor with the nut.
Torque: 9.8 N.m (100 kgf.cm, 87 in.lbf)
e. Install the suction hose with the bolt.
Torque: 7.8 N.m (80 kgf.cm, 69 in.lbf)
5. INSTALL FAN AND GENERATOR V BELT
6. INSTALL NO. 1 ENGINE UNDER COVER SUBASSEMBLY
7. INSTALL BATTERY TRAY
8. INSTALL BATTERY
9. INSTALL BATTERY HOLD DOWN CLAMP
Torque: 6.0 N.m (61 kgf.cm, 53 in.lbf)
10. CONNECT CABLE TO NEGATIVE BATTERY TERMINAL
Torque: 3.9 N.m (40 kgf.cm, 35 in.lbf)
11. CHARGE REFRIGERANT
12. WARM UP ENGINE
13. CHECK FOR REFRIGERANT LEAKAGE