Heated Oxygen Sensor
Heated Oxygen Sensor:
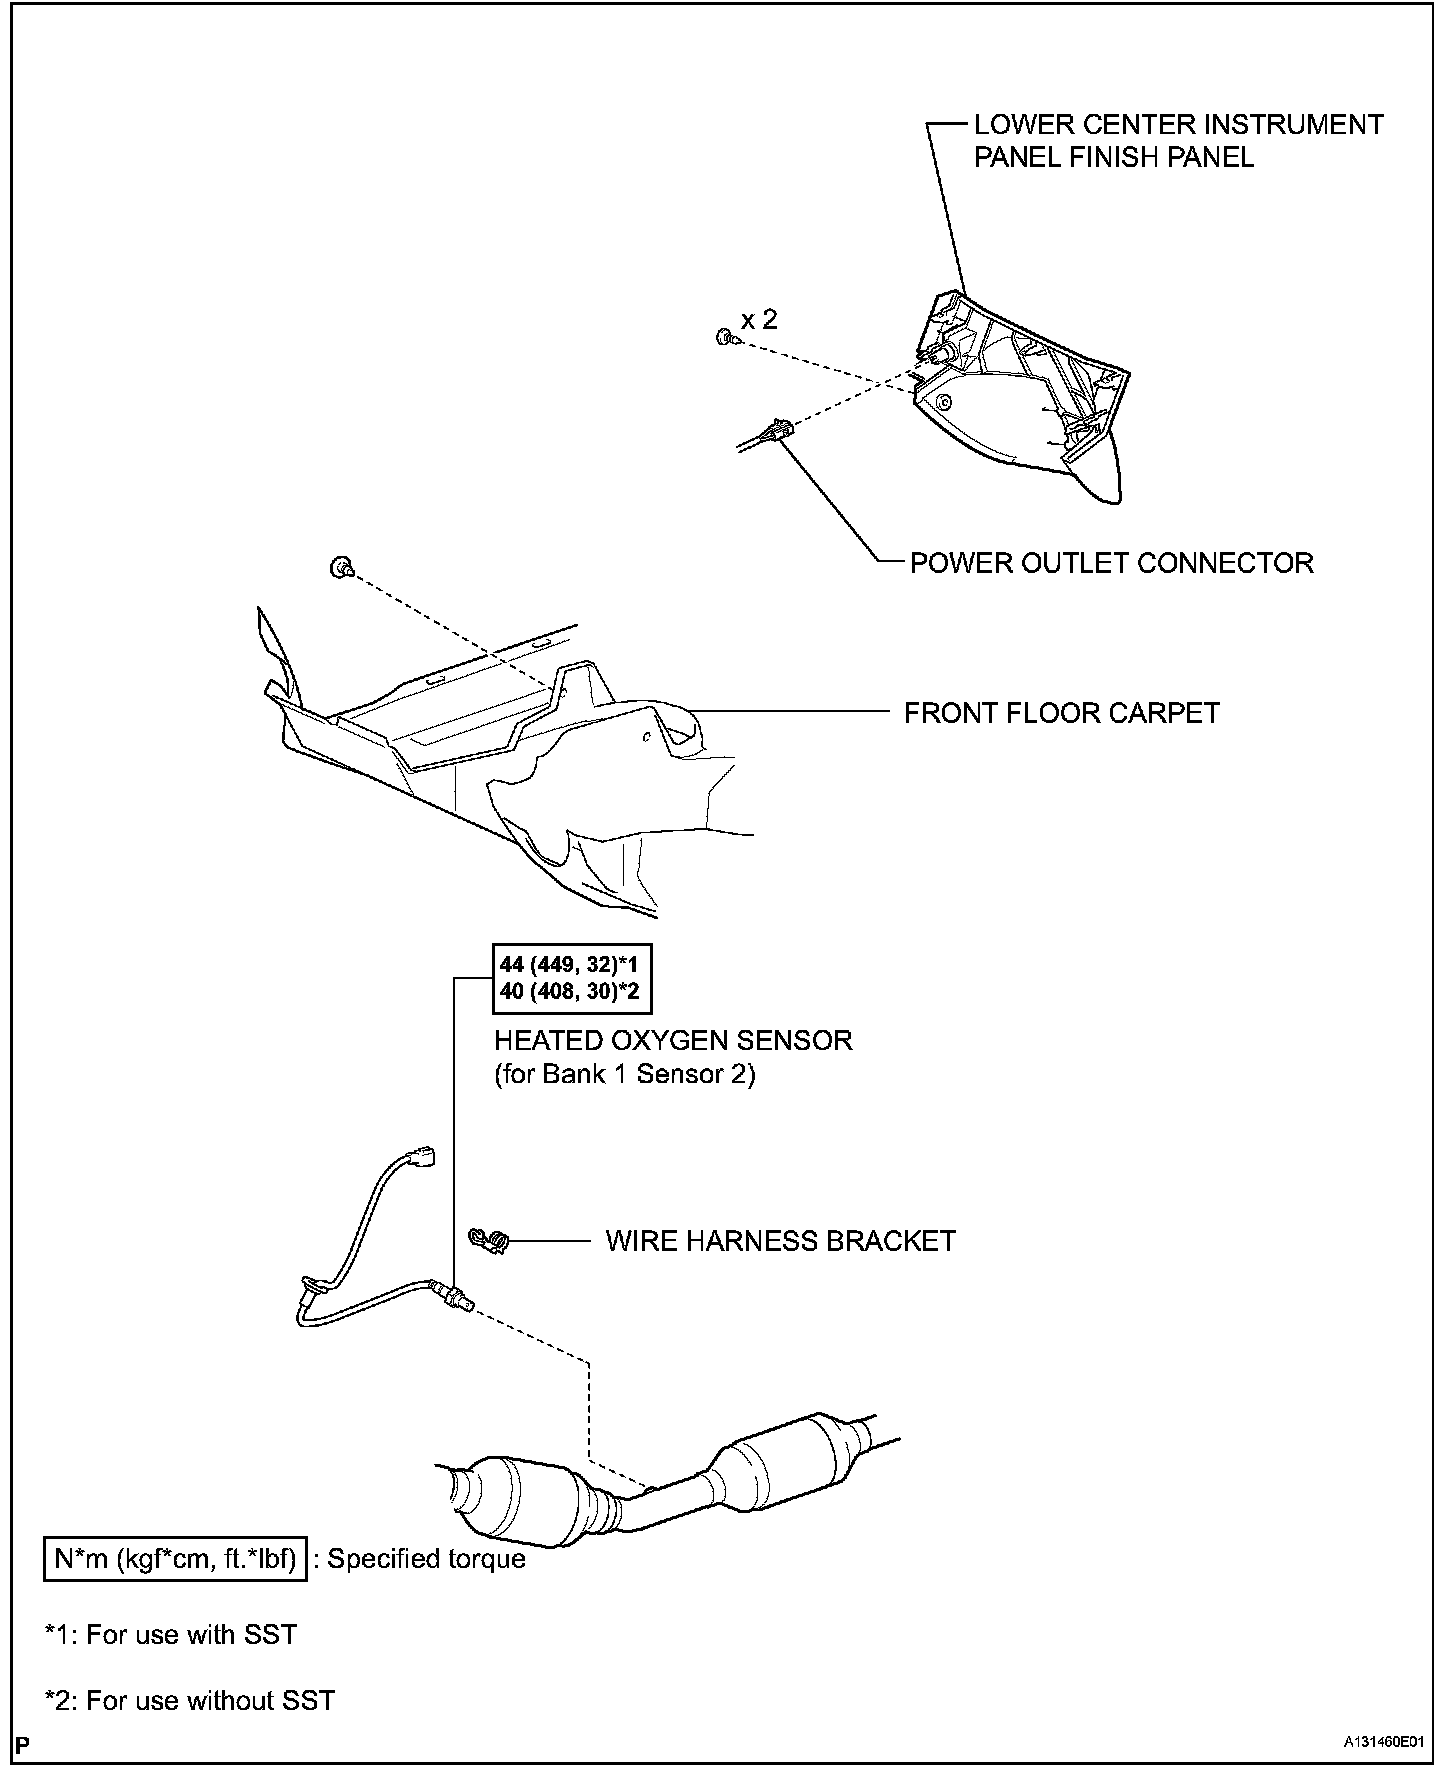
REMOVAL
1. REMOVE REAR NO. 2 FLOOR BOARD
2. REMOVE REAR DECK FLOOR BOX
3. REMOVE REAR NO. 3 FLOOR BOARD
4. DISCONNECT CABLE FROM NEGATIVE BATTERY TERMINAL
CAUTION: Wait at least 90 seconds after disconnecting the cable from the negative (-) battery terminal to prevent airbag and seat belt pretensioner activation.
5. REMOVE LOWER CENTER INSTRUMENT PANEL FINISH PANEL
6. REMOVE HEATED OXYGEN SENSOR (for Bank 1 Sensor 2)
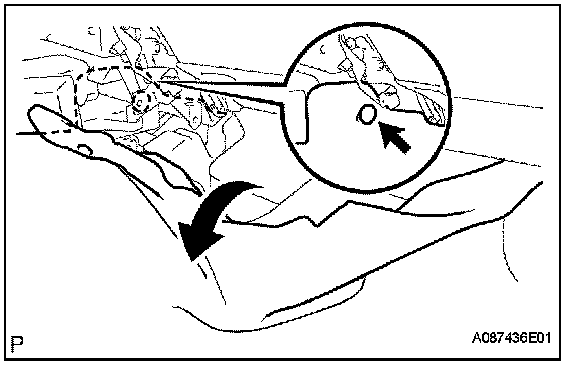
a. Using a clip remover, remove the clip.
b. Fold back the floor carpet front.
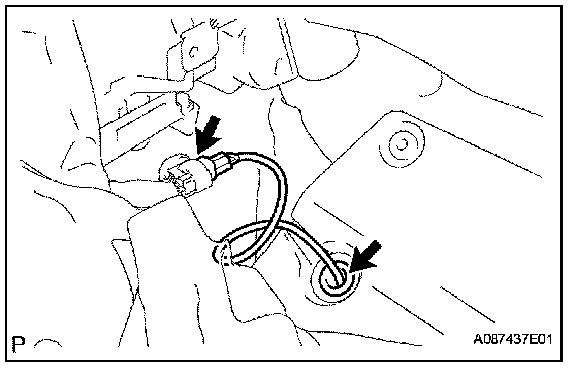
c. Disconnect the sensor connector.
d. Remove the grommet of the sensor from the vehicle.
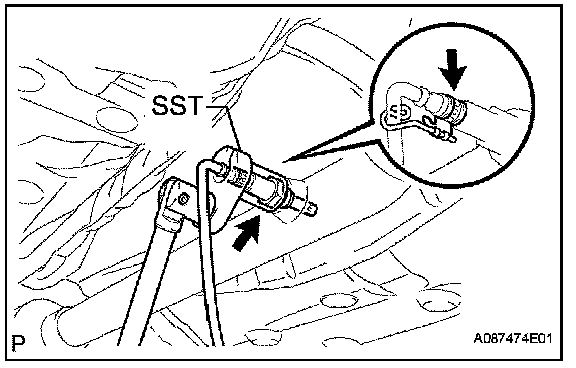
e. Remove the wire harness clamp bracket from the sensor.
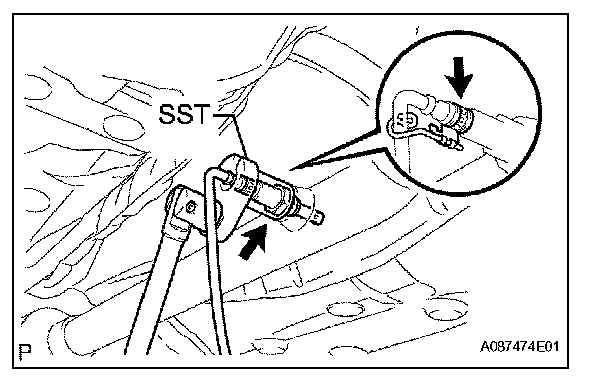
f. Using SST, remove the sensor.
SST 09224-00010
INSTALLATION
1. INSTALL HEATED OXYGEN SENSOR (for Bank 1 Sensor 2)
a. Using SST, install the sensor.
SST 09224-00010
Torque: 44 N.m (449 kgf.cm, 32 ft.lbf) for use with SST
40 N.m (408 kgf.cm, 30 ft.lbf) for use without SST
HINT: Use a torque wrench with a fulcrum length of 30 cm (11.81 in.).
b. Install the wire harness clamp bracket to the sensor.
c. Install the grommet of the sensor to the vehicle.
d. Connect the sensor connector.
e. Install the floor carpet front with the clip
2. CONNECT CABLE TO NEGATIVE BATTERY TERMINAL
3. CHECK FOR EXHAUST GAS LEAKS
4. INSTALL LOWER CENTER INSTRUMENT PANEL FINISH PANEL
5. INSTALL REAR NO. 3 FLOOR BOARD
6. INSTALL REAR DECK FLOOR BOX
7. INSTALL REAR NO. 2 FLOOR BOARD
8. PERFORM INITIALIZATION
a. Perform initialization
NOTE: Certain systems need to be initialized after disconnecting and reconnecting the cable from the negative (-) battery terminal.