Steering Angle Sensor: Service and Repair
REMOVAL1. PRECAUTION
CAUTION: Be sure to read the "PRECAUTION" thoroughly before servicing.
2. DISCONNECT CABLE FROM NEGATIVE BATTERY TERMINAL
CAUTION: Wait at least 90 seconds after disconnecting the cable from the negative (-) battery terminal to prevent airbag and seat belt pretensioner activation.
3. PLACE FRONT WHEELS FACING STRAIGHT AHEAD
4. REMOVE STEERING PAD ASSEMBLY
5. REMOVE STEERING WHEEL ASSEMBLY
6. REMOVE STEERING COLUMN COVER
7. REMOVE SPIRAL CABLE SUB-ASSEMBLY
8. REMOVE STEERING ANGLE SENSOR
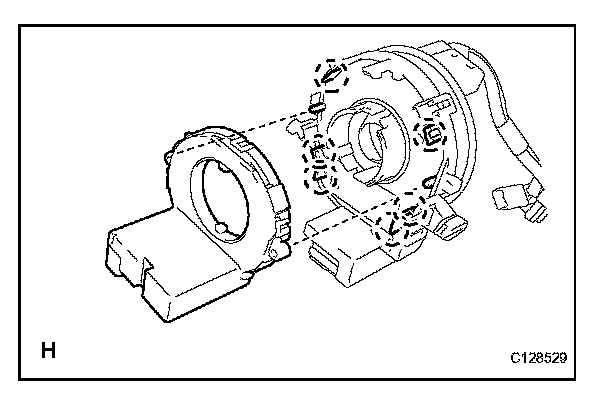
a. Detach the 6 claws and remove the sensor from the spiral cable.
INSTALLATION
1. INSTALL STEERING ANGLE SENSOR
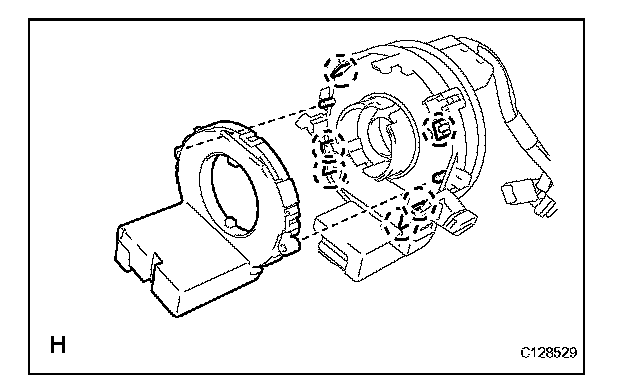
a. Align the locating pins, attach the 6 claws and install the sensor to the spiral cable.
2. INSTALL SPIRAL CABLE SUB-ASSEMBLY
3. INSTALL STEERING COLUMN COVER
4. INSTALL STEERING WHEEL ASSEMBLY
5. INSTALL STEERING PAD ASSEMBLY
6. INSPECT STEERING WHEEL CENTER POINT
7. CONNECT CABLE TO NEGATIVE BATTERY TERMINAL
NOTE: When reconnecting the cable to the negative (-) battery terminal after installing the steering angle sensor, check that the front tires and steering wheel are kept aligned straight ahead before and after connecting the cable to the negative (-) battery terminal.
8. INSPECT STEERING PAD ASSEMBLY.
9. CHECK SRS WARNING LIGHT
a. Check the SRS warning light.