Drive Belt: Service and Repair
DRIVE BELTCOMPONENTS:
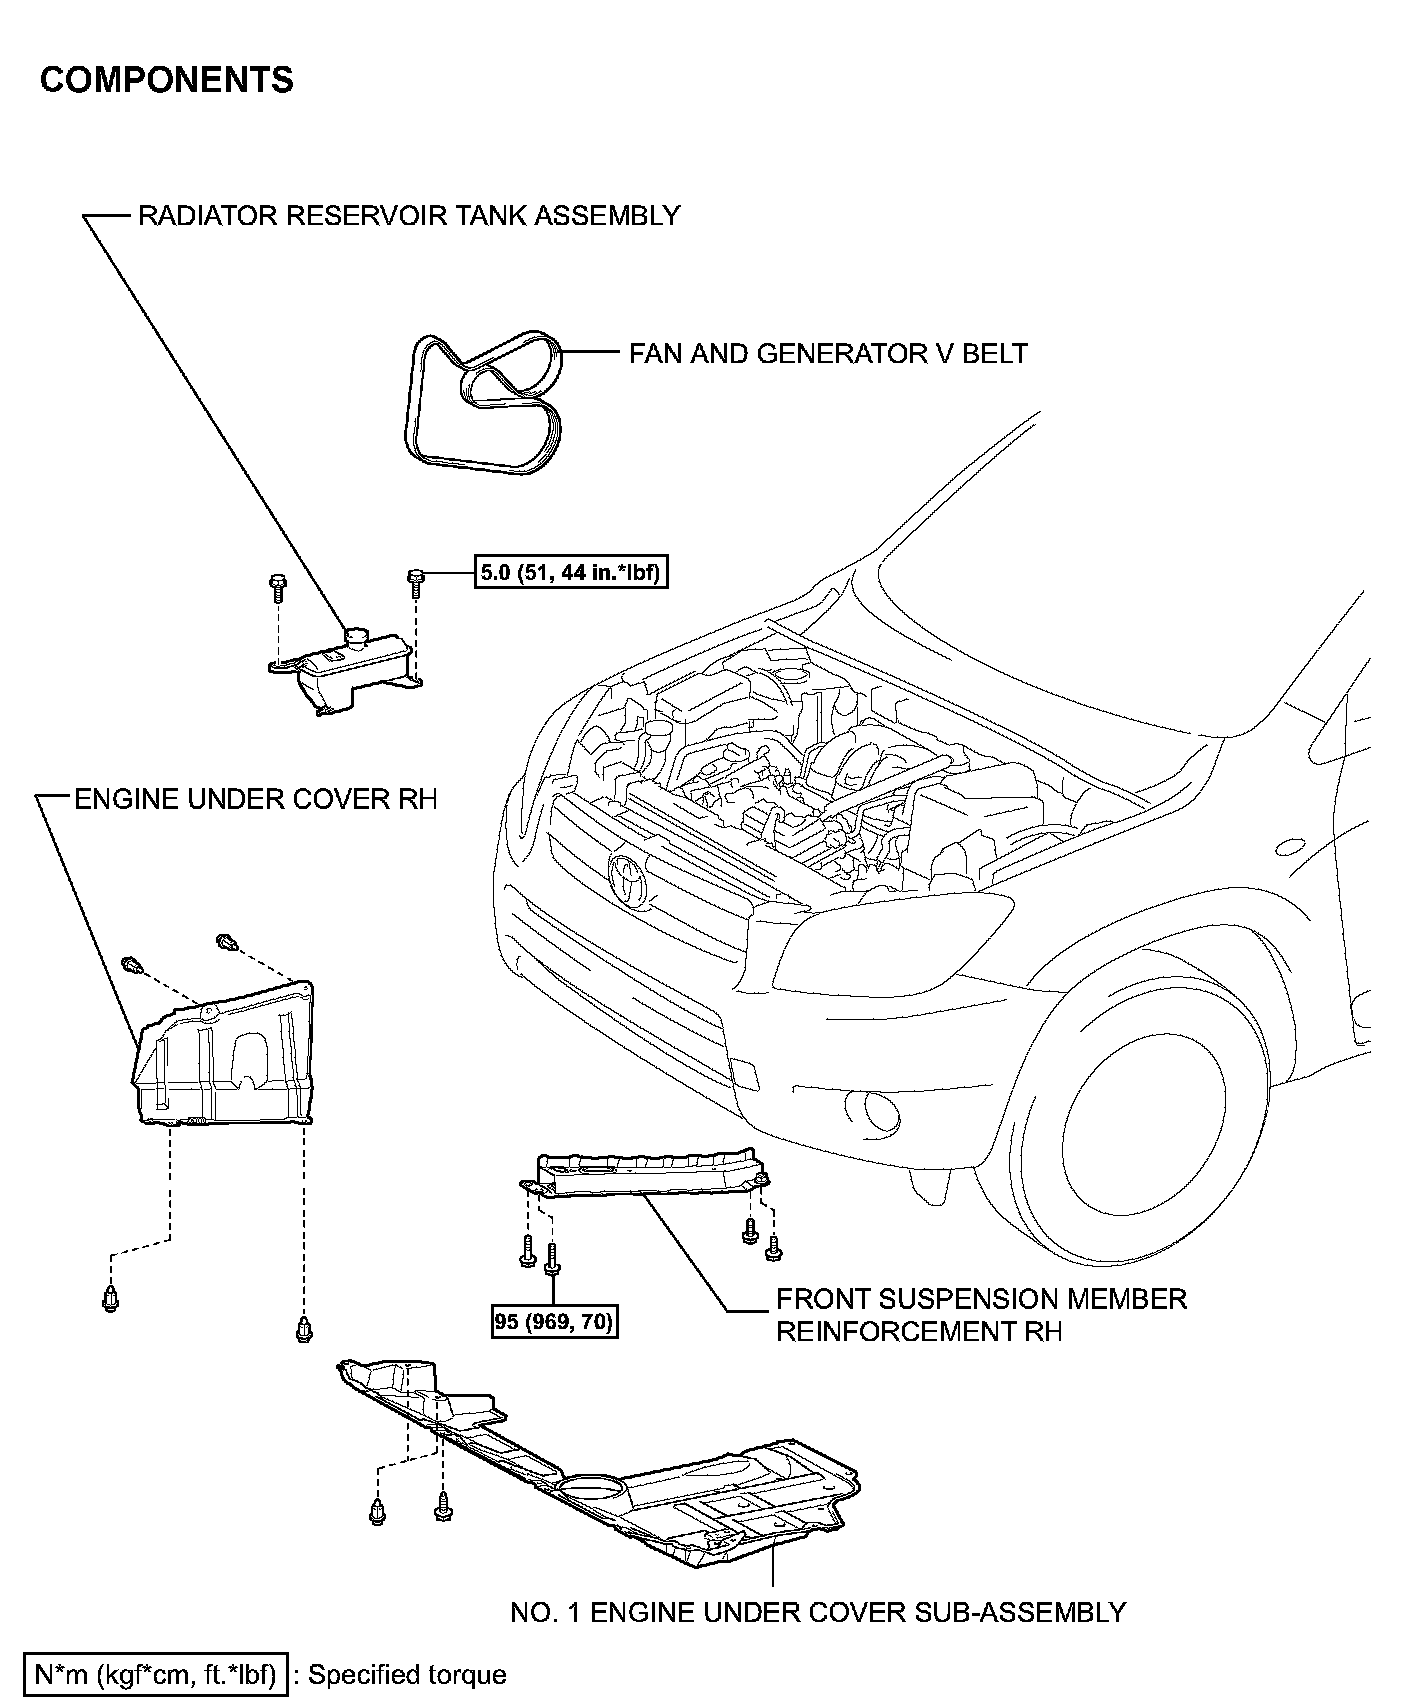
REMOVAL
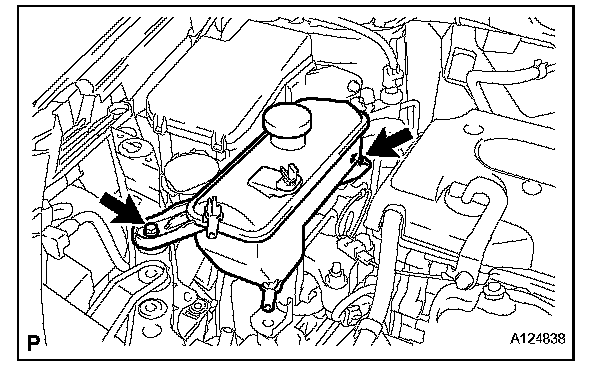
1. DISCONNECT RADIATOR RESERVOIR TANK ASSEMBLY
(a) Remove the 2 bolts and disconnect the reservoir tank.
2. REMOVE NO. 1 ENGINE UNDER COVER SUB-ASSEMBLY
3. REMOVE ENGINE UNDER COVER RH
(a) Remove the 2 clips and engine under cover.
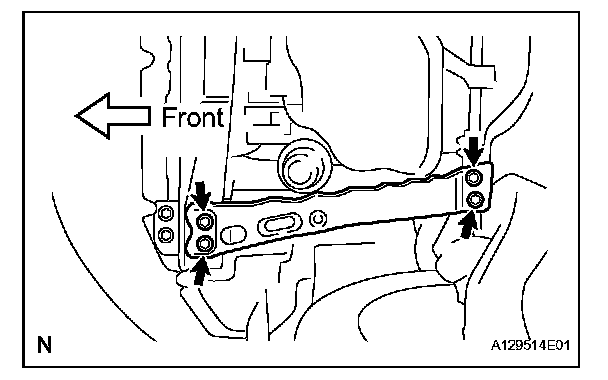
4. REMOVE FRONT SUSPENSION MEMBER REINFORCEMENT RH
(a) Remove the 4 bolts and reinforcement.
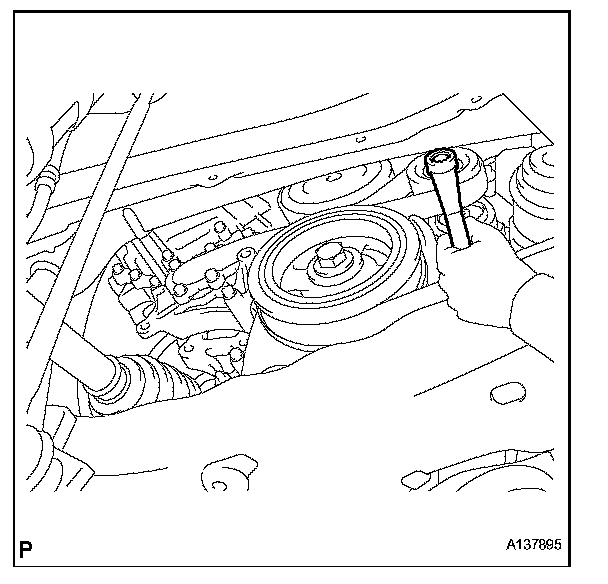
5. REMOVE FAN AND GENERATOR V BELT
(a) Rotate the tensioner pulley counterclockwise to loosen the belt tension. Then remove the V-ribbed belt.
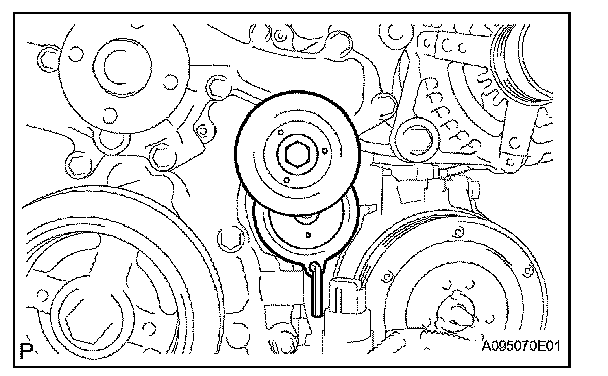
(b) While turning the belt tensioner counterclockwise, align its holes, and then insert the 5 mm bi-hexagon wrench into the holes to fix the V-ribbed belt tensioner in place.
INSTALLATION
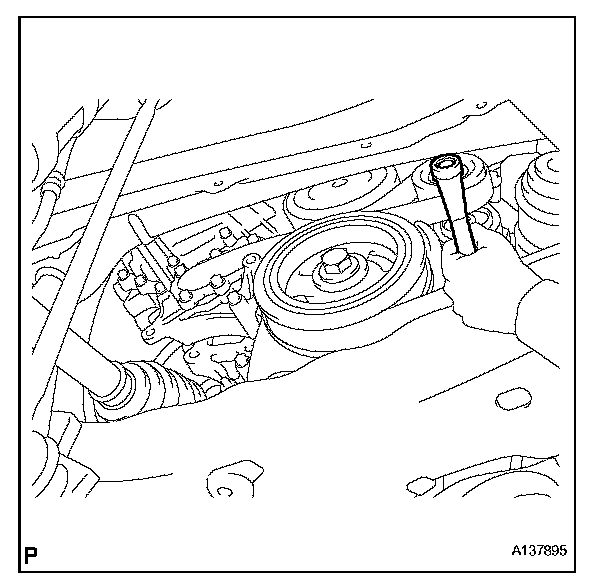
1. INSTALL FAN AND GENERATOR V BELT
(a) Rotate the tensioner pulley counterclockwise, and then install the V-ribbed belt.
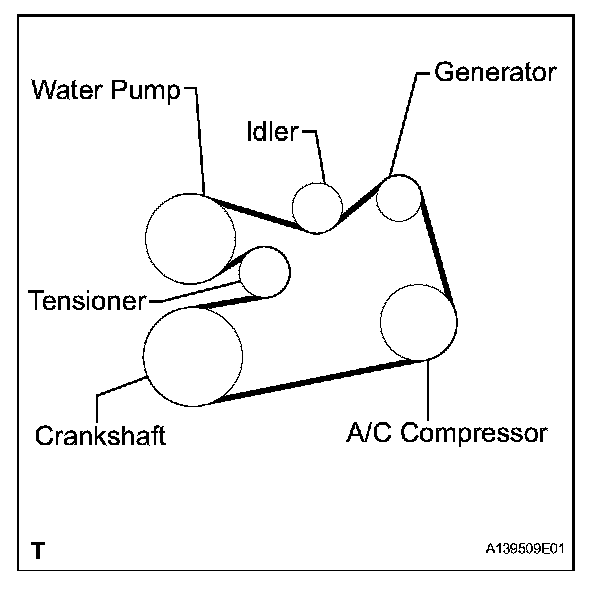
(b) If it is difficult to install the V-ribbed belt, perform the following procedure.
(1) Put the V-ribbed belt on everything except the tensioner pulley as shown in the illustration.
(2) While releasing the belt tension by turning the belt tensioner counterclockwise, put the V-ribbed belt on the tensioner pulley.
NOTICE:
^ Put the backside of the V-ribbed belt on the tensioner pulley and idler pulley.
^ Check that the V-ribbed belt is properly set to each pulley.
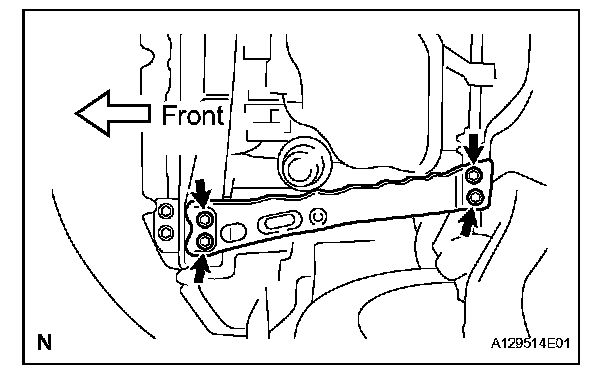
2. INSTALL FRONT SUSPENSION MEMBER REINFORCEMENT RH
(a) Install the reinforcement with the 4 bolts.
Torque: 95 Nm (969 kgf-cm, 70 ft. lbs.)
3. INSTALL ENGINE UNDER COVER RH
(a) Install the engine under cover with the 2 clips.
4. INSTALL NO. 1 ENGINE UNDER COVER
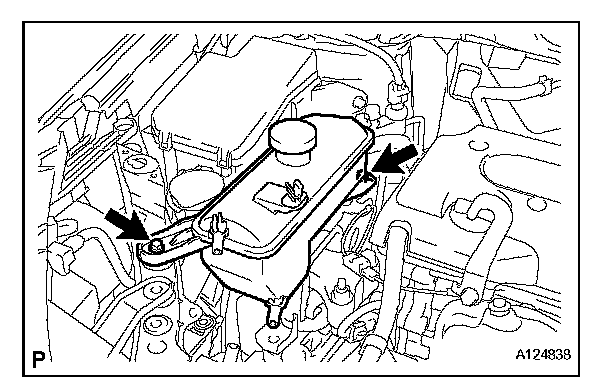
5. CONNECT RADIATOR RESERVOIR TANK ASSEMBLY
(a) Connect the reservoir tank with the 2 bolts.
Torque: 5.0 Nm (51 kgf-cm, 44 inch lbs.)