Reassembly
AIR CONDITIONING: FRONT COOLING UNIT: REASSEMBLY
REASSEMBLY
1. INSTALL NO. 1 COOLER THERMISTOR
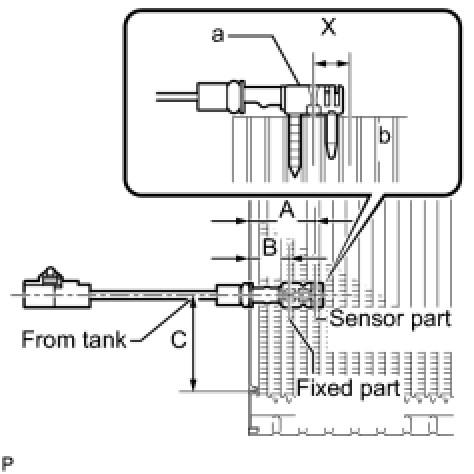
(a) Install the No. 1 cooler thermistor as shown in the illustration.
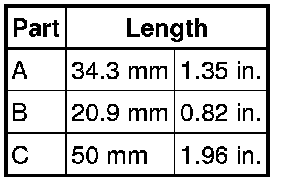
NOTICE :
- Be sure to insert the thermistor only once because reinserting it into the same position will not allow it to be firmly secured.
- When reusing the evaporator, insert the thermistor one row next to the one that has been used previously (X in the illustration).
- After inserting the thermistor, do not apply excessive force to the wire.
- Directly insert the thermistor until the edge of plastic case "a" comes into contact with evaporator "b".
2. INSTALL NO. 1 COOLER EVAPORATOR SUB-ASSEMBLY
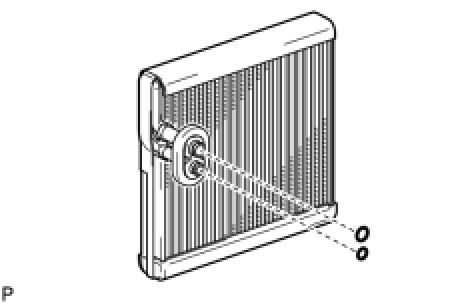
(a) Sufficiently apply compressor oil to 2 new O-rings and the fitting surfaces.
(b) Install the 2 O-rings to the No. 1 cooler evaporator sub-assembly.
Compressor oil:
ND-OIL 8 or equivalent
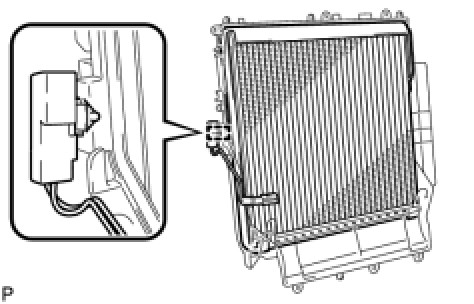
(c) Install the No. 1 cooler evaporator sub-assembly.
(d) Engage the clamp.
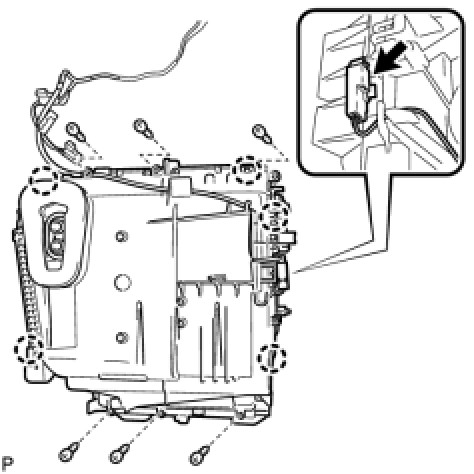
(e) Engage the 5 claws.
(f) Install the plate cover with the 6 screws.
(g) Connect the connector.
3. INSTALL COOLER EXPANSION VALVE
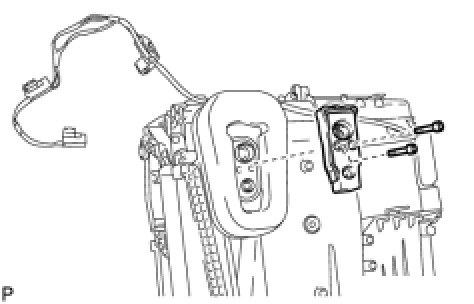
(a) Using a 4 mm hexagon wrench, install the cooler expansion valve with the 2 hexagon bolts.
Torque: 3.5 Nm (36 kgf-cm, 31 in-lbf)
4. INSTALL ASPIRATOR (for Manual Air Conditioning System)
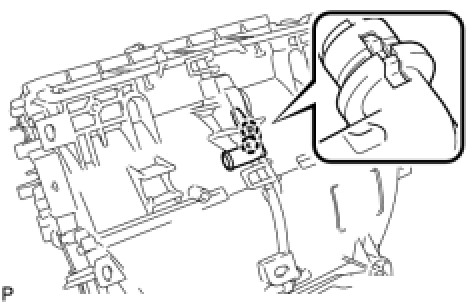
(a) Engage the 2 claws and install the aspirator.
5. INSTALL ASPIRATOR (for Automatic Air Conditioning System)
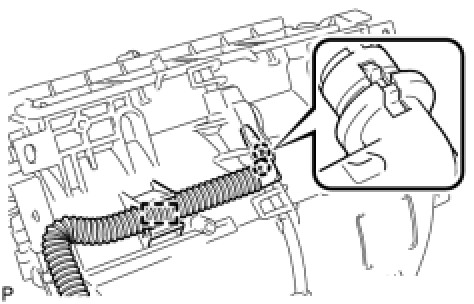
(a) Engage the 2 claws.
(b) Engage the clamp and install the aspirator.
6. INSTALL HEATER RADIATOR UNIT SUB-ASSEMBLY
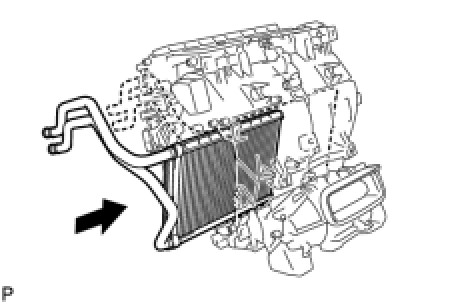
(a) Install the heater radiator unit sub-assembly as shown in the illustration.
7. INSTALL HEATER CLAMP
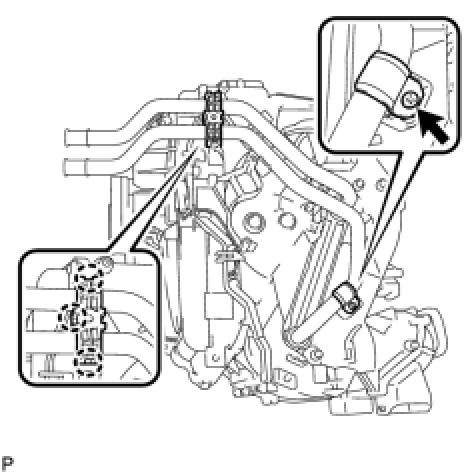
(a) Install the clamp with the screw.
(b) Engage the 3 claws and install the heater clamp.
8. INSTALL FRONT AIR MIX CONTROL SERVO MOTOR SUB-ASSEMBLY
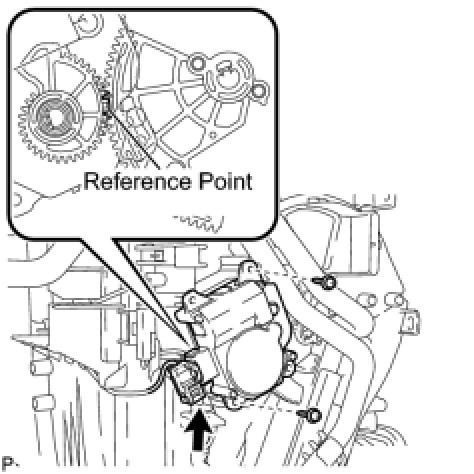
(a) Using the reference point, install the front air mix control servo motor sub-assembly with the 2 screws.
(b) Connect the connector.
9. INSTALL FRONT AIR OUTLET CONTROL SERVO MOTOR SUB-ASSEMBLY
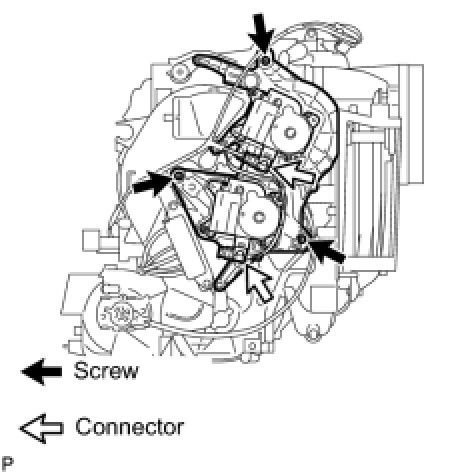
(a) Install the front air outlet control servo motor sub-assembly with the 3 screws.
(b) Connect the 2 connectors.
10. INSTALL BLOWER ASSEMBLY

(a) Engage the 2 claws.
(b) Install the blower assembly with the 2 screws.
(c) Connect the connector.
11. INSTALL QUICK HEATER ASSEMBLY (w/ PTC Heater)
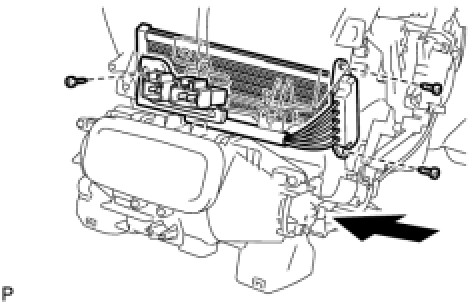
(a) Install the quick heater assembly as shown in the illustration.
(b) Install the 3 screws.
12. INSTALL NO. 3 AIR DUCT SUB-ASSEMBLY
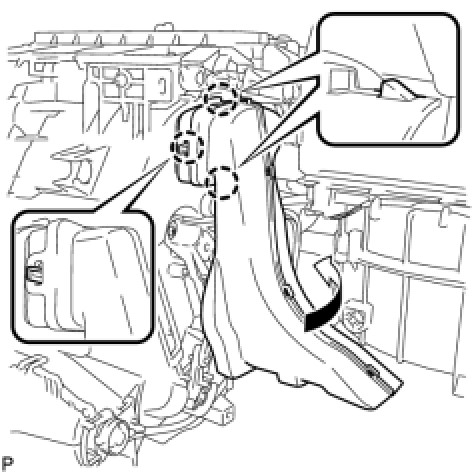
(a) Engage the 3 claws and install the No. 3 air duct sub-assembly as shown in the illustration.
13. INSTALL TRANSPONDER KEY ECU (w/o Smart Key System) Installation
14. INSTALL ID CODE BOX (IMMOBILISER CODE ECU) (w/ Smart Key System) Installation