Part 1
INTRODUCTION: REPAIR INSTRUCTION: PRECAUTION
PRECAUTION
1. BASIC REPAIR HINT
(a) HINTS ON OPERATIONS
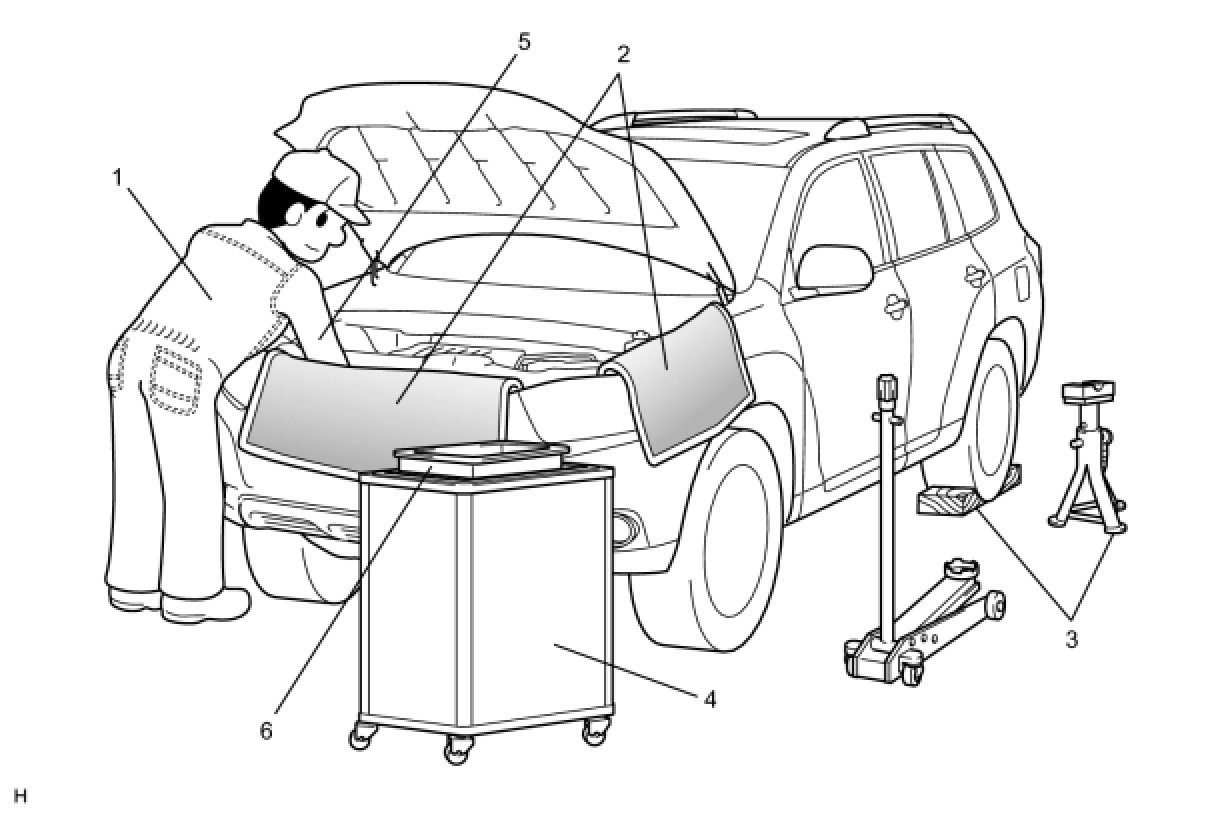
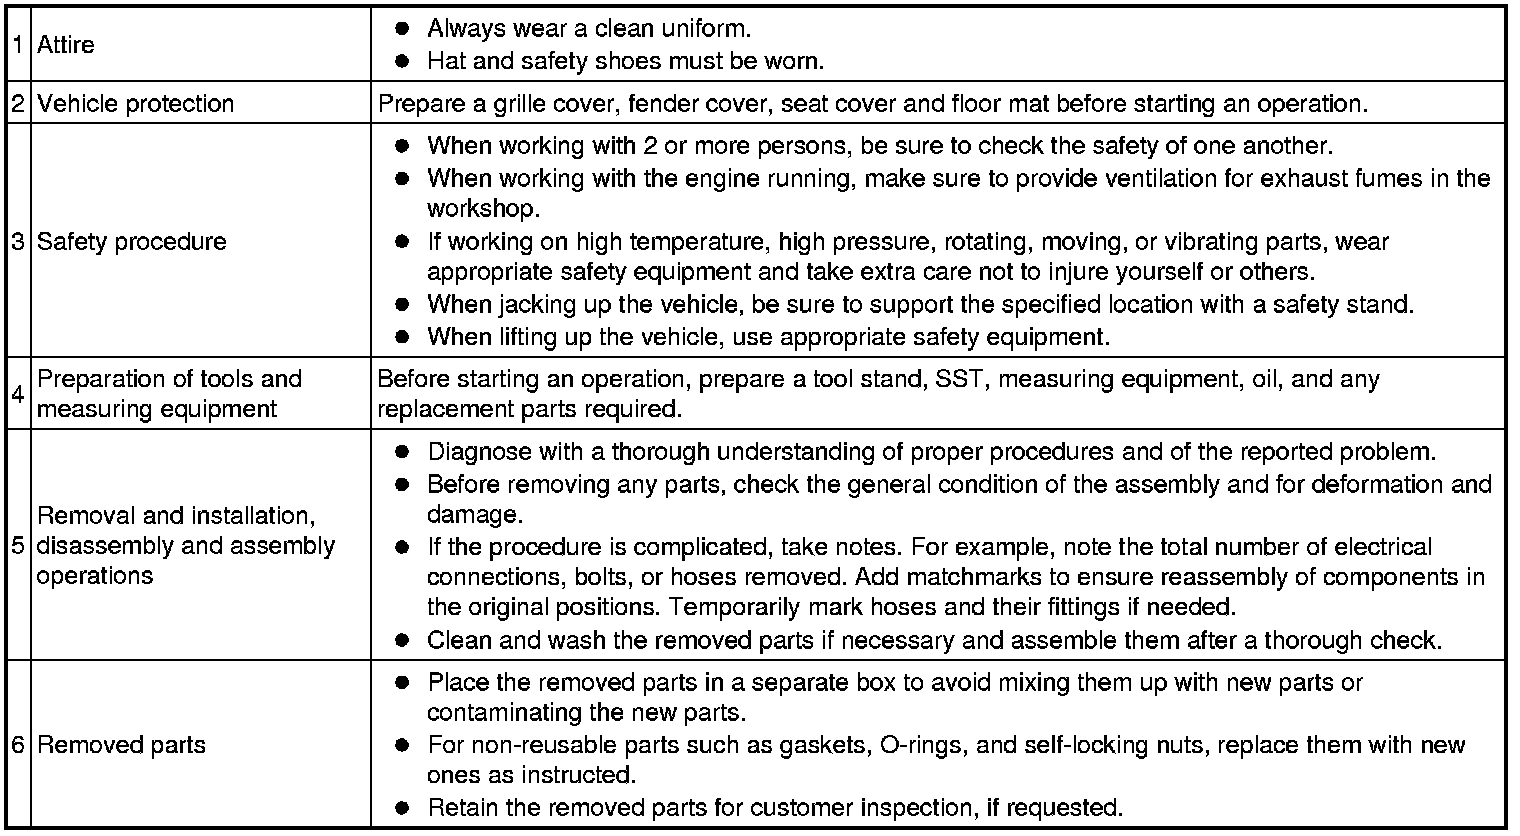
(b) JACKING UP AND SUPPORTING VEHICLE
(1) Care must be taken when jacking up and supporting the vehicle. Be sure to lift and support the vehicle at the proper locations.

(c) PRECOATED PARTS
(1) Precoated parts are bolts and nuts that are coated with a seal lock adhesive at the factory.
(2) If a precoated part is retightened, loosened or moved in any way, it must be recoated with the specified adhesive.
(3) When reusing a precoated part, clean off the old adhesive and dry the part with compressed air. Then apply new seal lock adhesive appropriately to that part.
(4) Some seal lock agents harden slowly. You may have to wait for the seal lock adhesive to harden.
(d) GASKETS
(1) When necessary, use a sealer on gaskets to prevent leaks.
(e) BOLTS, NUTS AND SCREWS
(1) Carefully follow all the specifications for tightening torques. Always use a torque wrench.
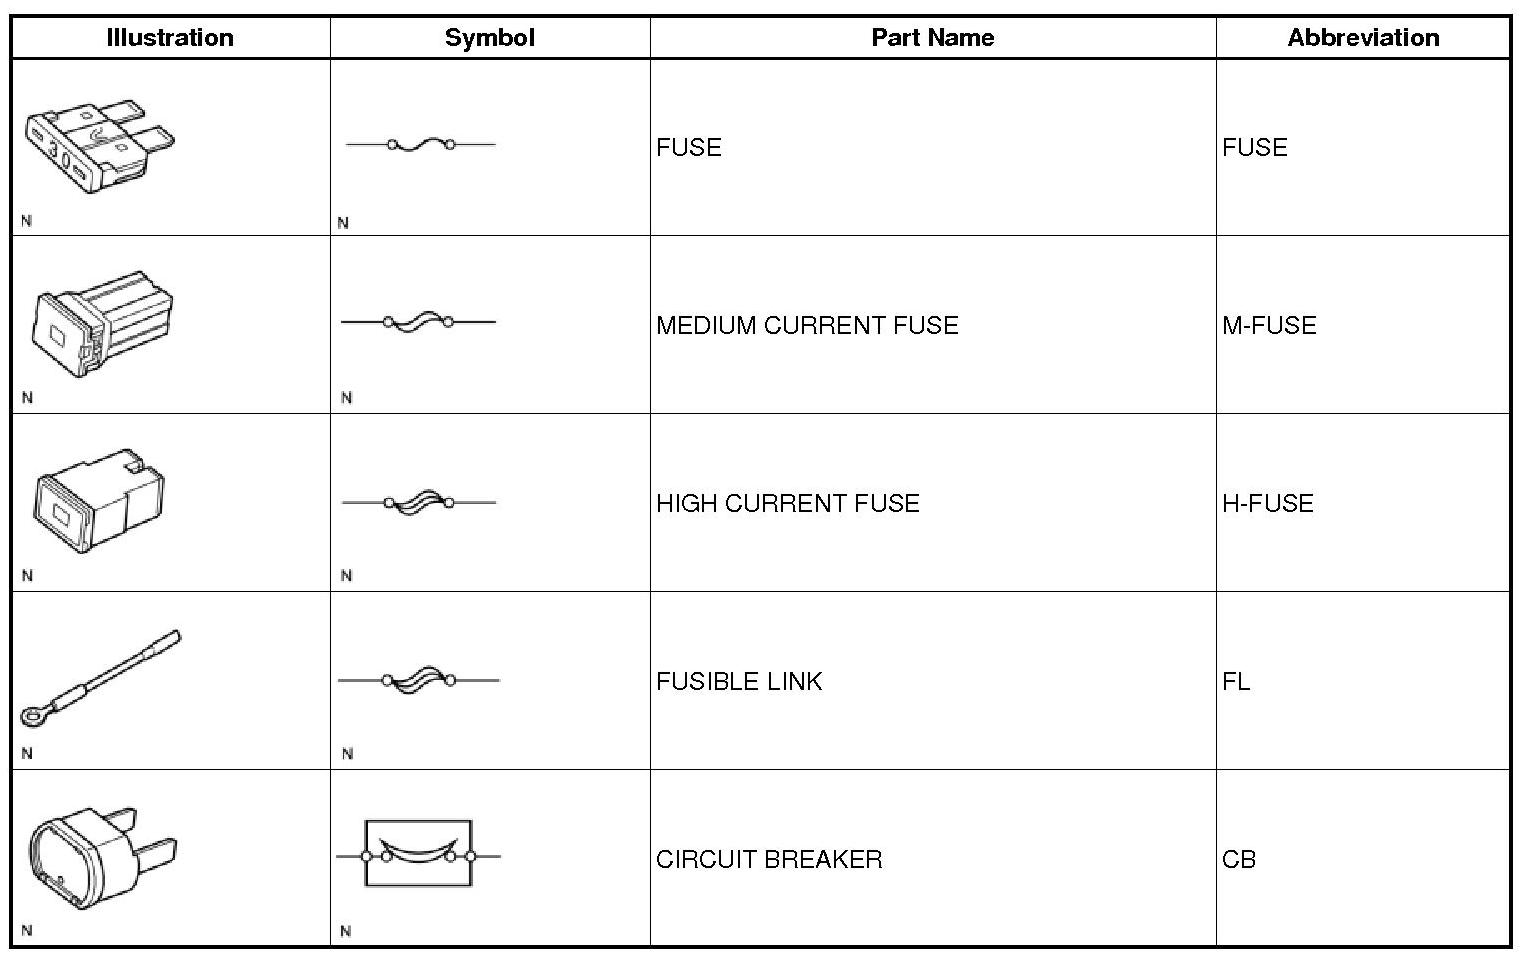
(f) FUSES

(1) When inspecting a fuse, check that the wire of the fuse is not broken.
(2) If the wire of a fuse is broken, confirm that there are no shorts in its circuit.
(3) When a fuse is replaced, a fuse with the same amperage rating must be used.
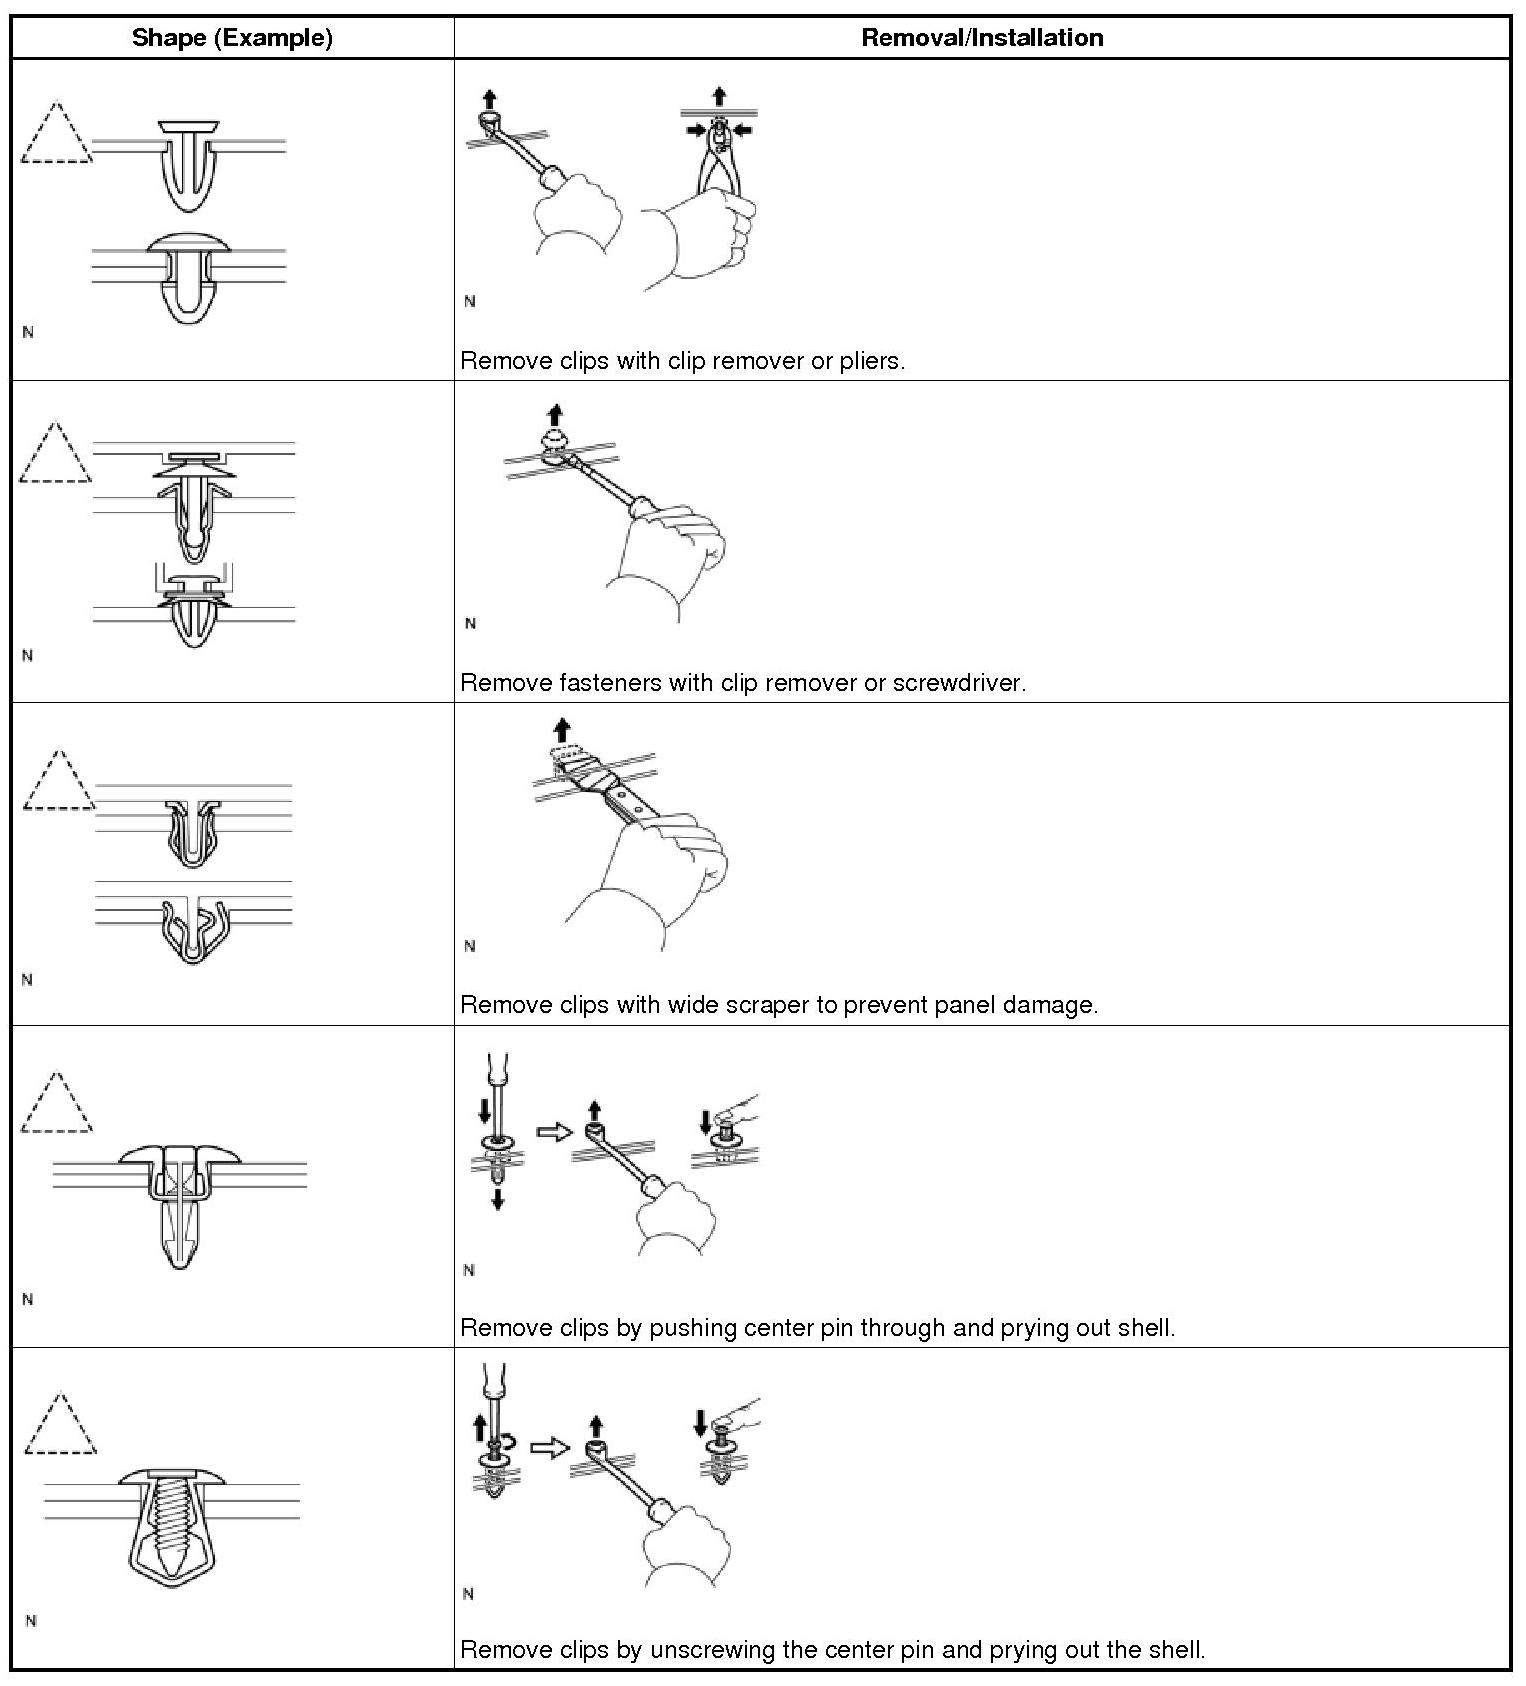
(g) CLIPS
(1) The removal and installation methods of typical clips used for vehicle body parts are shown in the table below.
HINT: If clips are damaged during a procedure, always replace the damaged clips with new ones.
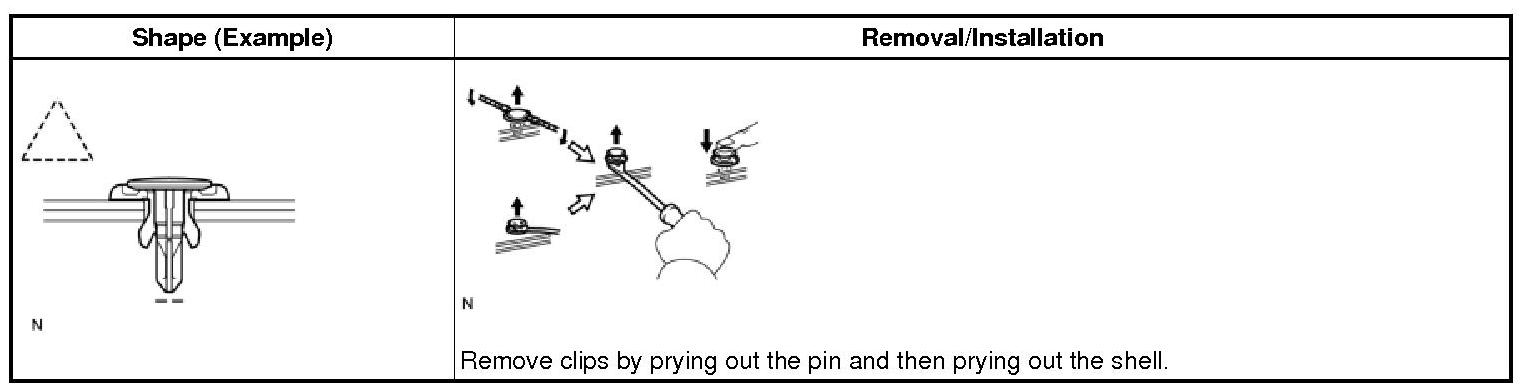
(h) CLAWS
(1) The removal and installation methods of typical claws used for vehicle body parts are shown in the table below.
HINT: If claws are damaged during a procedure, always replace the cap or cover that has damaged claws with a new one.
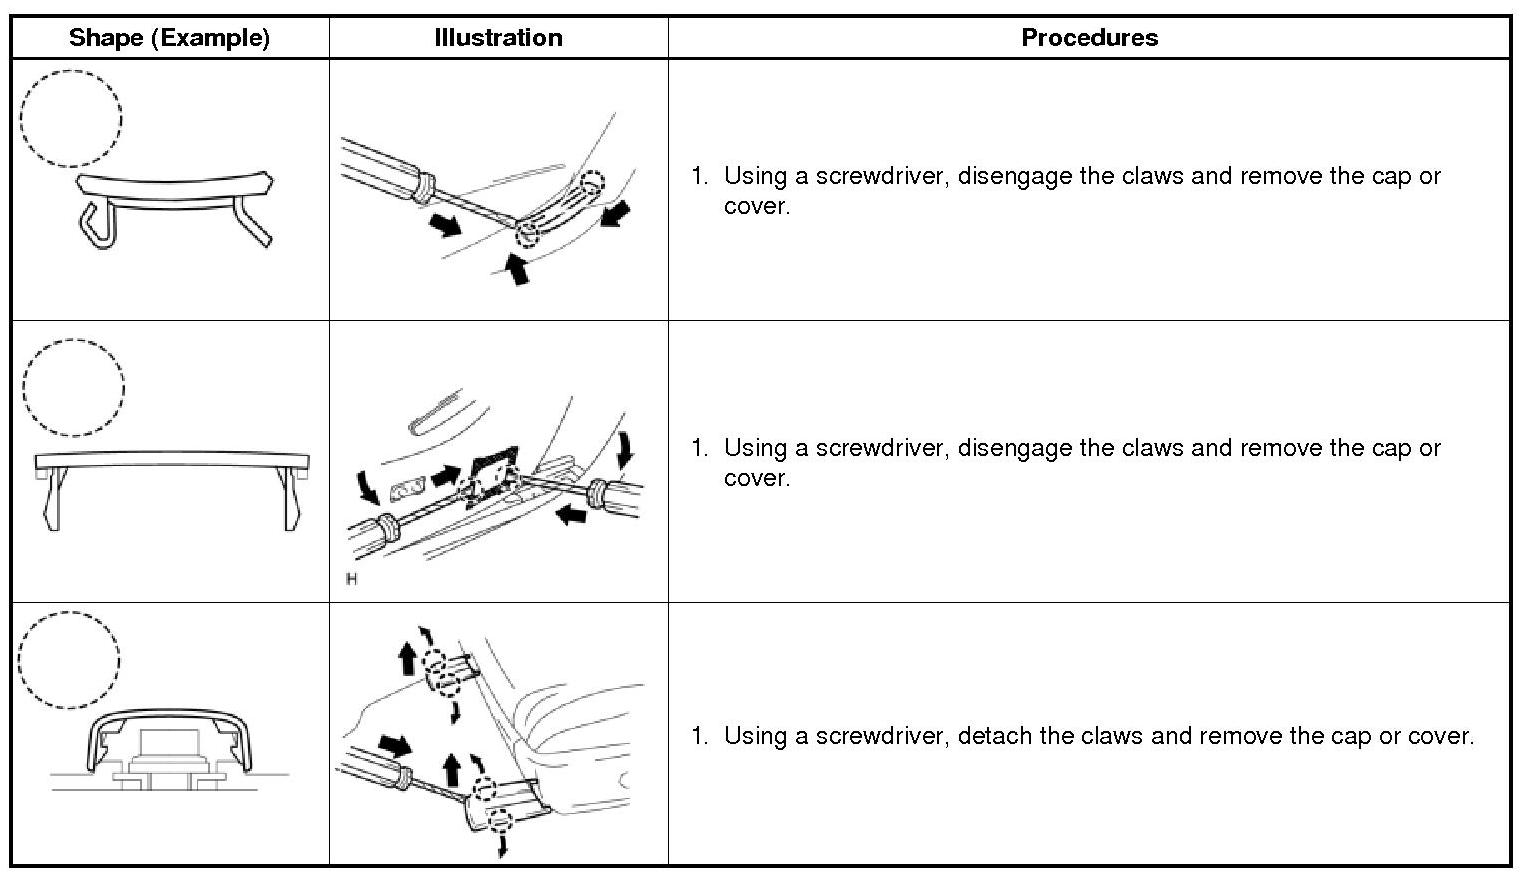
(i) HINGES, GUIDES, CLAMPS, PINS, AND ETC.
(1) The removal and installation methods of typical hinges, guides, clamps, and pins used for vehicle body parts are shown in the table below.
HINT: If clamps are damaged during a procedure, always replace the cap or cover that has damaged clamps with a new one.
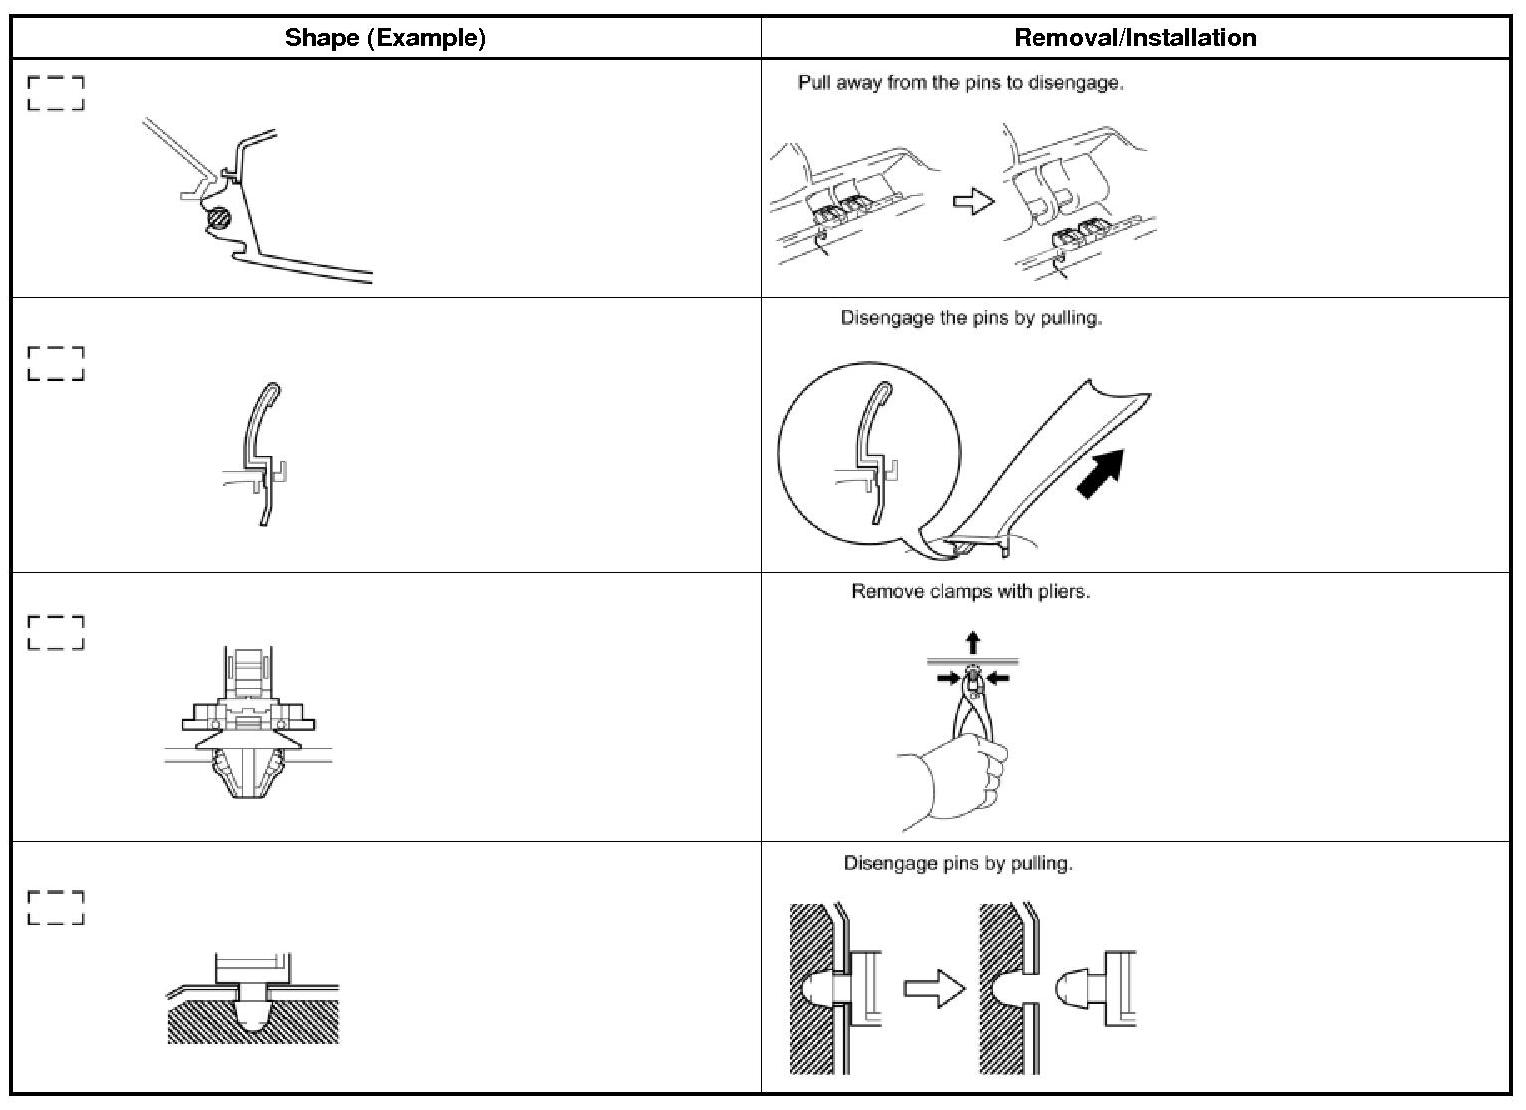
(j) REMOVAL AND INSTALLATION OF VACUUM HOSES

(1) To disconnect a vacuum hose, pull and twist from the end of the hose. Do not pull from the middle of the hose as this may damage the hose.

(2) When disconnecting vacuum hoses, use tags to identify where they should be reconnected.
(3) After completing any hose related repairs, double check that the vacuum hoses are properly connected. The label under the hood shows the proper layout.
(4) When using a vacuum gauge, never force the hose onto a connector that is too large. If a hose has been stretched, air may leak. Use a step-down adapter if necessary.
(k) TORQUE WHEN USING TORQUE WRENCH WITH EXTENSION TOOL


(1) Use the formula below to calculate special torque values for situations where SST or an extension tool is combined with a torque wrench.
Formula:
T' = (L2/(L1 + L2)) * T
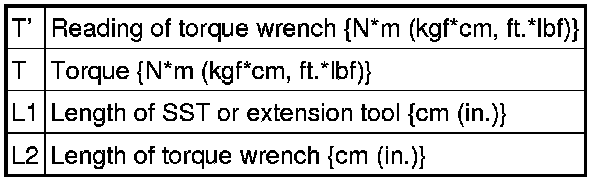
NOTE: If an extension tool or SST is combined with a torque wrench and used to tighten to a torque specification, the actual torque will be excessive and parts will be damaged.
2. PRECAUTIONS FOR HIGH-VOLTAGE CIRCUIT INSPECTION AND SERVICE
CAUTION: The HIGHLANDER HV has a hybrid system that operates at voltages up to 650 V. The hybrid system uses an HV battery that contains an electrolyte which is a strong alkali solution that includes potassium hydroxide. Be sure to follow the instructions to handle the system correctly. Failure to do so may result in serious injury or electrocution.
(a) Technicians must undergo special training to be able to service and inspect the high-voltage system.
(b) All high-voltage wire harnesses and connectors are colored orange. The HV battery and other high-voltage components have "High Voltage" caution labels. Do not carelessly touch these wires or components.
(c) When there is a problem with the wire harness or connector of a high-voltage circuit, repairs to the harness or connector should not be attempted. Replace damaged or malfunctioning high voltage cables or connectors.
(d) Before inspecting or servicing the high-voltage system, be sure to follow all safety measures, such as wearing insulated gloves and removing the service plug to prevent electrocution. Carry the removed service plug in your pocket to prevent other technicians from accidentally reconnecting it while you are servicing the vehicle.
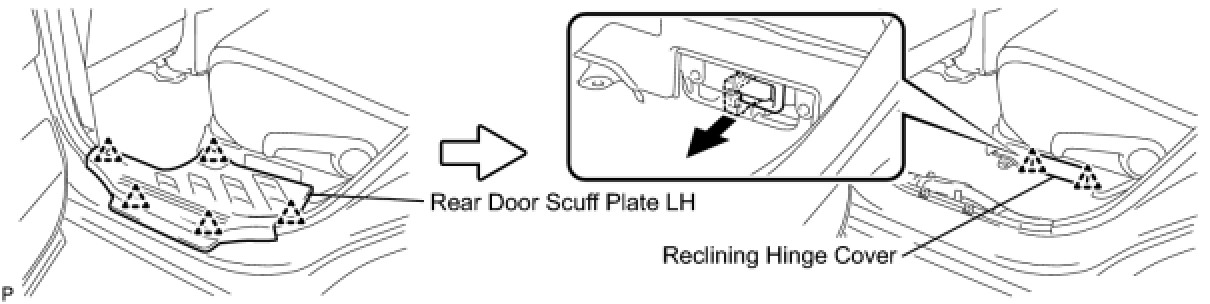
NOTE: After removing the service plug grip, do not turn the power switch on (READY), unless instructed by the repair manual because this may cause a malfunction.
(e) After removing the service plug, wait 5 minutes before touching any of the high-voltage connectors and terminals.
HINT: Waiting for at least 5 minutes is required to discharge the high-voltage capacitor inside the inverter with converter assembly.

(f) Before wearing insulated gloves, make sure that they are not cracked, ruptured, torn, or damaged in any way. Do not wear wet insulated gloves.
(g) When servicing the vehicle, do not carry metal objects like mechanical pencils or scales that can be dropped accidentally and cause a short circuit.
(h) Before touching a bare high-voltage terminal, wear insulated gloves and use a tester to make sure that the terminal voltage is 0 V.
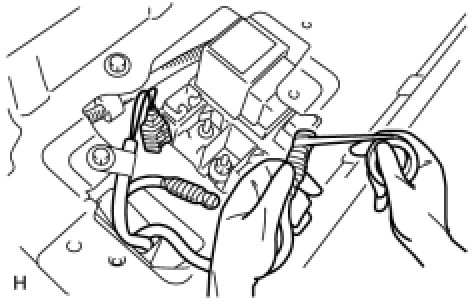
(i) After disconnecting or exposing a high-voltage connector or terminal, insulate it immediately using insulating tape.
(j) Bolts and nuts high-voltage terminals should be tightened firmly to the specified torque. Both insufficient and excessive torque can cause failure.
(k) Use the "CAUTION: HIGH VOLTAGE. DO NOT TOUCH DURING OPERATION" sign to notify other technicians that the high-voltage system is being inspected and/or repaired.
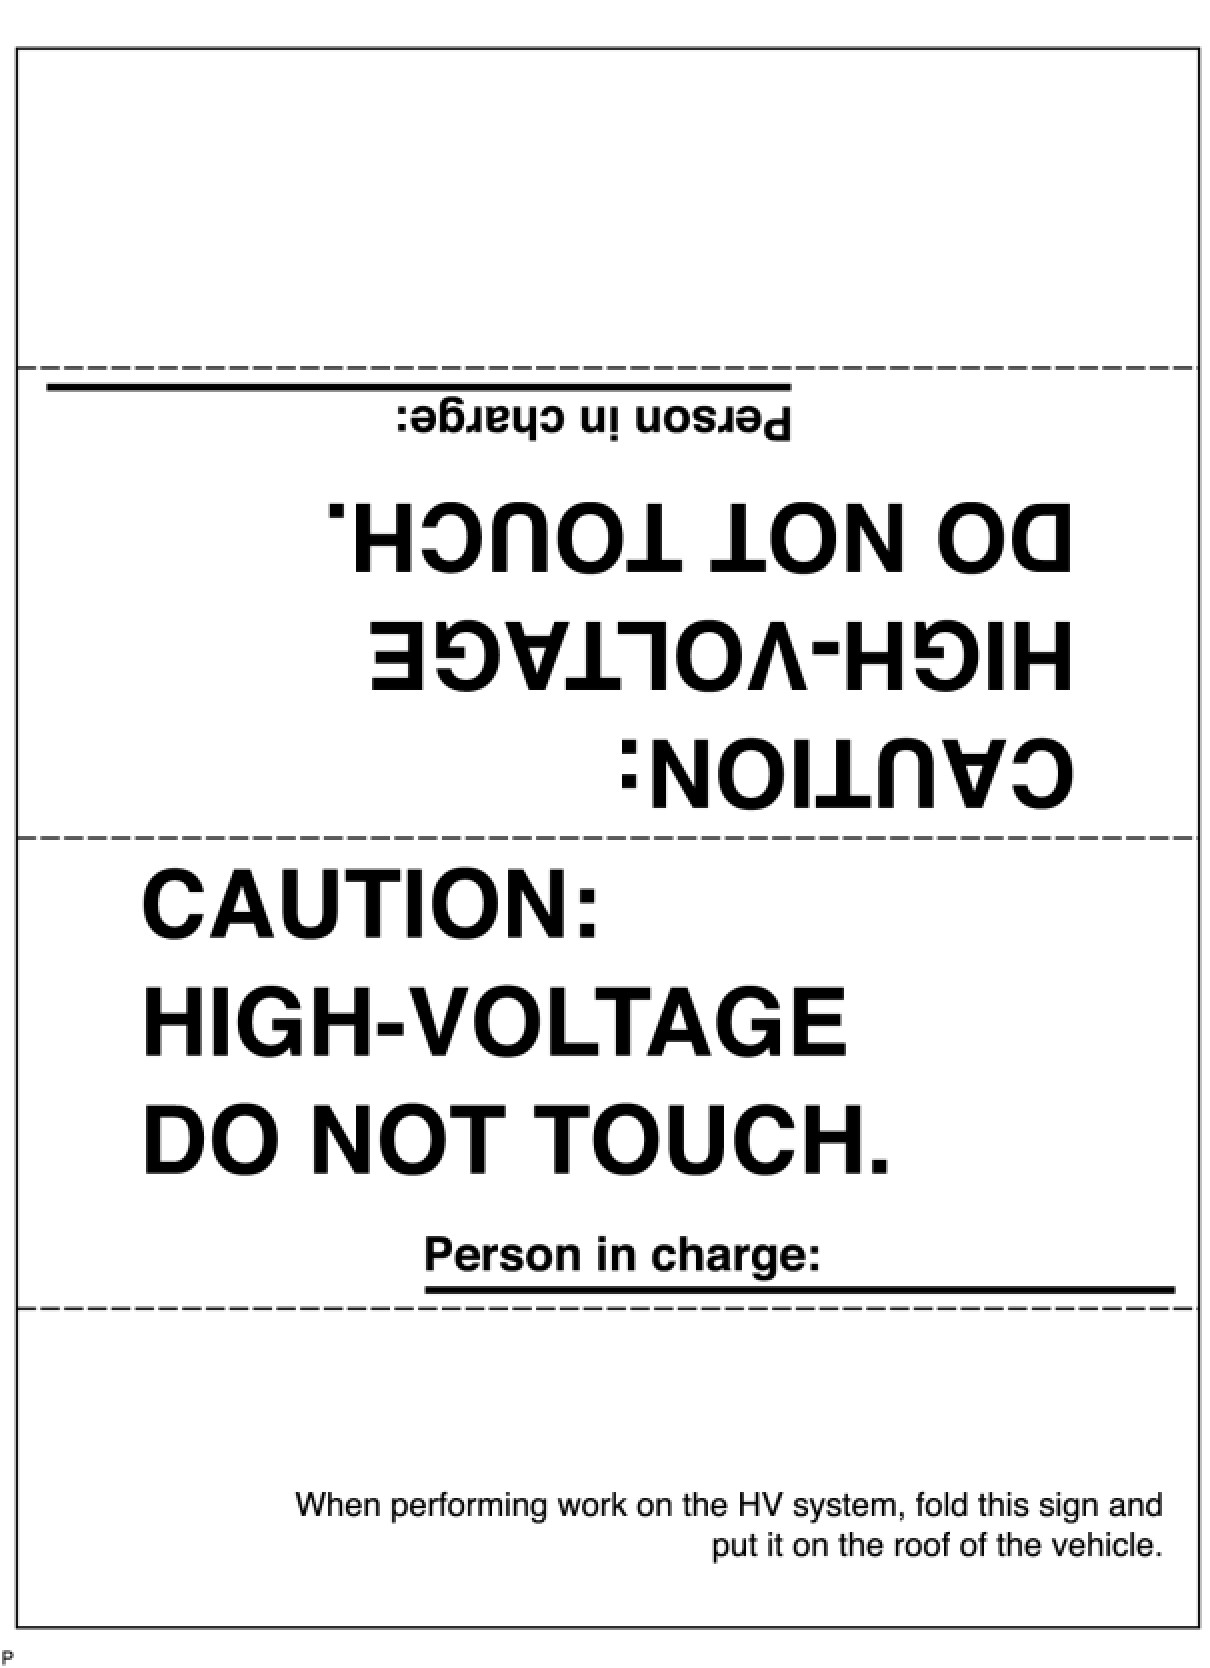
(l) After servicing the high-voltage system and before reinstalling the service plug, check again that you have not left a part or tool inside, that the high-voltage terminals are firmly tightened, and that the connectors are correctly connected.
(m) When installing hybrid system components such as the HV battery, make sure that the polarity of all connections is correct.
3. PRECAUTIONS TO BE OBSERVED WHEN INSPECTING OR SERVICING ENGINE COMPARTMENT
(a) The HIGHLANDER HV automatically turns the engine on and off when the READY light on the instrument panel is illuminated. To avoid injury, make sure that both the indicator on the power switch and the READY light on the meter are off.