Removal
HYBRID / BATTERY CONTROL: HV RELAY ASSEMBLY: REMOVAL
1. PRECAUTION
Service Precautions
2. REMOVE SERVICE PLUG GRIP
Removal
3. REMOVE CONNECTOR COVER ASSEMBLY Removal
4. CHECK TERMINAL VOLTAGE Removal
5. INSTALL CONNECTOR COVER ASSEMBLY Installation
6. REMOVE REAR SEAT CUSHION ASSEMBLY Removal
7. REMOVE REAR SEAT CUSHION LOCK HOOK Removal
8. REMOVE REAR SEATBACK ASSEMBLY RH Removal
9. REMOVE NO. 2 ROOM PARTITION COVER Removal
10. REMOVE REAR SEATBACK ASSEMBLY LH Removal
11. REMOVE REAR SIDE SEATBACK ASSEMBLY LH Removal
12. REMOVE REAR SIDE SEATBACK ASSEMBLY RH Removal
13. DISCONNECT REAR DOOR OPENING TRIM WEATHERSTRIP LH Removal
14. DISCONNECT REAR DOOR OPENING TRIM WEATHERSTRIP RH Removal
15. DISCONNECT REAR SEAT OUTER BELT ASSEMBLY (for LH Side) Removal
16. DISCONNECT REAR SEAT OUTER BELT ASSEMBLY (for RH Side) Removal
17. REMOVE CHILD RESTRAINT SEAT ANCHOR BRACKET SUB-ASSEMBLY LH Removal
18. DISCONNECT REAR SEAT INNER WITH CENTER BELT ASSEMBLY LH Removal
19. REMOVE ROOF SIDE INNER GARNISH LH Removal
20. REMOVE ROOF SIDE INNER GARNISH RH Removal
21. REMOVE CENTER STOP LIGHT SET Removal
22. REMOVE CHILD RESTRAINT SEAT TETHER ANCHOR COVER Removal
23. REMOVE REAR SEAT SHOULDER BELT COVER Removal
24. REMOVE PACKAGE TRAY TRIM PANEL ASSEMBLY Removal
25. REMOVE NO. 1 ROOM PARTITION BOARD Removal
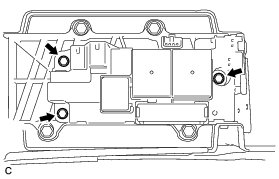
26. REMOVE NO. 4 HYBRID BATTERY SHIELD PANEL
CAUTION:
Wear insulated gloves.
(a) Using the service plug grip, remove the battery cover lock striker.
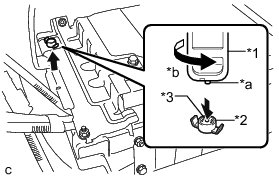
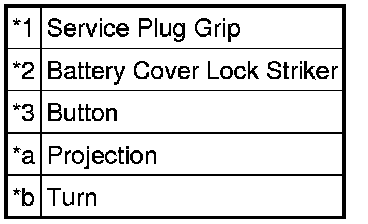
Text in Illustration
HINT
Insert the projecting part of the service plug grip, and turn the button of the battery cover lock striker counterclockwise to release the lock.
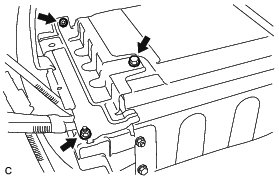
(b) Remove the bolt, 2 nuts and No. 4 hybrid battery shield panel.
27. DISCONNECT NO. 4 FLOOR WIRE
CAUTION:
Wear insulated gloves.
NOTICE:
Insulate the disconnected connectors with insulating tape.
(a) Disconnect the 2 connectors shown in the illustration.
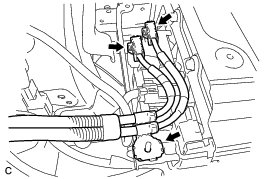
(b) Disconnect the shielded wire ground and No. 4 floor wire.
28. REMOVE NO. 1 HYBRID BATTERY SHIELD SUB-ASSEMBLY
CAUTION:
Wear insulated gloves.
(a) Disconnect the connector and wire harness clamp.
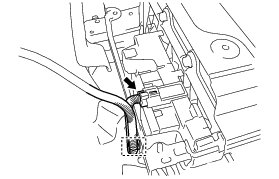
(b) Remove the bolt, 3 nuts and No. 1 hybrid battery shield sub-assembly.
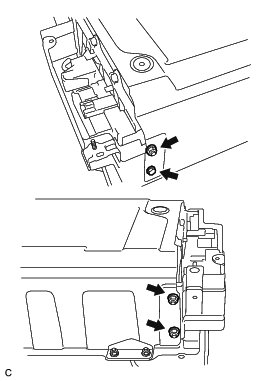
29. REMOVE HYBRID BATTERY JUNCTION BLOCK ASSEMBLY
CAUTION:
Wear insulated gloves.
NOTICE:
Insulate the disconnected terminals with insulating tape.
(a) Disengage the claw and disconnect the terminal cover.
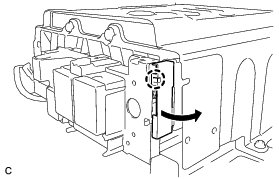
(b) Using an insulated tool, remove the 2 bolts.
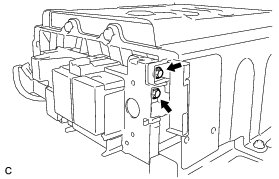
(c) Disconnect the connector shown in the illustration.
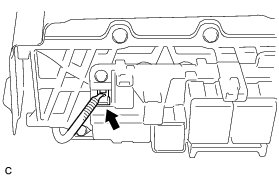
(d) Remove the 3 bolts and hybrid battery junction block assembly.