Installation
1UR-FE EMISSION CONTROL: EGR VALVE: INSTALLATION
1. INSTALL EGR VALVE BRACKET
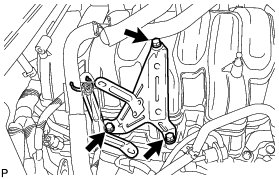
(a) Install the EGR valve bracket with the 3 bolts.
Torque : 21 Nm (214 kgf-cm, 15 ft-lbf)
2. INSTALL NO. 3 EGR PIPE SUB-ASSEMBLY
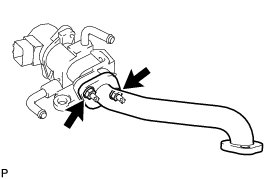
(a) Install a new gasket and the No. 3 EGR pipe with the 2 nuts.
Torque : 10 Nm (102 kgf-cm, 7 ft-lbf)
3. INSTALL EGR INLET
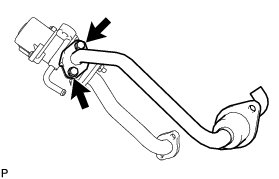
(a) Install a new gasket and the EGR inlet with the 2 bolts.
Torque : 10 Nm (102 kgf-cm, 7 ft-lbf)
NOTICE:
Make sure the gasket's claws are not caught between the EGR inlet and EGR valve.
4. INSTALL EGR VALVE ASSEMBLY
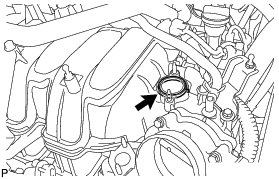
(a) Install a new gasket to the intake manifold.
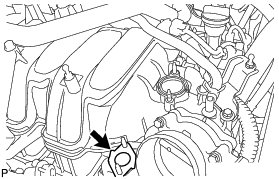
(b) Install a new gasket to the No. 2 EGR pipe.
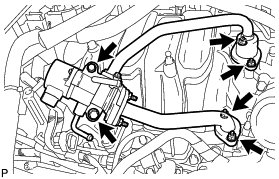
(c) Temporarily install the EGR valve assembly to the intake manifold with the 2 bolts and 4 nuts.
NOTICE:
Be careful not to damage the intake manifold when installing the EGR valve assembly.
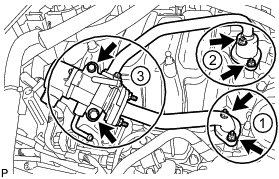
(d) Using several steps, uniformly tighten the 2 bolts and 4 nuts in the sequence shown in the illustration.
for bolt - Torque : 21 Nm (214 kgf-cm, 15 ft-lbf)
for nut - Torque : 10 Nm (102 kgf-cm, 7 ft-lbf)
5. CONNECT NO. 13 WATER BY-PASS HOSE
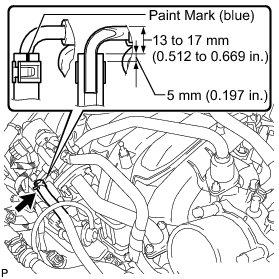
(a) Connect the No. 13 water by-pass hose.
HINT
The direction of the hose clamp is indicated in the illustration.
6. CONNECT NO. 12 WATER BY-PASS HOSE
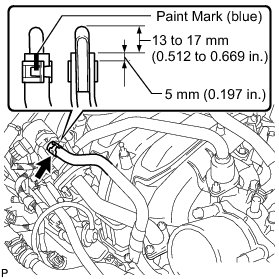
(a) Connect the No. 12 water by-pass hose.
HINT
The direction of the hose clamp is indicated in the illustration.
7. INSTALL AIR CLEANER HOSE ASSEMBLY Installation
8. ADD ENGINE COOLANT Service and Repair
9. INSPECT FOR COOLANT LEAK Testing and Inspection
10. INSTALL V-BANK COVER SUB-ASSEMBLY Installation