Reassembly
1UR-FE BATTERY / CHARGING: GENERATOR: REASSEMBLY
1. INSTALL GENERATOR DRIVE END FRAME BEARING
(a) for 130 A, 150 A Type:
(1) Using SST and a press, press in a new bearing.
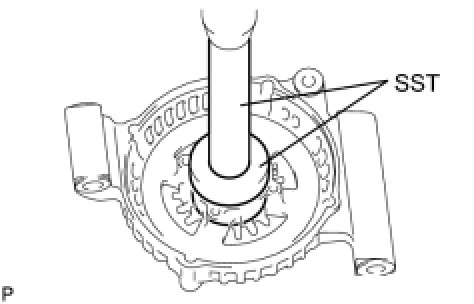
SST : 09950-60010
09951-00470
SST : 09950-70010
09951-07100
(2) Install the retainer plate with the 4 screws.
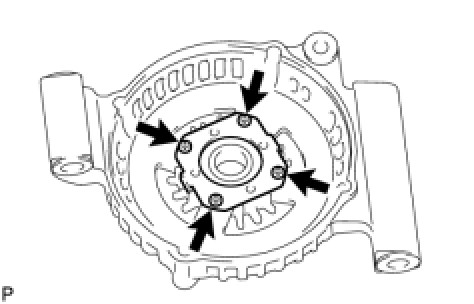
Torque : 2.3 Nm (23 kgf-cm, 20 in-lbf)
(b) for 180 A Type:
(1) Using SST and a press, press in a new bearing.
SST : 09950-60010
09951-00470
SST : 09950-70010
09951-07100
(2) Install the retainer plate with the 4 screws.
Torque : 3.0 Nm (30 kgf-cm, 26 in-lbf)
2. INSTALL GENERATOR ROTOR ASSEMBLY
(a) Place the drive end frame on the pulley.
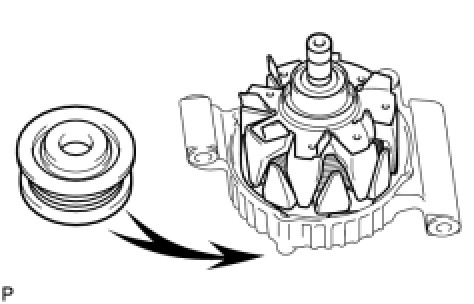
(b) Install the rotor to the drive end frame.
3. INSTALL GENERATOR COIL ASSEMBLY (for 130 A, 150 A Type)
(a) Place the generator washer on the rotor.
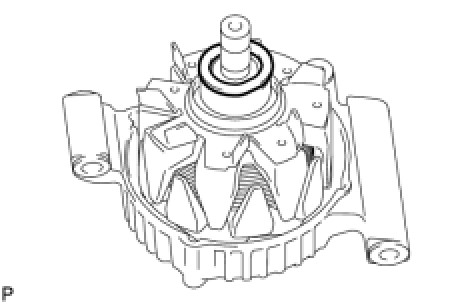
(b) Using SST and a press, slowly press in the coil assembly.
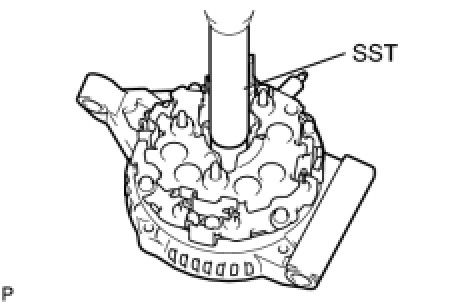
SST : 09285-76010
(c) Install the 4 bolts.
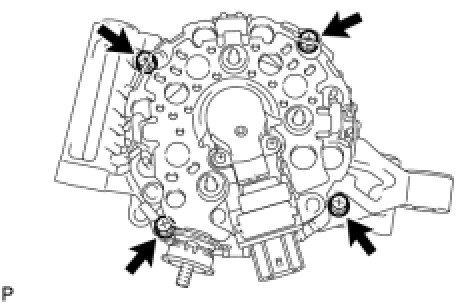
Torque : 5.8 Nm (59 kgf-cm, 51 in-lbf)
4. INSTALL GENERATOR COIL ASSEMBLY (for 180 A Type)
(a) Place the generator washer on the rotor.
(b) Using SST and a press, slowly press in the coil assembly.
SST : 09285-76010
(c) Install the 4 bolts.
Torque : 7.5 Nm (76 kgf-cm, 66 in-lbf)
5. INSTALL GENERATOR BRUSH HOLDER ASSEMBLY
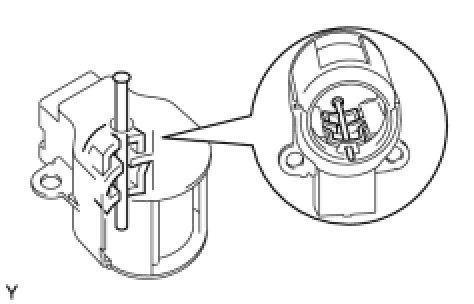
(a) While pushing the 2 brushes toward the inside of the brush holder, insert a pin (diameter: 1.0 mm (0.0394 in.)) into the brush holder hole.
(b) Install the generator brush holder with the 2 screws.
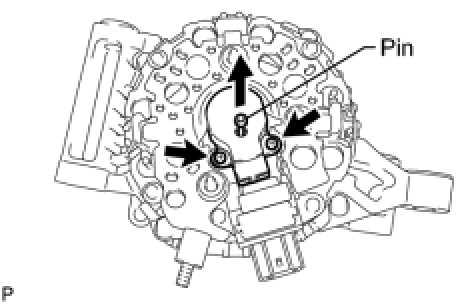
Torque : 1.8 Nm (18 kgf-cm, 16 in-lbf)
(c) Pull out the pin from the generator brush holder.
6. INSTALL GENERATOR REAR END COVER
(a) Install the terminal insulator to the generator rectifier end frame.
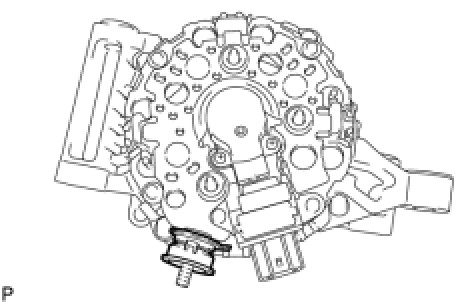
NOTICE:
Pay attention to the mounting orientation of the terminal insulator.
(b) Install the end cover with the 3 nuts.
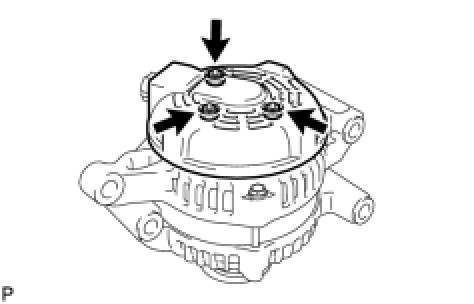
Torque : 4.6 Nm (47 kgf-cm, 41 in-lbf)
7. INSTALL GENERATOR PULLEY
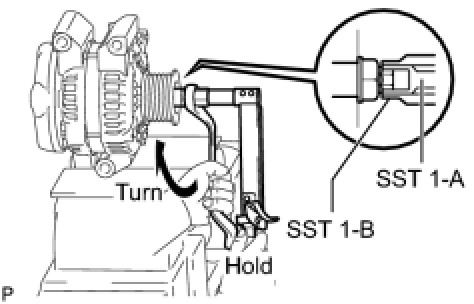
(a) Clamp the generator housing stay in a vise.
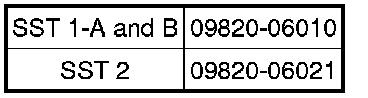
(b) Install SST 1-A to the pulley shaft.
SST : 09820-63011
09820-06010
09820-06021
HINT
(c) Install SST 1-B to SST 1-A.
(d) Install the pulley onto the rotor shaft by tightening the pulley nut by hand.
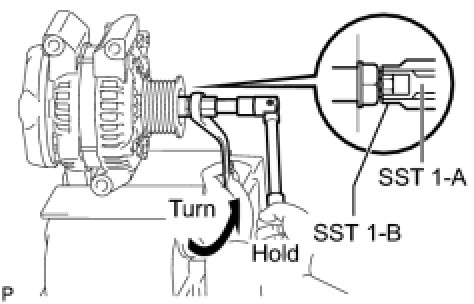
(e) Hold SST 1-A with a torque wrench, and tighten SST 1-B clockwise to the specified torque.
Torque : 39 Nm (398 kgf-cm, 29 ft-lbf)
NOTICE:
Check that SST is secured to the rotor shaft.
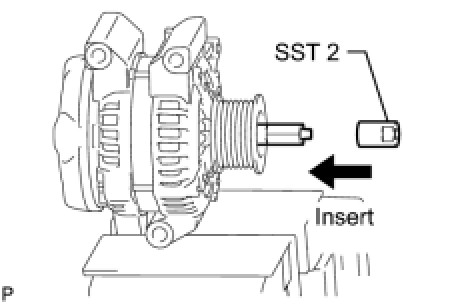
(f) Insert SST 2, and attach the pulley nut to SST 2.
(g) Tighten the pulley nut by turning SST 1-A in the direction shown in the illustration.
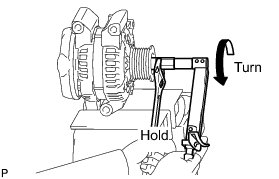
Torque : 133 Nm (1356 kgf-cm, 98 ft-lbf)
HINT
Hold the adjustable wrench against the vise and tighten the nut securely.
(h) Remove SST 2 from the generator.
(i) Turn SST 1-B, and remove SST 1-A and B.
(j) Turn the pulley and check that the pulley moves smoothly.