Disassembly
HEATING / AIR CONDITIONING: FRONT AIR CONDITIONING UNIT: DISASSEMBLY
1. REMOVE TRANSPONDER KEY ECU ASSEMBLY (w/ Engine Immobiliser System) Removal
2. REMOVE DEFROSTER LOWER NOZZLE ASSEMBLY
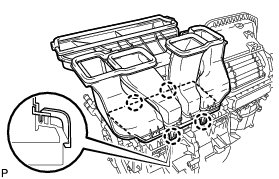
(a) Disengage the 4 claws and remove the defroster lower nozzle.
3. REMOVE NO. 2 AIR DUCT SUB-ASSEMBLY
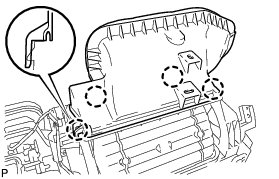
(a) Disengage the 4 claws and remove the No. 2 air duct.
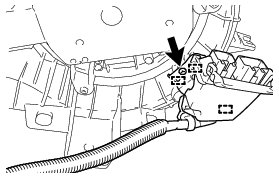
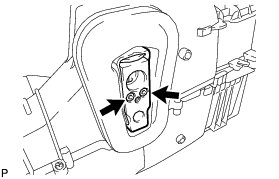
4. REMOVE NO. 1 AIR CONDITIONING RADIATOR DAMPER SERVO SUB-ASSEMBLY
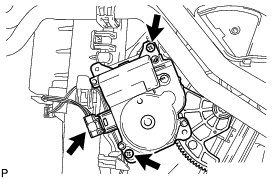
(a) Disconnect the connector.
(b) Remove the 2 screws and No. 1 air conditioning radiator damper servo.
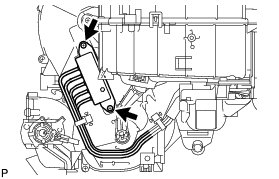
5. REMOVE HEATER RADIATOR UNIT SUB-ASSEMBLY
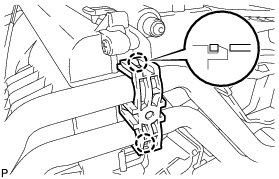
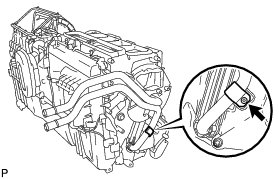
(a) Disengage the 2 claws and remove the heater clamp.
(b) Remove the screw and piping clamp.
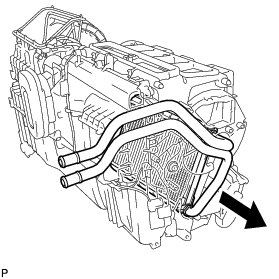
(c) Remove the heater radiator unit from the air conditioning radiator.
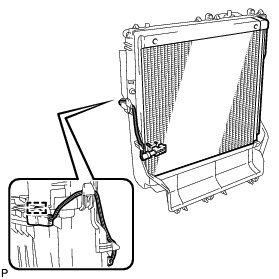
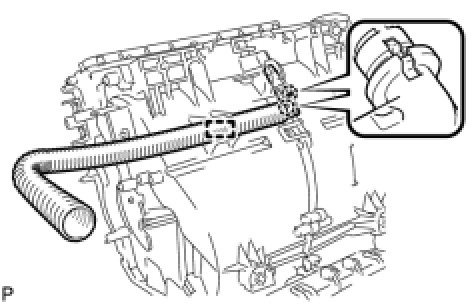
6. REMOVE AIR CONDITIONING HARNESS
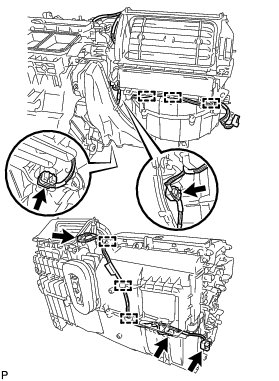
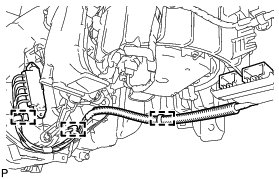
(a) Disconnect the 5 connectors.
(b) Disengage the 6 clamps and remove the air conditioning harness.
7. REMOVE NO. 4 AIR DUCT SUB-ASSEMBLY Disassembly
8. REMOVE PTC HEATER ASSEMBLY (w/ PTC Heater)
(a) Disengage the 3 clamps.
(b) Remove the screw, then disengage the 3 guides and separate the cover plate.
(c) Remove the 2 screws and PTC heater.
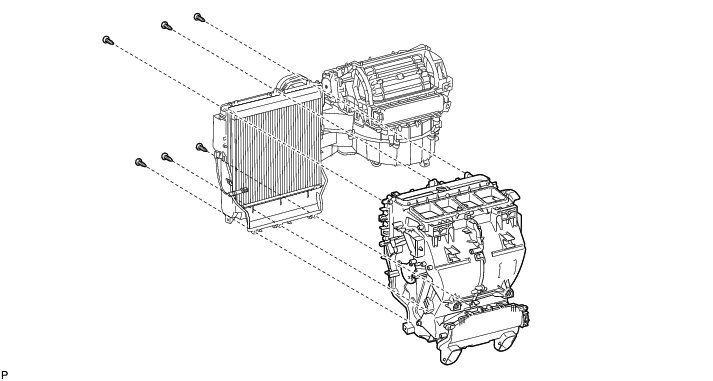
9. REMOVE AIR CONDITIONING RADIATOR ASSEMBLY
(a) Remove the 6 screws and air conditioning radiator assembly from the blower assembly with evaporator sub-assembly.
10. REMOVE NO. 2 AIR CONDITIONING RADIATOR DAMPER SERVO SUB-ASSEMBLY
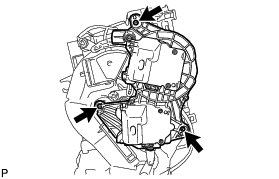
(a) Remove the 3 screws and No. 2 air conditioning radiator damper servo.
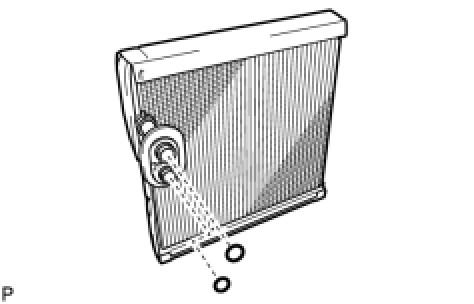
11. REMOVE COOLER EXPANSION VALVE
(a) Using a 4 mm hexagon wrench, remove the 2 hexagon bolts and detach the cooler expansion valve.
(b) Remove the 2 O-rings from the cooler evaporator.
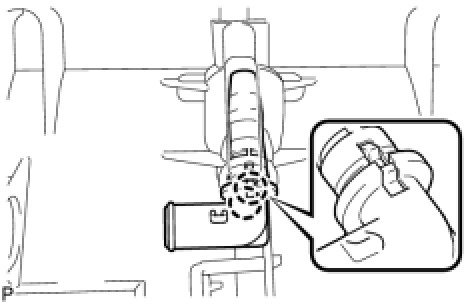
12. REMOVE NO. 1 COOLER EVAPORATOR SUB-ASSEMBLY
(a) Disengage the clamp and remove the No. 1 cooler evaporator with the cooler thermistor.
(b) Remove the 2 O-rings from the No. 1 cooler evaporator.
13. REMOVE NO. 1 COOLER THERMISTOR Removal
14. REMOVE ASPIRATOR (for Manual Air Conditioning System)
(a) Disengage the 2 claws and remove the aspirator.
15. REMOVE ASPIRATOR (for Automatic Air Conditioning System)
(a) Disengage the clamp.
(b) Disengage the 2 claws and remove the aspirator.