Replacement
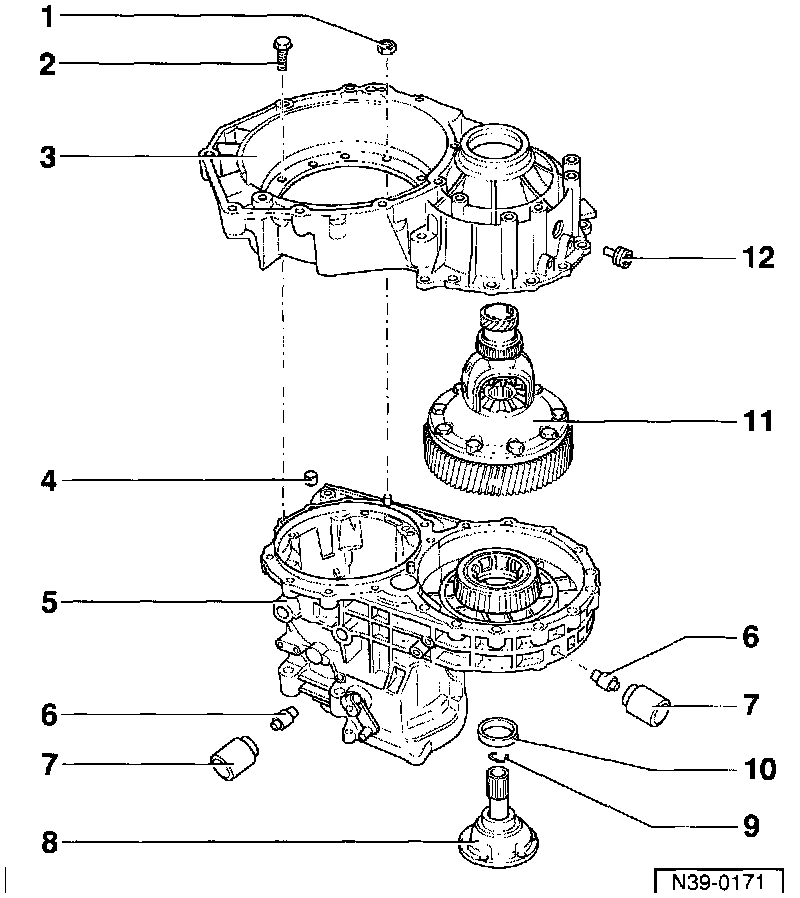
Component Notes And Information
NOTE:
^ During service procedures, refer to the illustration above and the information below.
^ The drive pinion does not need to be removed for removing and installing the differential.
1 Nut
- Tighten to: 25 Nm (18 ft lb)
- Qty. 2
2 Screw
- Tighten to: 25 Nm (118 ft lb)
3 Torque converter
- Is allocated to transmission housing according to engine version
- As a replacement part it is allocated according to transmission code letters refer to Replacement parts supplier
- On vehicles with diesel engine the Engine Speed (RPM) Sensor -G28- is installed in the top of the torque converter housing refer to Fig. 3 below
4 Sleeve
- To centralize the transmission and torque converter housing
5 Transmission housing
- Before assembling transmission and torque converter housings together, coat sealing surfaces with AMV 188 200
6 Breather tube
- Remove using pliers
- Drive onto stop using drift VW 460/2
7 Breather cap
8 Flange shaft
- Remove using VW 771
- Drive in using plastic hammer
9 Circlip
- Always replace
- Removing and installing refer to Fig. 1 below
10 Oil seal for flange shaft
- Before installing, pack space between sealing lips with multipurpose grease
- Can be replaced with transmission installed. Left Seal and Right Seal For Models Up to Dec. 1995
- Remove with VW 681
- Driving in refer to Fig. 2 below
11 Differential
- Disassembling and assembling refer to Disassembly/Assembly.
12 Plug
- Tighten to: 20 Nm (15 ft lb)
- Checking gear oil with transmission installed. Testing and Inspection
Procedures
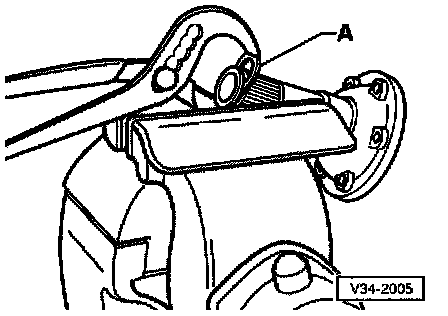
Fig. 1 Removing And Installing Circlip
- Clamp flange shaft in vice using protective vice clamps.
- Press circlip out of flange shaft groove using new circlip -A-.
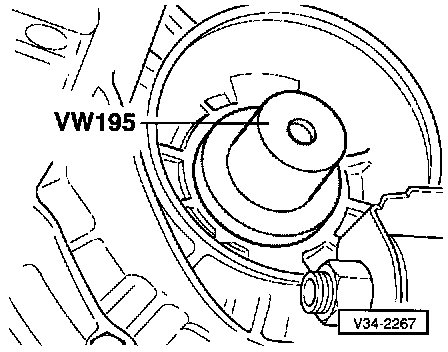
Fig. 2 Drive Seal In Onto Stop Using VW 195
- Fill space between seal and dust lip with multi-purpose grease.
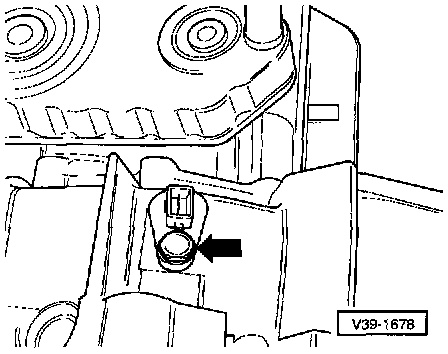
Fig. 3 Engine Speed Sensor (only For Diesel Engines)
- Remove bolt -arrow- and remove Engine Speed Sensor -G28- from torque converter housing.