Front Camber
Front axle camber, centering
Only by moving the subframe it is possible to change the camber slightly.
- Remove noise insulation tray.

- Loosen hex bolts -1-, -2-, -5-, -6-, -7- and -8-.
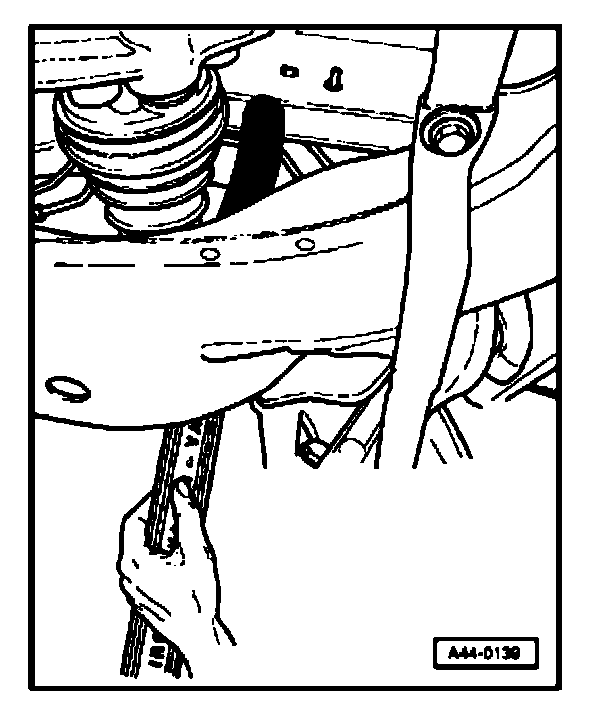
- Move subframe with a plastic coated pry bar until the specified value for camber is achieved.
- Screw in new hex bolts -7- and -8-.
- Screw in new front hex bolts -5- and -6- and tighten, Refer to Front Suspension, Service and Repair, Front Suspension, Servicing, See item 28.
- Tighten new hex bolts -1-, -2-, -3- and -4- , Refer to Front Suspension, Service and Repair, Front Suspension, Servicing, See - item 27.
- Install sound insulation below engine/transmission.
Important: The toe must be checked after each camber adjustment.