Trunk / Liftgate Weatherstrip: Service and Repair
Seal
The seal on the rear lid is equipped at the factory with a sealant, applied to body flange and then rolled on.
• When the seal is removed, the sealant spreads on the inner side of the seal and the sides bend up slightly. If the seal is being installed again, the sealing performance and proper seating are no longer guaranteed.
• For this reason, every seal, that has been removed completely, must be replaced with a "hammer-stroke seal".
• For partially removed seals, seal flanks must be pressed together before installation.
Removing
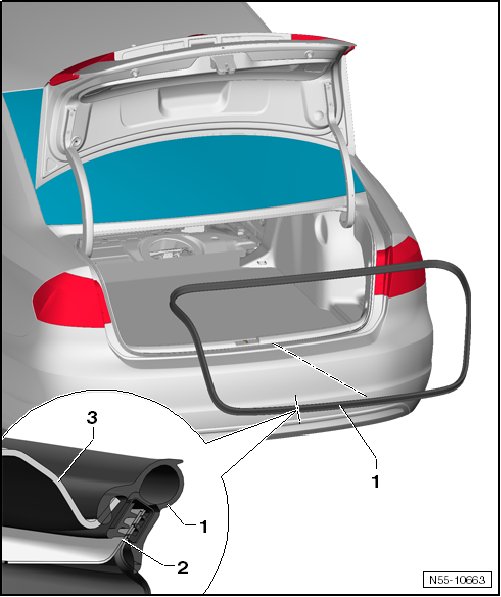
- Remove the rear lid seal - 1 - from the body flange - 2 -.
Installation
- Slide the seal - 1 - over the rear lid.
- Align the rear lid seal - 1 - with the vulcanized point on the left tail lamp assembly.
- Press the rear lid seal - 1 - evenly onto the body flange - 2 -.
• Make sure the trim panel - 3 - fits inside the protective strip on the rear lid seal - 1 - after it has been installed.