Front Axle Camber, Correcting
Front Axle Camber, Correcting
Special tools, testers and auxiliary items required
• Torque wrench (V.A.G 1332)
• Camber correction is required only after repair work on chassis. The camber is not adjustable, however it can be rearranged by sliding the subframe!
• Slide subframe only toward left or right, under no circumstances in or against direction of travel!
- Remove noise insulation.
- Loosen bolts - 1 - for subframe - 2 - to body on both sides.

Adjusting the camber is limited by the subframe hole tolerances. If moving the subframe does not reach the specified value, then check the installation.=> [ Chassis Evaluation Checklist for Accident Vehicles ] Chassis Evaluation Checklist for Accident Vehicles.
- Only specified value for camber can be adjusted by moving subframe - arrows 3 -.
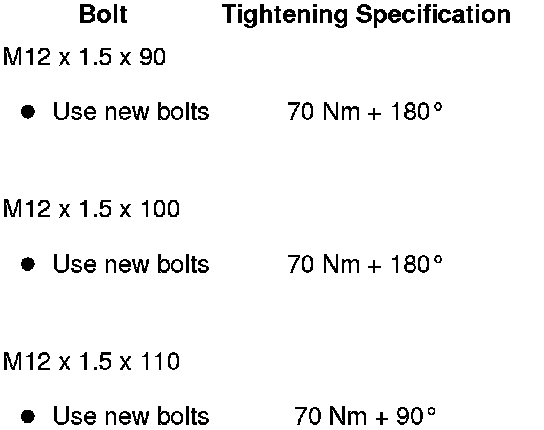
- Bolt on subframe to body with additional torque angle using new bolts.
After sliding subframe and steering gear along with it as well, clearance between universal joint of steering column and cutout of bulkhead must be checked.
- Remove securing nuts - arrows - and remove foot well trim.

There must be at least 5 mm of clearance between universal joint - 2 - and cutout in bulkhead.

Tightening Specifications

Tightening specifications, subframe to body