Spring, Spring Strut Mount, Shock Absorber, Replacement
C. SPRING, SPRING STRUT MOUNT, SHOCK ABSORBER, REPLACEMENTSpecial tools: 961 4031, 999 5036, -5037, -5407
C1
Raise the car and remove the wheel
C2
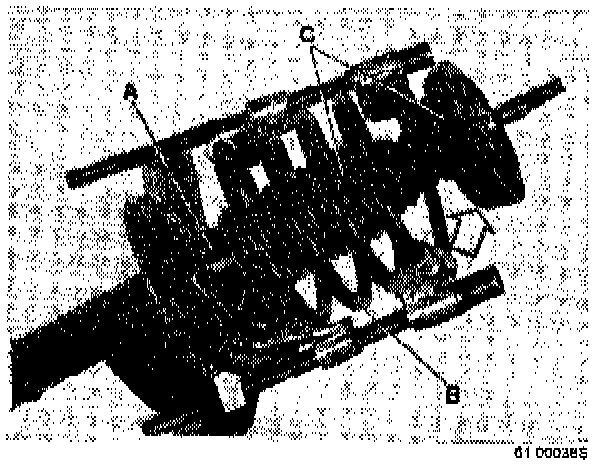
Remove the ABS sensor from the stub axle
Remove the screw to the ABS sensor (A). Detach the ABS sensor cable from the spring strut (B).
C3
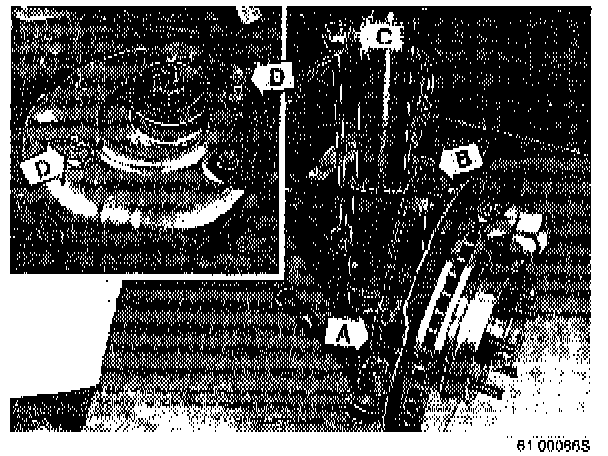
Remove the nut (C) to the anti-roll bar link from the spring strut
Tap off the link from the spring strut.
C4
Loosen the nuts (D) holding the spring strutmount to the body a few turns
See inset illustration
C5
Use a jack and place in position
Turn the wheel out and position the jack under the control arm applying a light pressure.
Note!
The pressured applied from the jack is important in order to prevent the brake hose from stretching when the spring strut is removed from the stub axle.
C6
Remove the spring strut.

Remove the two retaining screws holding the spring strut in the stub axle.
Remove the nuts to the spring strut mounting on the body.
Remove the spring strut.
C7
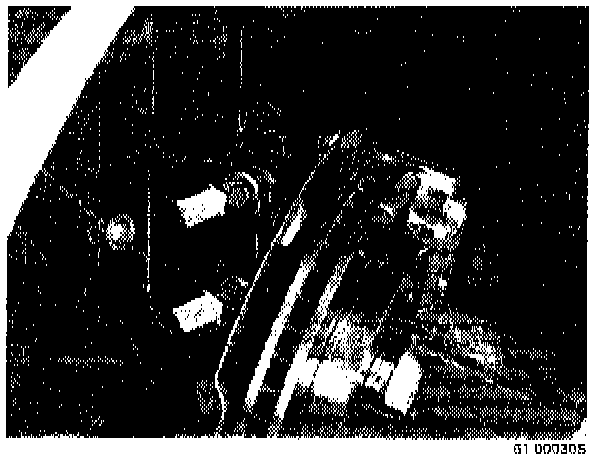
Fasten the spring strut in a vise, pulling the spring together.
Fasten the spring strut in a vise as shown in the picture.
Release the spring using spring clamps 999 5407. Set the clamps facing each other.
Alternately tightening the spring clamps until the spring is compressed.
C8
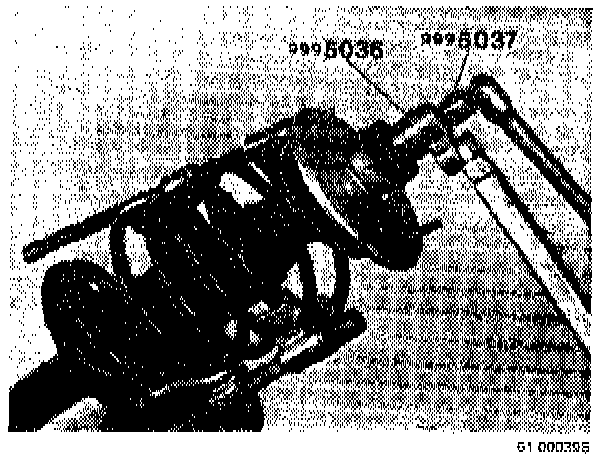
Remove shock absorber nut and washer
Use socket 999 5036 and counterhold 999 5037.
C9
Remove:
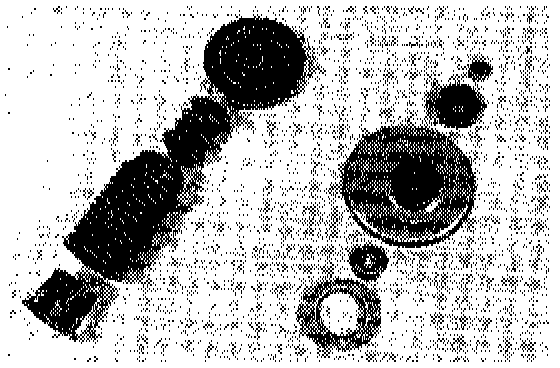
- the spring strut mount
- the shock absorber washer
- the axial bearing
- the spring seat
- the rubber bumper
- guide sleeve protector
Check the parts for wear and damage.
C10
Assemble sleeve protector, rubber bumper, and spring seat.
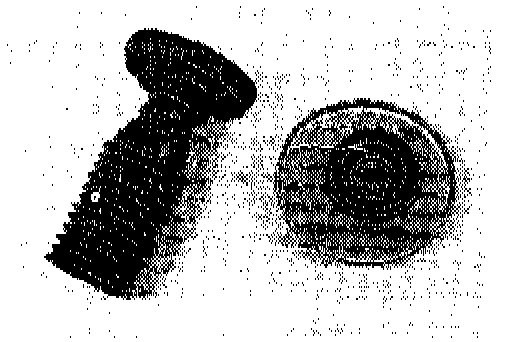
Install the axial bearing on the spring strut mount with the color marking turned up toward the spring strut mount.
C11
When replacing the spring:
Note!
Always loosen and tighten the spring clamps in alternating order.
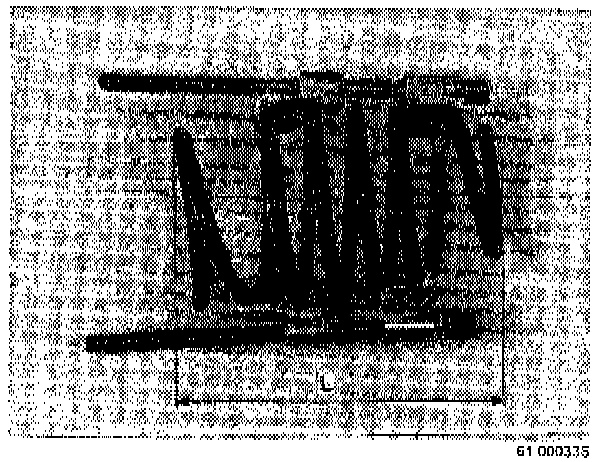
Compress the spring to a length (L, see illustration) of approx. 290-300 mm (11-13/32" - 11-13/16")
ASSEMBLING THE SPRING STRUT
C12
Pull the shock absorber piston up as far as it goes.
Place the protector guide sleeve (A) and spring (B) on the strut.
C13
Install gaiter sleeve/rubber bumper/spring seat (C)
Verify that spring ends settle in correct locations, both in the upper and the lower spring seat, see arrows in the picture.
C14
Install the shock absorber washer and the spring strut mount
Verity that the bearing is properly in place, see the preceding picture (work step C10).
C15
Install the washer and the nut
Tighten the nut to 80 Nm (59 ft.lbs). Use socket 999 5036 and counterhold 999 5037.
C16
Remove the spring clamps
Loosen alternately using the tool 999 5407. Verify that spring ends settle in Correct locations.
MOUNTING OF THE SPRING STRUT
C17
Install the spring strut in place in the spring strut turret
Mount the spring strut on the body using new nuts. Do not tighten the nuts yet.
C18
Install the spring strut on the wheel spindle Use new bolts and nuts.
Tighten to 65 Nm (48 ft.lbs). Then tighten at an angle with 90°.
C19
tighten the nuts (D) of the spring strut assembly to the body to 50 Nm (37 ft. lbs)
C20
Install the ABS sensor (A) to the wheel spindle
Clean the ABS sensor before installing. Install the ABS sensor bolt. Tighten with 8 Nm (6 ft.lbs).
Install the sensor cable on the spring strut (B).
C21
Install anti-roll bar link (C) on the spring strut
Tighten with 50 Nm (37 ft. lbs).
C22
Remove the jack
C23
Install the wheel

Make sure that the mounting surfaces of the brake discs and rims are clean. Lubricate the rim center guide of the hub. Use rust inhibitor, P/N 1161030-0. Install the bolts loosely. Next tighten them crosswise to 85 Nm (63 ft. lbs). When tightening with a nut driver, use torque socket 981 4031.
Lower the car.