Center Console Removal/Installation
Center Console Removal/Installation
NOTE:
- Put on gloves to protect your hands.
- Take care not to scratch the front seat, the dashboard, or the related parts.
1. Remove these items:
- Center console rear trim Center Console Rear Trim Removal/Installation
- Center trim Dashboard Center Trim Removal/Installation
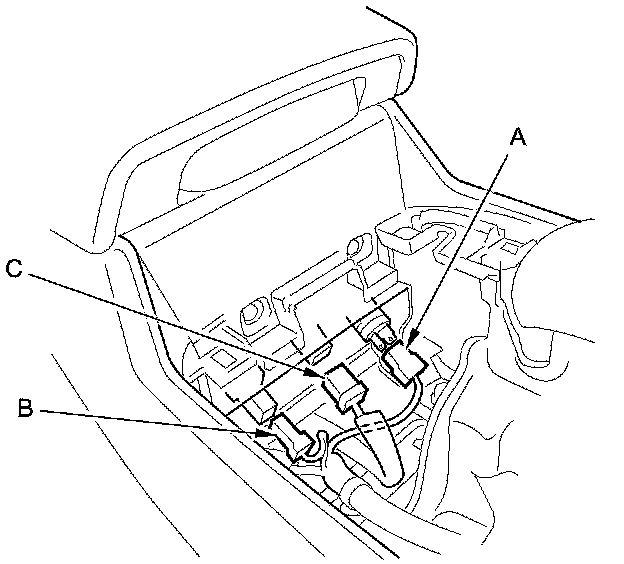
2. Disconnect the console accessory power socket connector (A), the auxiliary jack assembly connector (B), and the USB jack connector (C).
3. Remove the screws (A) and the bolts (B) securing the center console (C).
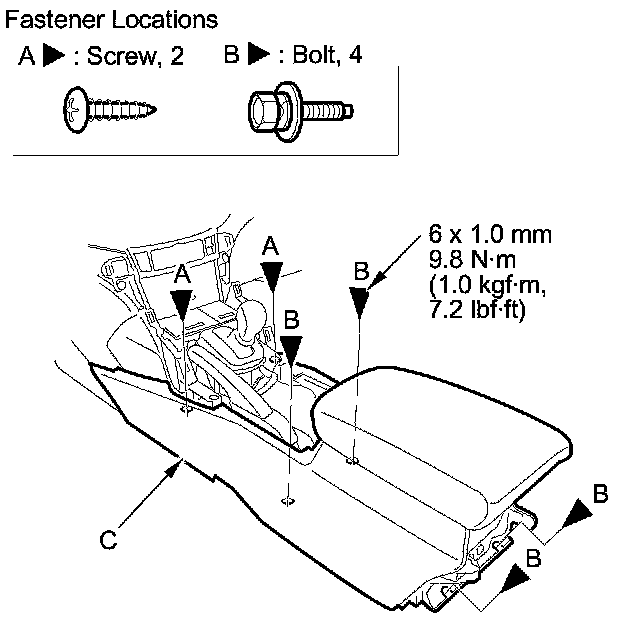
4. Remove the center console (A).
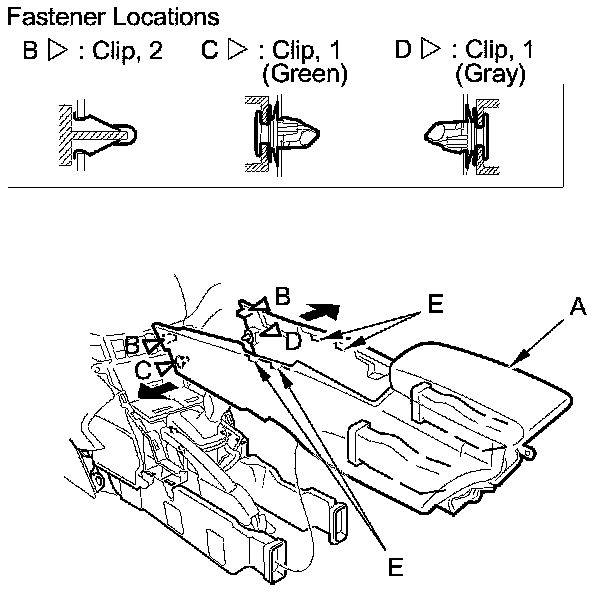
1. Detach the clips (B, C, D) by pulling the front edges of the console out from both sides.
2. Pull up the console to release the hooks (E).
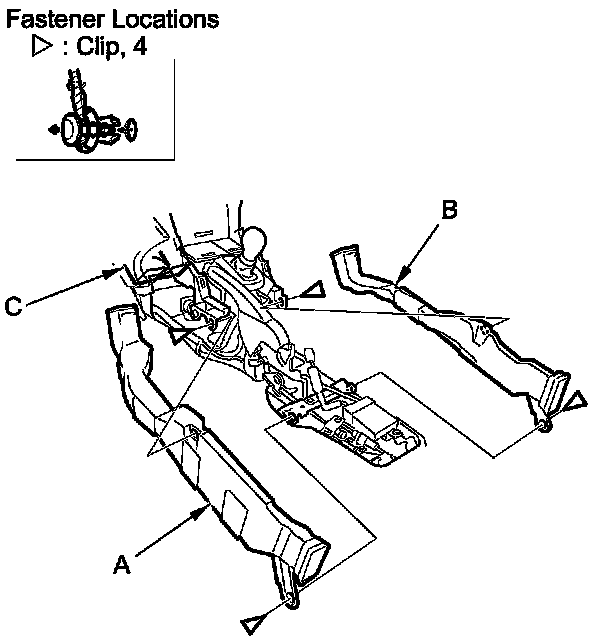
5. If necessary, detach the clips, then remove the driver's rear ventilation duct (A) and the passenger's rear ventilation duct (B) from the heater unit (C).
6. Install the console in the reverse order of removal, and note these items:
- If the clips are damaged or stress-whitened, replace them with new ones.
- Make sure each connector is plugged in properly.
- Make sure the wire harnesses are not pinched.
- Push the clips and the hooks into place securely.