Rear Differential Center Case Replacement
Rear Differential Center Case Replacement
1. Remove the rear differential Rear Differential Removal.
2. Remove the rear differential right side case (A), the rear differential left side case (B), the six 8 x 14 mm dowel pins (C), and the O-rings (D) from the rear differential center case (E).
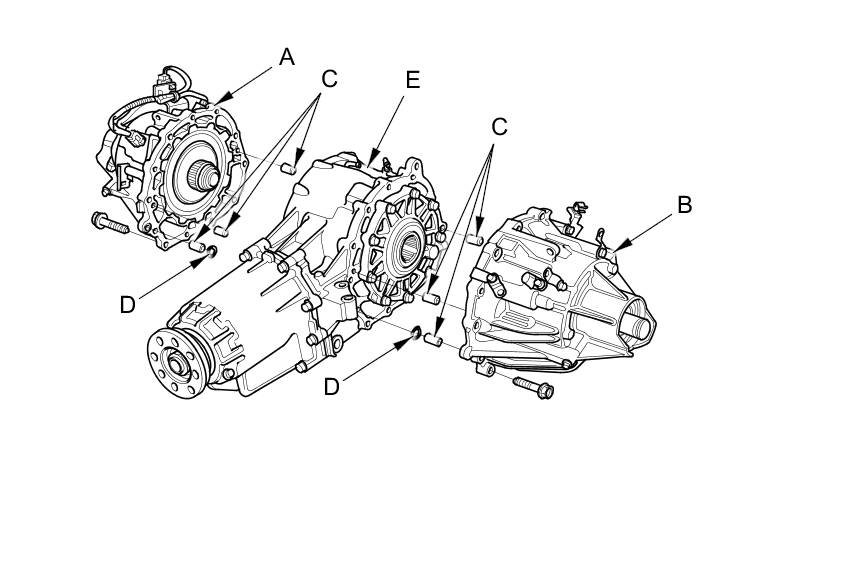
3. Replace a new rear differential center case.
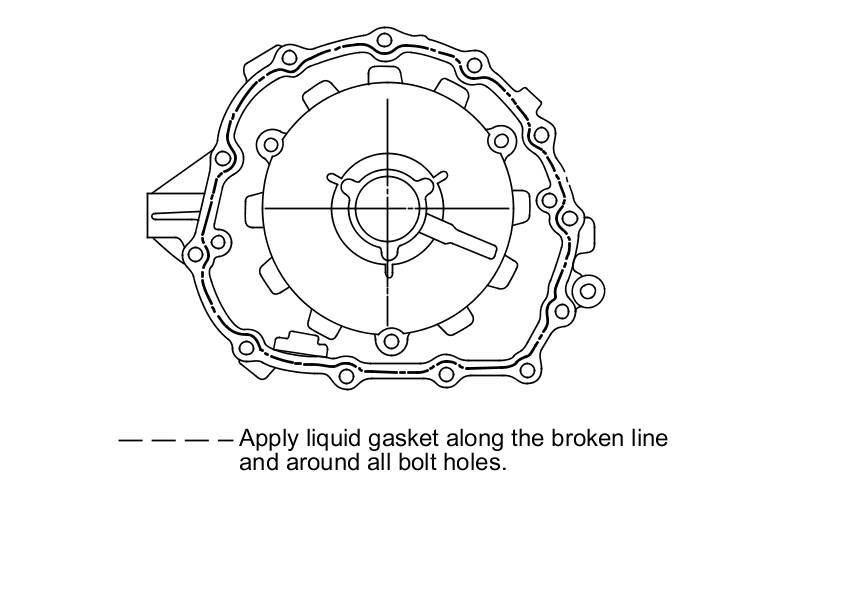
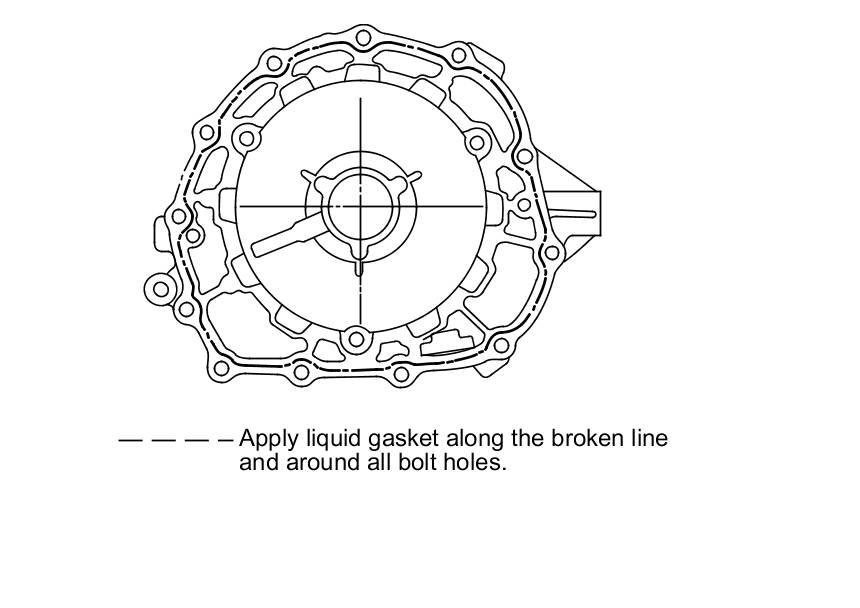
4. Remove the dirt and oil from the sealing surfaces. Apply liquid gasket (P/N 08717-0004, 08718-0003, 08718-0004, or 08718-0009) to the sealing surface. Make sure you seal up to the inside edge of the bolt holes to prevent oil leakage.
NOTE:
- You must assemble the housings within 5 minutes after applying the liquid gasket. If you applied liquid gasket P/N 08718-0012, the component must be installed within 4 minutes. If not, the sealing surface must be cleaned, and the liquid gasket reapplied.
- Allow liquid gasket to cure at least 30 minutes after assembly before filling the differential with fluid.
Left side case
Right side case
5. Install the six 8 x 14 mm dowel pins (A), new O-rings (B), the rear differential left side case (C), and the rear differential right side case (D) onto the rear differential center case (E).
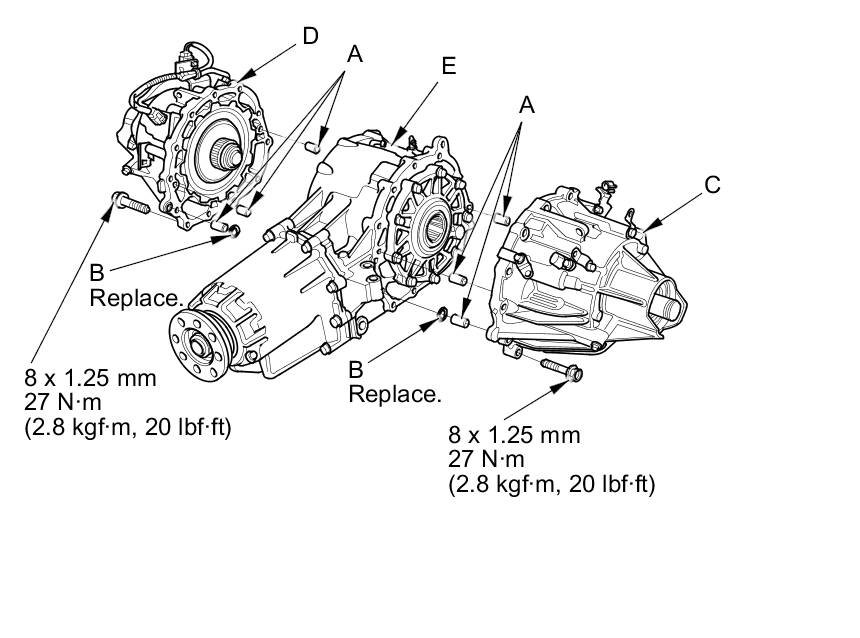
6. Tighten the mounting bolts in a crisscross pattern in several steps, then tighten the bolts to the specified torque.
7. Install the rear differential Rear Differential Installation.