Instrument Panel, Gauges and Warning Indicators: Testing and Inspection
Auxiliary instruments in center console, checkingChecking voltmeter -G14-
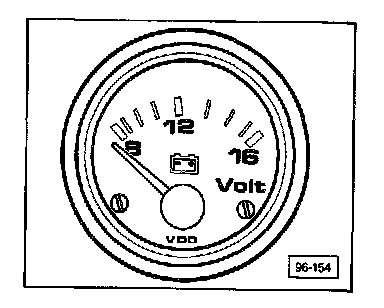
- Switch ignition on.
Specification: Battery Positive Voltage (B+)
If not:
- Check wiring to voltmeter for open circuit according to wiring diagram, and repair as necessary.
Checking oil pressure gauge -G11-
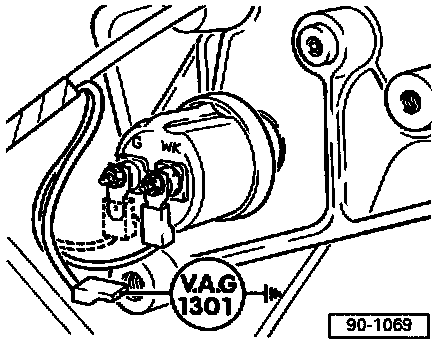
- Disconnect wire connector from terminal G on engine oil pressure sensor, located on top of oil filter housing, or on rear of engine.
Note: Illustration is for reference only-the sensor location shown is for an engine other than the 2.8 liter V6.
- Using a jumper wire, connect tester VW13O1 between sensor connector and Ground (GND)
- Switch ignition ON
- Adjust VW 1301 as follows:
dial setting gauge reads
350 5 bar (72.5 psi)
150 2 bar (29.0 psi)
10 0 bar (0.0 psi)
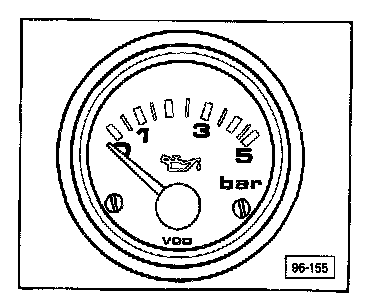
- Oil pressure display must correspond with specified values.
If not:
- Check wiring to oil pressure gauge for open circuit according to wiring diagram, and repair as necessary.
Checking oil temperature gauge -G9-
- Remove engine compartment undertray.
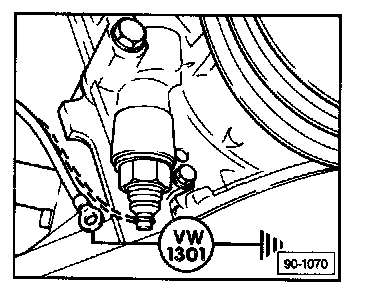
- Disconnect wire connection from oil temperature sensor. Sensor located at front of engine on oil pump housing
- Connect VW 1301 tester between sensor connector and Ground (GND).
- Switch ignition on.
- Adjust VW13O1 as follows:
dial setting gauge reads
26 170°C (338°F)
150 130°C (266°F)
690 60°C (140°F)
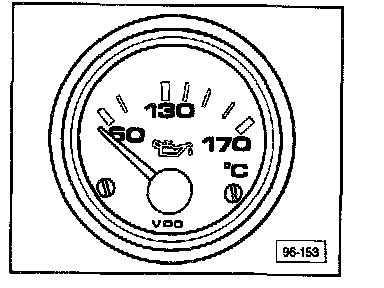
- Oil temperature display must correspond to specified values.
If not:
- Check wiring to oil temperature gauge for open circuit according to wiring diagram, and repair as necessary.