0B6A Automatic Transmission
Selector Lever Cable, Adjusting
Special tools, testers and auxiliary items required
• Trim Removal Wedge (3409)
• Socket and Key (T40031)
Procedure
• Tightening specification, refer to => [ Selector Lever Cable Overview ] 0B6A Transmission.
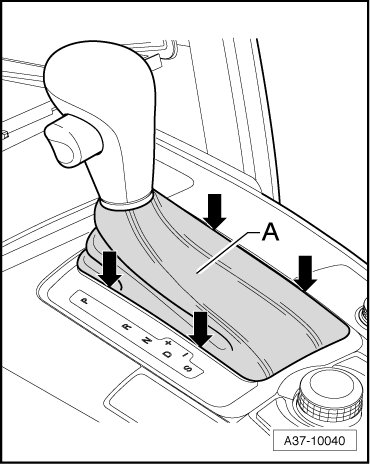
- Pry the selector lever boot frame - 1 - out of the center console - arrows - using the (3409).
- Move the selector lever into D.
- Through opening - arrow - in shift mechanism, loosen bolt on selector lever cable approximately one turn using the (T40031).

• Loosen the clamping screw approximately one turn but do not remove it.
• The clamping screw is only accessible when the selector lever is in D.
• The selector lever must remain in D when the clamping screw is loose.
- Carefully move the selector forward and back gently without shifting into another selector lever position. This releases the tension in the selector lever cable.
- Move the selector lever into the Tiptronic gate.
• Do not touch the selector lever during the adjusting.
- Tighten the clamping screw in this position with the (T40031) without touching the selector lever.
- Selector mechanism, checking, refer to => [ Selector Mechanism, Checking ] Selector Mechanism, Checking.
If shift mechanism does not function properly after adjusting selector lever cable:
- Bring the selector lever cable into the basic setting. Refer to => [ Selector Lever Cable, Bringing into Basic Setting ] Selector Lever Cable, Bringing Into Basic Setting.