Evaporator Case: Service and Repair
NOTE:^ Whenever an A/C evaporator core is replaced, it will be necessary to replace the suction accumulator/drier.
^ If an evaporator leak is suspected, the A/C evaporator core must be leak-tested before it is removed from the vehicle.
SPECIAL SERVICE TOOL(S) REQUIRED
Description Tool Number
Spring Lock Coupling Disconnect Tool (1/2 Inch) 412-027 (412-027 (T81P-19623-G2))
REMOVAL
1. Disconnect battery ground cable.
2. Remove instrument panel.
3. Place a drain pan or suitable container under the heater water hose connections at the cowl panel.
4. Following proper procedures, recover refrigerant from A/C system at service access gauge port valve located on suction line. Observe all safety precautions. Refrigerant Recovery
5. Remove suction accumulator/drier.
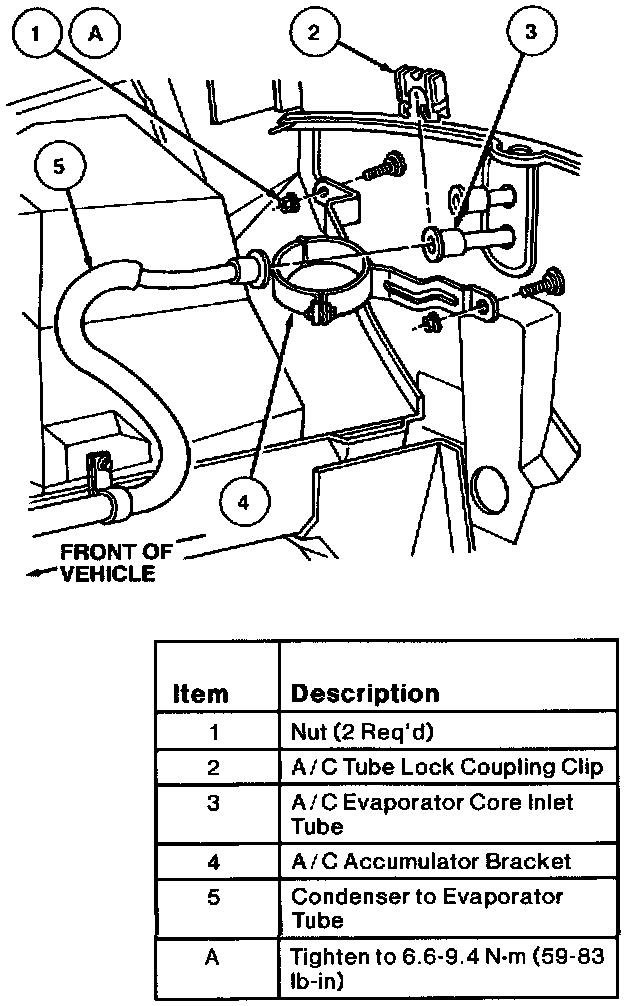
6. Remove two nuts retaining A/C accumulator bracket to cowl panel and remove A/C accumulator bracket.
7. Disconnect condenser to evaporator tube from A/C evaporator core inlet tube at cowl panel using 1/2 inch Spring Lock Coupling Disconnect Tool 412-027 (412-027 (T81P-19623-G2)) or equivalent. Cap refrigerant lines and evaporator core tube to prevent entrance of dirt and excess moisture.
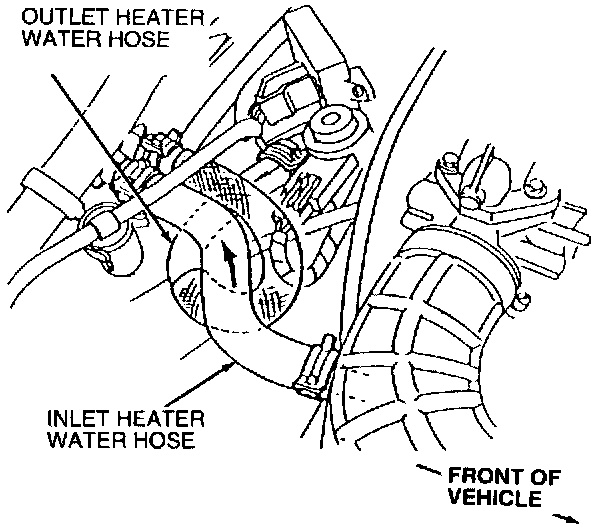
8. Disconnect heater water hoses from heater core tubes and plug heater water hoses with suitable 5/8 inch and 3/4 inch plugs. Cap heater core tubes to prevent coolant loss from heater core during removal of A/C evaporator housing.
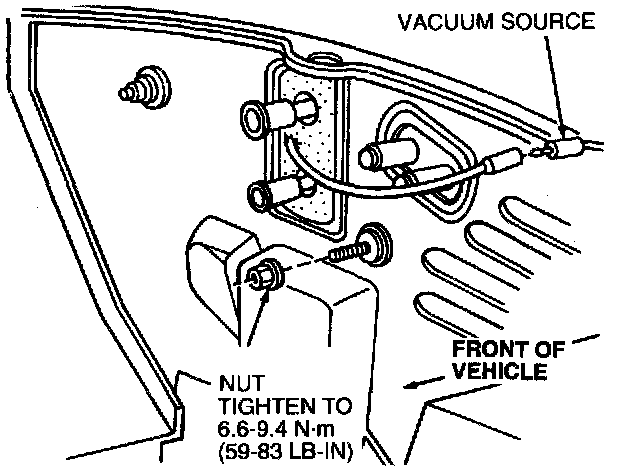
9. Disconnect vacuum supply hose (black) from vacuum source in engine compartment.
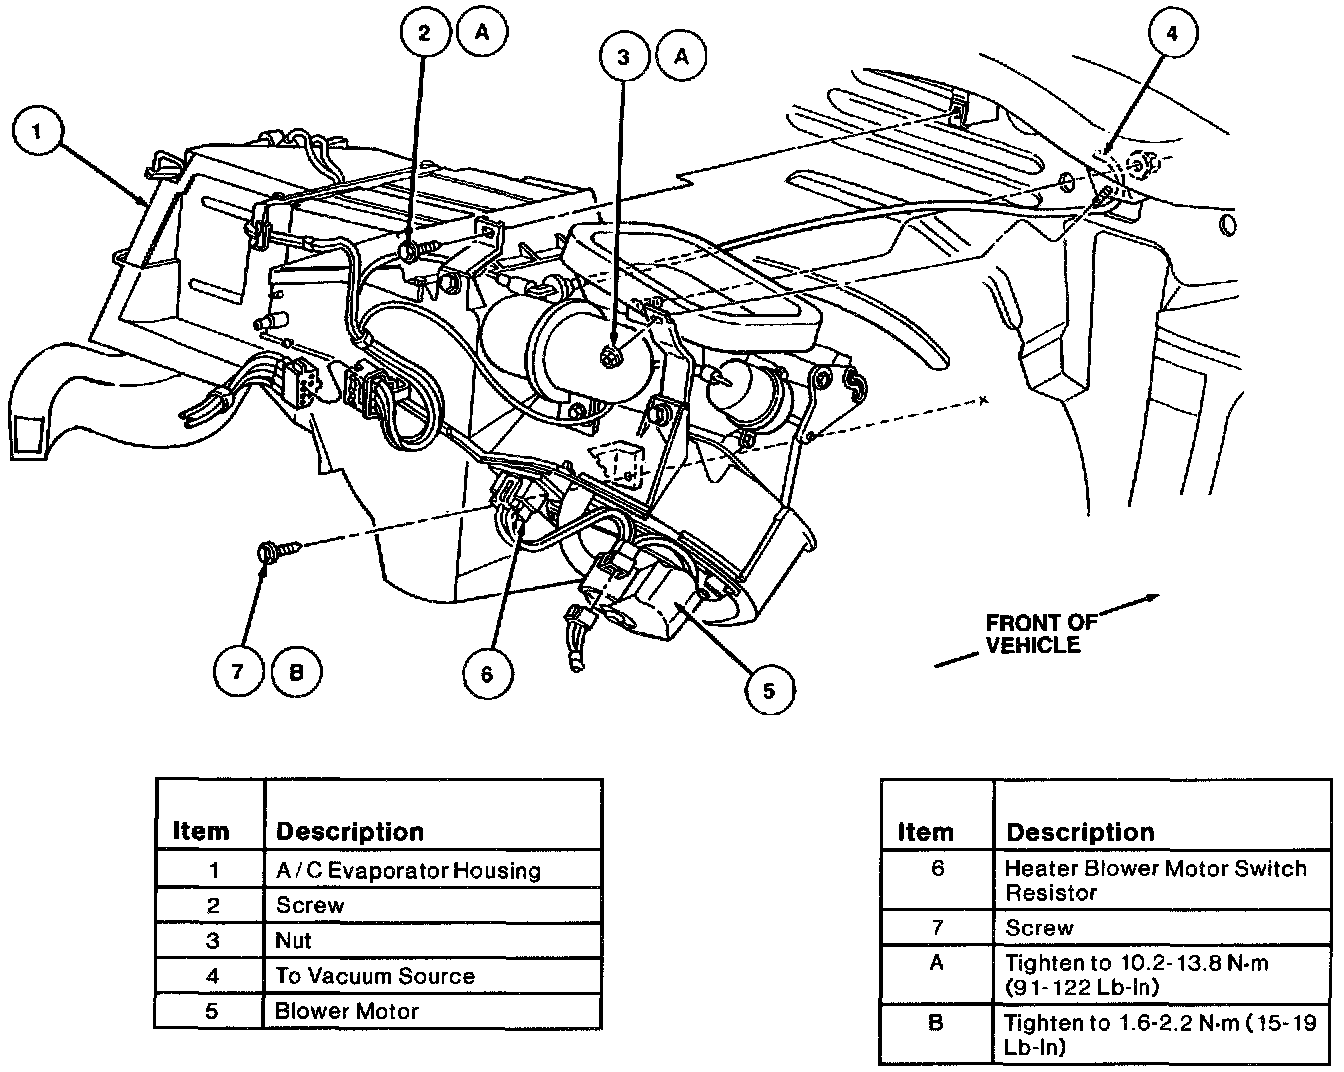
10. Remove nut retaining A/C evaporator housing to cowl panel.
11. Inside passenger compartment, remove one screw retaining the bottom of the A/C evaporator housing to cowl panel.
12. Remove screw retaining A/C evaporator case support bracket to cowl top panel.
13. Remove nut retaining A/C evaporator case mounting bracket to cowl top panel.
14. Disconnect wire harness connector at blower motor.
15. Carefully pull A/C evaporator housing away from cowl panel and remove from vehicle.
INSTALLATION
1. Install A/C evaporator housing to cowl panel.
2. Install nut retaining A/C evaporator housing to cowl top bracket. Tighten to 10.2-13.8 N.m (91-122 Lb-In).
3. Install screw retaining A/C evaporator housing to cowl top bracket. Tighten to 10.2-13.8 N.m (91-122 Lb-In).
4. Install screw retaining the bottom of the A/C evaporator housing to cowl panel. Tighten screw to 1.6-2.2 N.m (15-19 Lb-In).
5. Working under hood, install nut retaining A/C evaporator housing to cowl panel. Tighten nut to 6.6-9.4 N.m (59-83 Lb-In).
6. Connect vacuum supply hose (black) to vacuum source in engine compartment and connect blower motor connector.
7. Connect two heater water hoses to heater core inlet and outlet tubes.
8. Connect condenser to evaporator tube to A/C evaporator core inlet tube.
9. Install A/C accumulator bracket to cowl panel and secure with two nuts. Tighten to 6.6-9.4 N.m (59-83 Lb-In).
10. Install suction accumulator/drier.
11. Install instrument panel.
12. Connect battery ground cable.
13. Charge refrigerant system. Observe all safety precautions.
14. After service has been completed, check the engine coolant level in the radiator and in the radiator coolant recovery reservoir. Fill as required with the recommended coolant mixture.