Oil Cooler: Service and Repair
Oil CoolerEngine Lubrication Components - Exploded View (Part 1):

Engine Lubrication Components - Exploded View (Part 2):

Engine Lubrication Components - Exploded View (Part 3):

Engine Lubrication Components - Exploded View (Part 4):

Engine Lubrication Components - Exploded View (Part 5):

Engine Lubrication Components - Exploded View (Part 6):

Removal
1. With the vehicle in NEUTRAL, position it on a hoist. For additional information, refer to Maintenance/Service and Repair.
2. Drain the engine cooling system.
3. Remove the generator. For additional information, refer to Alternator.
4. CAUTION: If metal or aluminum material is present in the oil cooler, mechanical concerns exist. Failure to correct these concerns may cause engine failure. To diagnose mechanical concerns, refer to Engine System.
Remove the 6 bolts and the oil cooler.
^ Discard the gaskets.
^ Inspect the oil cooler.
Installation
1. NOTE: Clean the sealing surfaces with metal surface prep. Follow the directions on the packaging. Inspect the mating surfaces.
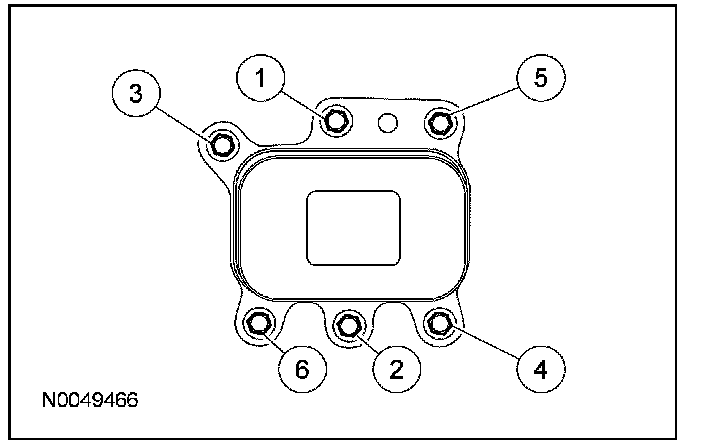
Using new gaskets, install the oil cooler and the 6 bolts.
^ Tighten in the sequence shown to 10 Nm (89 lb-in).
2. Install the generator.
3. Fill and bleed engine cooling system.