Washer Pump and Reservoir
Washer Pump and Reservoir
Removal and Installation
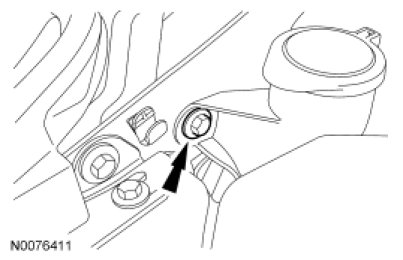
1. Remove the washer fluid reservoir filler neck bolt.
2. Position aside the coolant overflow bottle.
- Remove the 2 bolts and position the coolant overflow bottle aside.
3. With the vehicle in NEUTRAL, position it on a hoist. For additional information, refer to Jacking and Lifting Service and Repair.
4. Remove the radiator lower air deflector. For additional information, refer to Front End Body Panels Service and Repair.
5. Disconnect the washer pump electrical connector.
6. WARNING: Carefully read cautionary information on product label. For EMERGENCY MEDICAL INFORMATION seek medical advice. In the USA or Canada on Ford/Motorcraft products call: 1-800-959-3673. For additional information, consult the product Material Safety Data Sheet (MSDS) if available. Failure to follow these instructions may result in serious personal injury.
NOTE: To prevent spilling windshield washer fluid, drain the windshield washer reservoir before removal.
Disconnect the washer pump hose. For additional information, refer to C-Lock Coupler Service and Repair.
7. Remove the windshield reservoir.
- Remove the nut and 2 bolts.
- To install, tighten to 5 Nm (44 lb-in).
8. NOTICE: Do not operate the washer pump prior to filling the windshield washer reservoir. Failure to follow these instructions may result in premature pump failure.
To install, reverse the removal procedure.