Thermostat Housing: Service and Repair
Thermostat Housing - 2.5L
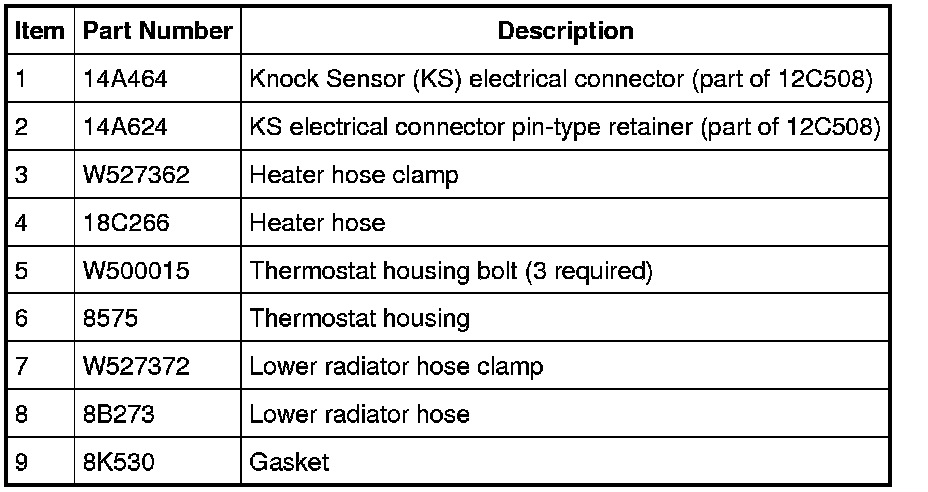
Removal and Installation
NOTE: The thermostat and thermostat housing are serviced as an assembly.
1. With the vehicle in NEUTRAL, position it on a hoist. For additional information, refer to Jacking and Lifting Service and Repair.
2. Drain the cooling system. For additional information, refer to Cooling System Draining, Filling and Bleeding Service and Repair.
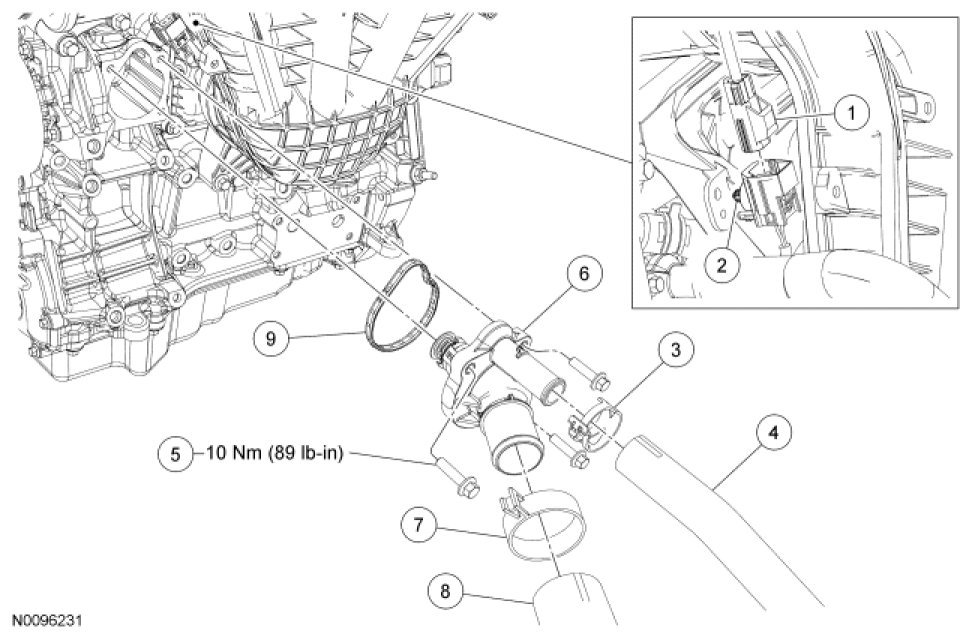
3. Disconnect the Knock Sensor (KS) electrical connector and detach the wiring harness pin-type retainer.
4. NOTE: Disconnecting the heater hose first will aid in the removal of the bottom thermostat housing bolt.
Disconnect the heater hose at the thermostat housing.
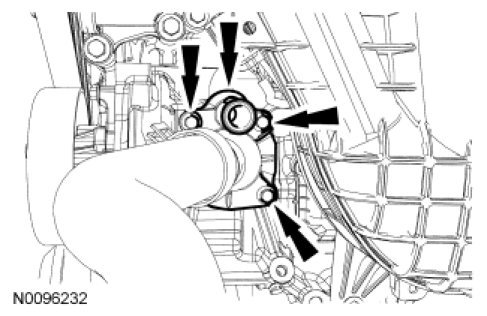
5. NOTE: The view of the thermostat housing bolts is obstructed by A/C and engine components. However, the bolts can be removed using 1/4-in drive hand tools.
Remove the 3 bolts and reposition the thermostat housing to gain access to the lower radiator hose clamp.
- Remove and discard the gasket.
- To install, tighten to 10 Nm (89 lb-in).
6. Disconnect the lower radiator hose at the thermostat housing.
7. To install, reverse the removal procedure.
- Install a new gasket.
8. Fill and bleed the cooling system. For additional information, refer to Cooling System Draining, Filling and Bleeding Service and Repair.